It all starts with a Table.
The Table or the Grid is the base of everything on Stackby. With the look and feel of a Spreadsheet, it could work for you like a simple spreadsheet or something that works its magic on your data and workflows.
This is where you can structure your data and do all the work that you have been typically doing on spreadsheets. We think of it as a highly modern table that lets you fit in your data the way you want it.
Here we go on everything you wanted to know about the Grid:
Summary
Duplicating a Grid View Layout
Using the Toolbar to Hide, Filter and Sort your Data and Change Your Row Height
Keyboard Shortcuts
Limits
Summary
Click on a stack and it directly opens in Grid View or the Table View. It is a blank canvas and right now as you open it, column properties are not set, the searches, filters, etc. have not been activated. You need to start with setting in these column properties and molding it how you want your data to look and work.
If you are starting on a Stack or the Grid, here is how to get the most out of the Grid View:
- Creating Tables
- Overview of Column Properties
- Adding a Column
- Primary Column
- Formula
- Look-Up/Look-Up Count
- Link
- In-built
- Date/Time
- Emails, URLs and Phone Number
- Attachment/Files
- Collaborators/Multi-Collaborators
- Single/Multiple Options
- Checkbox
- Number-Based
- Inserting/Deleting Rows
- Short/Long Text
- Adjusting Column Width, Column Position and Frozen Column
- Adding, Inserting and Deleting Rows
Duplicating a Grid View Layout
It is possible to create a duplicate/new Grid View of the stack that you are working on. This is usually done when you have more than one team members using the Grid and each one needs to see and work with different fields in the stack.
Unlike a spreadsheet, data doesn't change when you create a new Grid View. After creating the new Grid, use the hide, filter or sort features on your data as per your requirement to make your view more relevant. These changes that you make don't impact the remaining data.
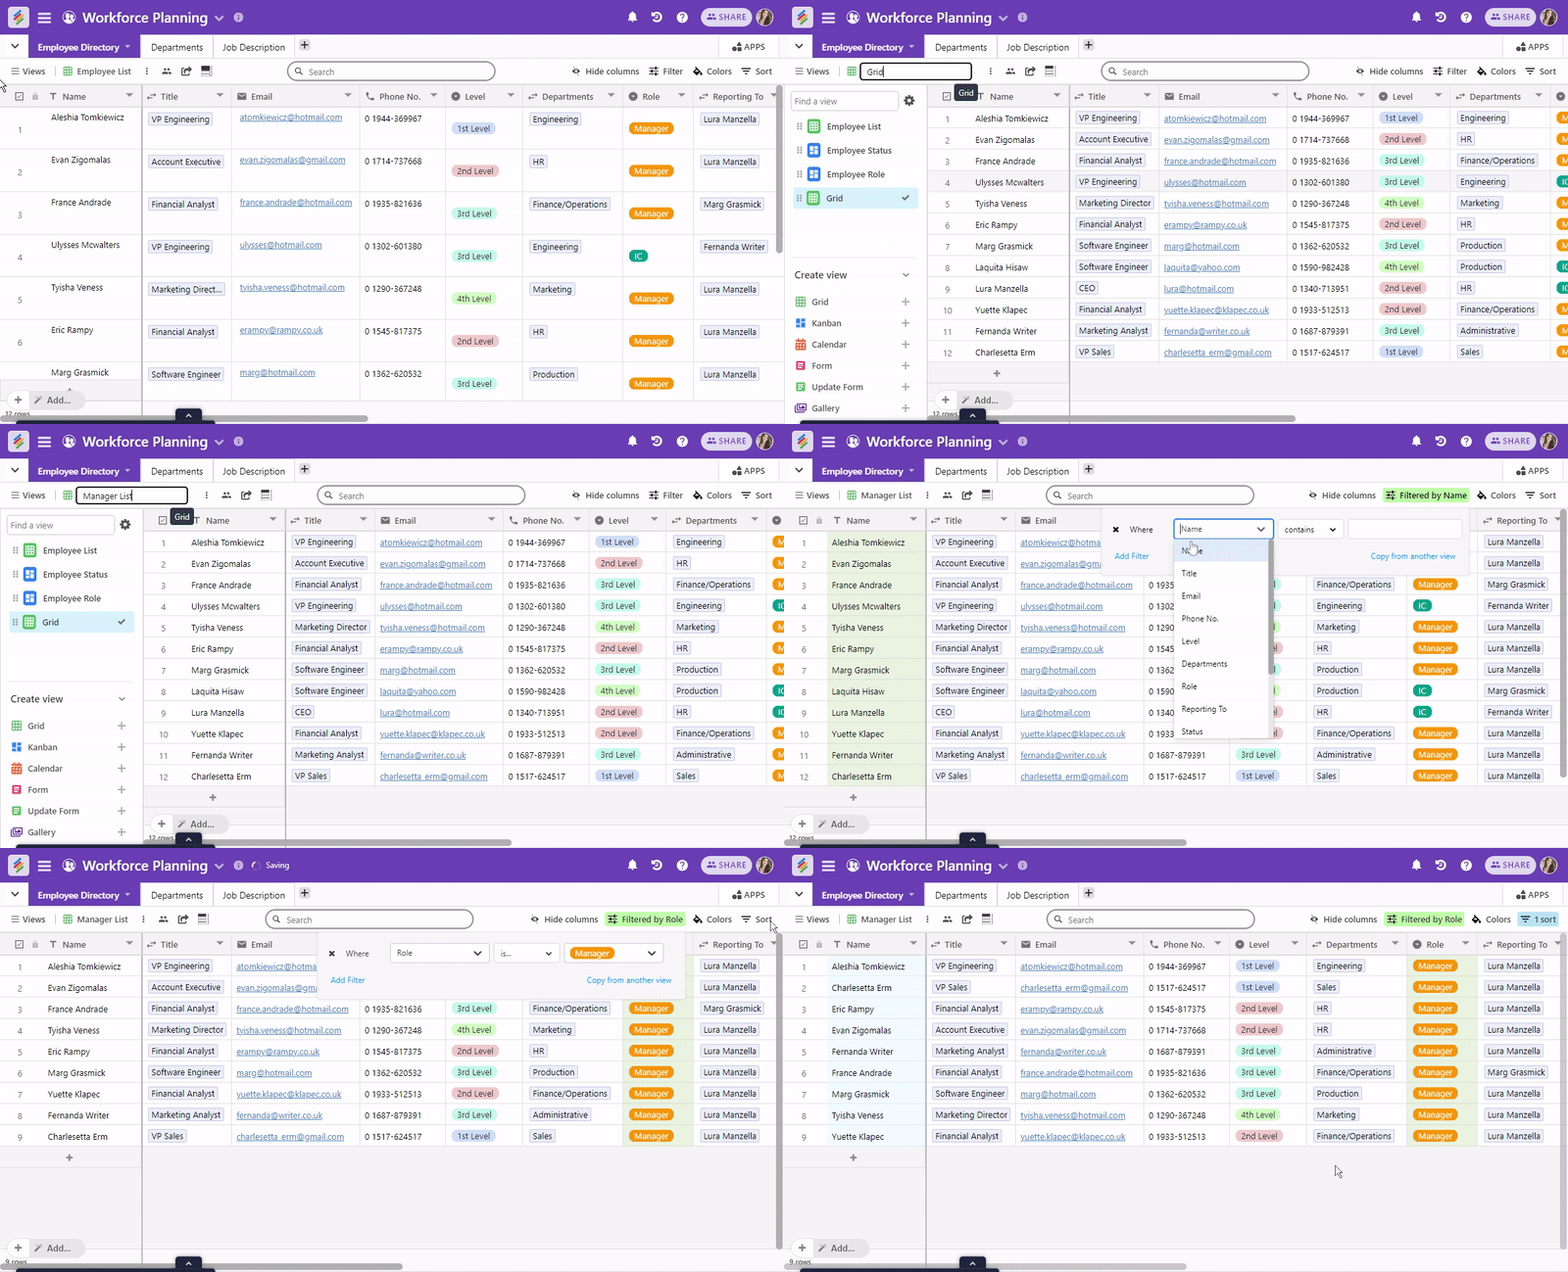
Here is how you can duplicate or create a new Grid View:
- Go to the table for which you need to create a new view
- Click on the Views section on the top left
- Select Grid (+) from the list and you are done

Now that you have created a new or a duplicate Grid view, the first thing to do is to rename it with an appropriate name that lets you easily distinguish the new one from the old.
Next, go to the new grid and format the data as per your requirement.
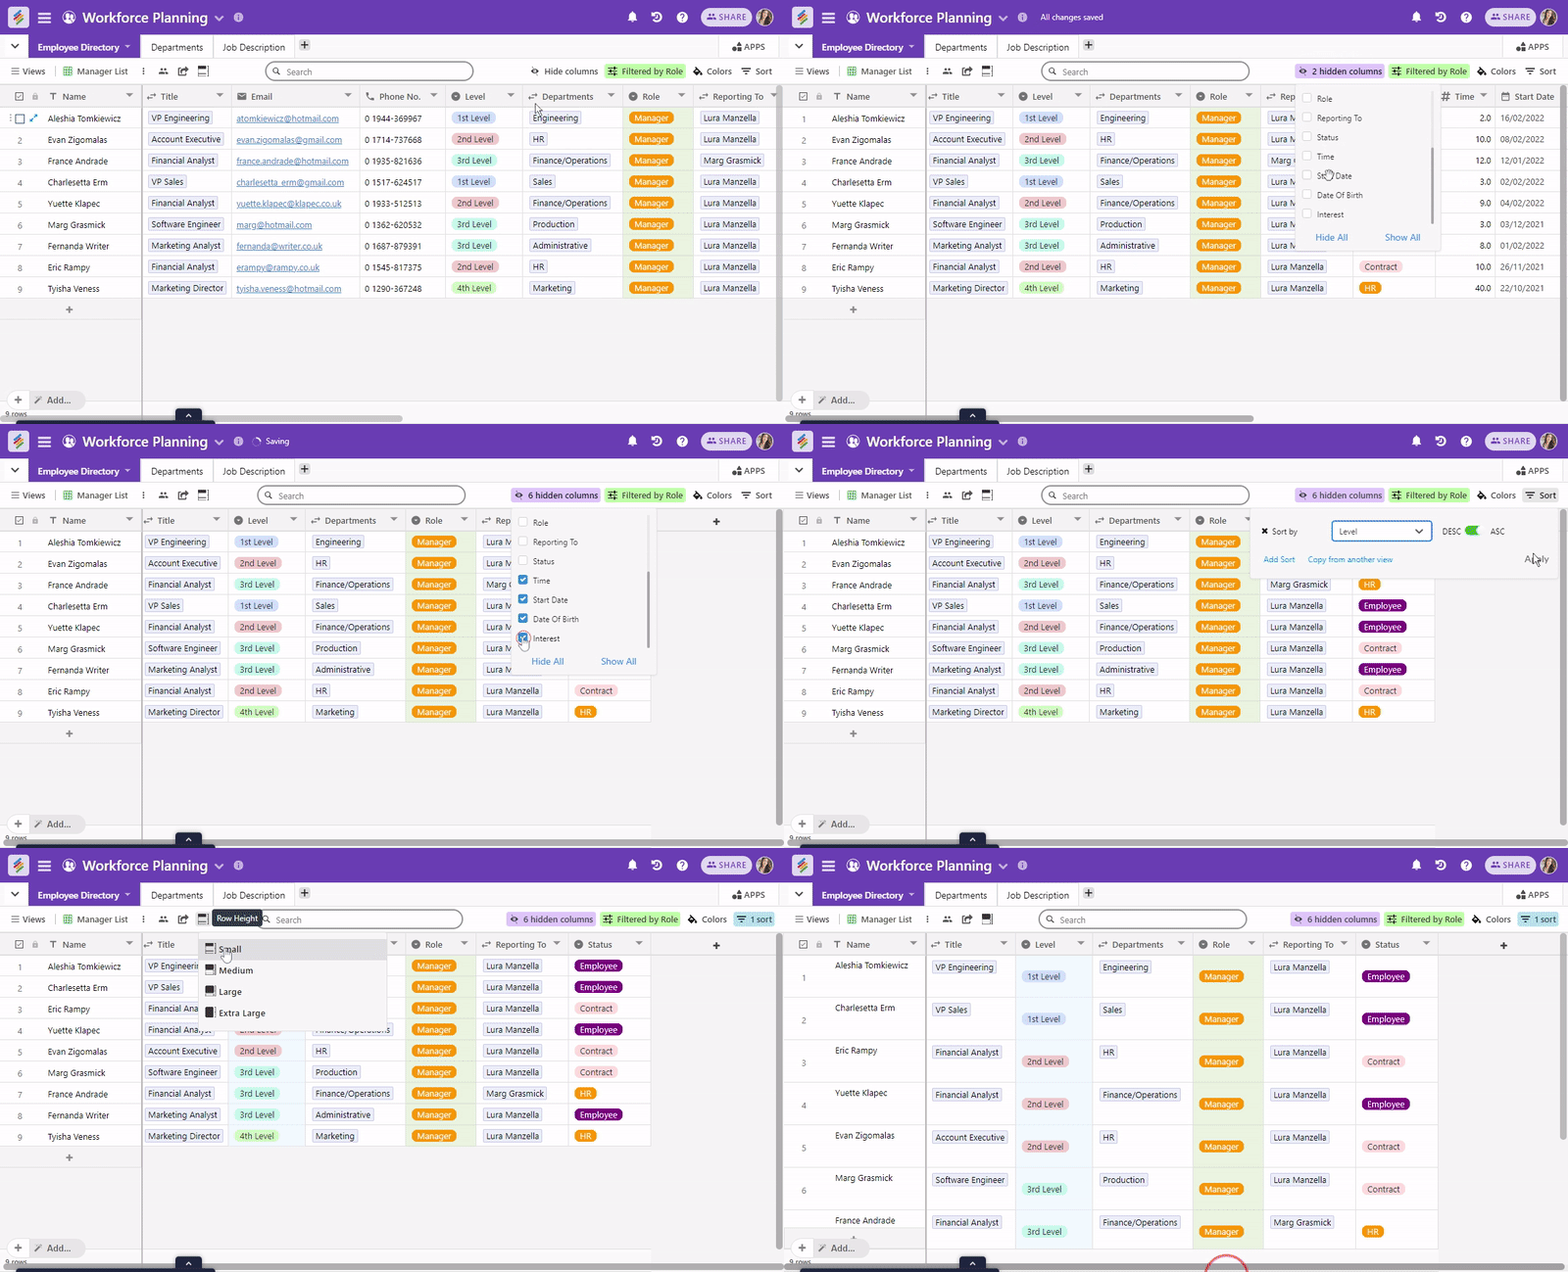
Using the Toolbar to Hide, Filter and Sort your Data and Change Your Row Height
For the new Grid, you can use the toolbar to Hide, Filter and Sort your data to personalize the view as per your requirement. You can also change the Row Height to customize it for your data to fit in. Once your data is formatted as per your requirement, you can start working on this new grid.

Keyboard Shortcuts
We are sure those keyboard lovers would be looking for a way to work on Stackby using Keyboard Shortcuts. To make it easy, we have a Keyboard shortcut help within Stackby.
To access the keyboard shortcut help:
Go to the Help section (? icon on the top right side) and you see the keyboard shortcut commands.
Or you can get the help here.
Limits
You can create 10 new views (all inclusive -- Grid, Kanban, Calendar and Form) during our 7-day Free Trial and 50 new views on all our paid versions. Check out our guide to Kanban, Calendar and Form layouts).


