

Kanban boards visually depict work various stages of a process (from left to right) and use cards to represent work items and columns to represent each stage of the process. As work progresses, the cards are moved to next set.
Kanban view on Stackby works exactly in the same way, leading the way with clarity when it comes to process and their progress.
We will be covering the following topics in relation to Kanban View:
Configuring Kanban View from Your Table
Use-Cases
Limits
Configuring Kanban View from Your Table
As we always tell you, everything on Stackby starts at the table. So you can have your data on a table and later convert it to a Kanban view for ease of use.
IMPORTANT NOTE
Our Kanban Layout uses single option or collaborator column type as its grouping parameter, you need to have at least one column that uses single option or collaborator as column property in your table.
Here are the next steps:
- Go to the Layout Change button just above the first column of your table, click on the + button, select and click on Kanban Layout to create a new Kanban View.
- A pop-up will ask you to select the grouping field and also let you know what groups you can select. Select the data (reminder that it allows only single option or collaborator column type selection) and you can view your data in Kanban.

Drag and Drop cards
All your rows now become cards in the Kanban.
You can drag and drop both cards and panels on your data's Kanban View. If you realize that the panels are not in order you wish, just drag and drop the panel to the right place.
Similarly, select, drag and drop a card to move to next panel once they have met the current deadline. 
Customizing Your Kanban Card
Easily customize your Kanban card to show/hide the column data. Click 'Customize Card' settings button on the top right to select the columns that you want to show when you look at your Kanban view. There, now you are only looking at the data that is most relevant to you.
Card Range
To change the range of cards to be displayed, select a new range from the 'Select Range' option on the tab above. Range is in a lot of 100s.
Hiding and Collapsing Panels
To make it easy for you to view just relevant cards, we have facilitated Hiding and Collapsing of panels.
To enable this, you need to go to your Kanban view and click on the Hide and Collapse button on the bottom right corner of each card.
Adding New Record and Deleting Panels
You can add a new record directly on your Kanban View. At the top right of your panel, you will find the "Add Record" button in the ellipses menu. Click to add.
Just below the Add Record, you will find the Delete Panel button. To delete a panel, just go to that panel and select the Delete Panel button.
Note: You won't be able to delete a panel with collaborator panel type

Adding a New Category in the Kanban View
You can add a new category in your Kanban View. Scroll from Left to Right and you will see a tab that says "Add a New Category." Click and add a new one and add records as needed.
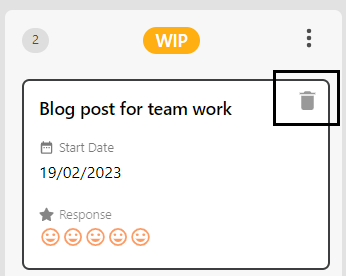
Deleting a record
You can delete records directly on your Kanban View. At the top right of your panel, you will find the "Delete icon".
Expand a record
Expand record allows users to view detailed information about a record by double-clicking on it. When a user double-clicks on a record, a new expanded form will appear, providing more information about the record.
For more reference about expand row
Use-Cases
Status Boards
Sprint Management
Sales CRM
Project Management
...and 100s more you can imagine.
Limits
You can view up to 100 row cards on a Kanban board at one go. So, if there are more cards in your data, you can view the first 100 cards on a single board and you can choose to change the range of the cards you want to display.
Note: You can also use Filter on your Kanban Board to only relevant cards on the panel. Also, check out our guide to our other Layouts - Grid, Calendar, and Form)