In this article, you will learn about
Adding & Inserting Rows
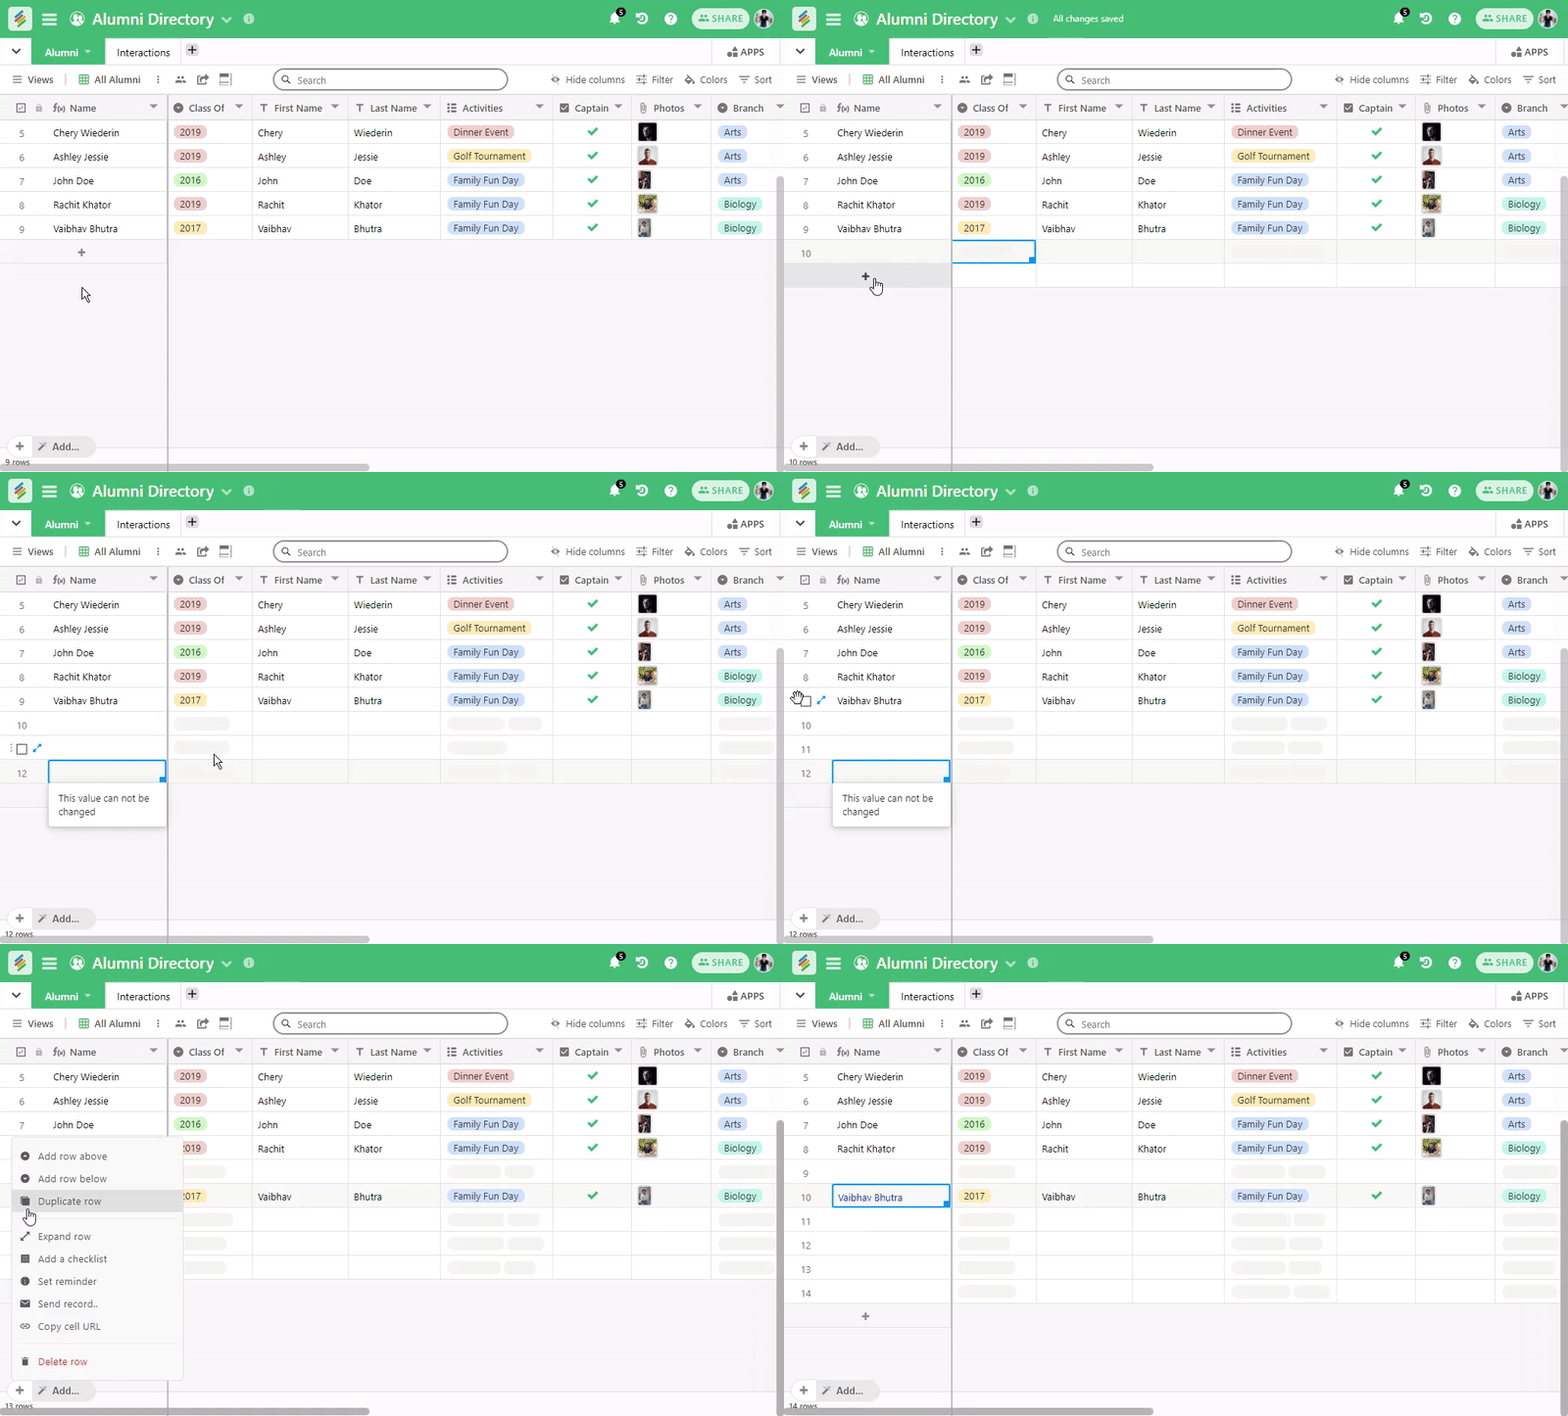
There are 3 ways of adding rows to your table:
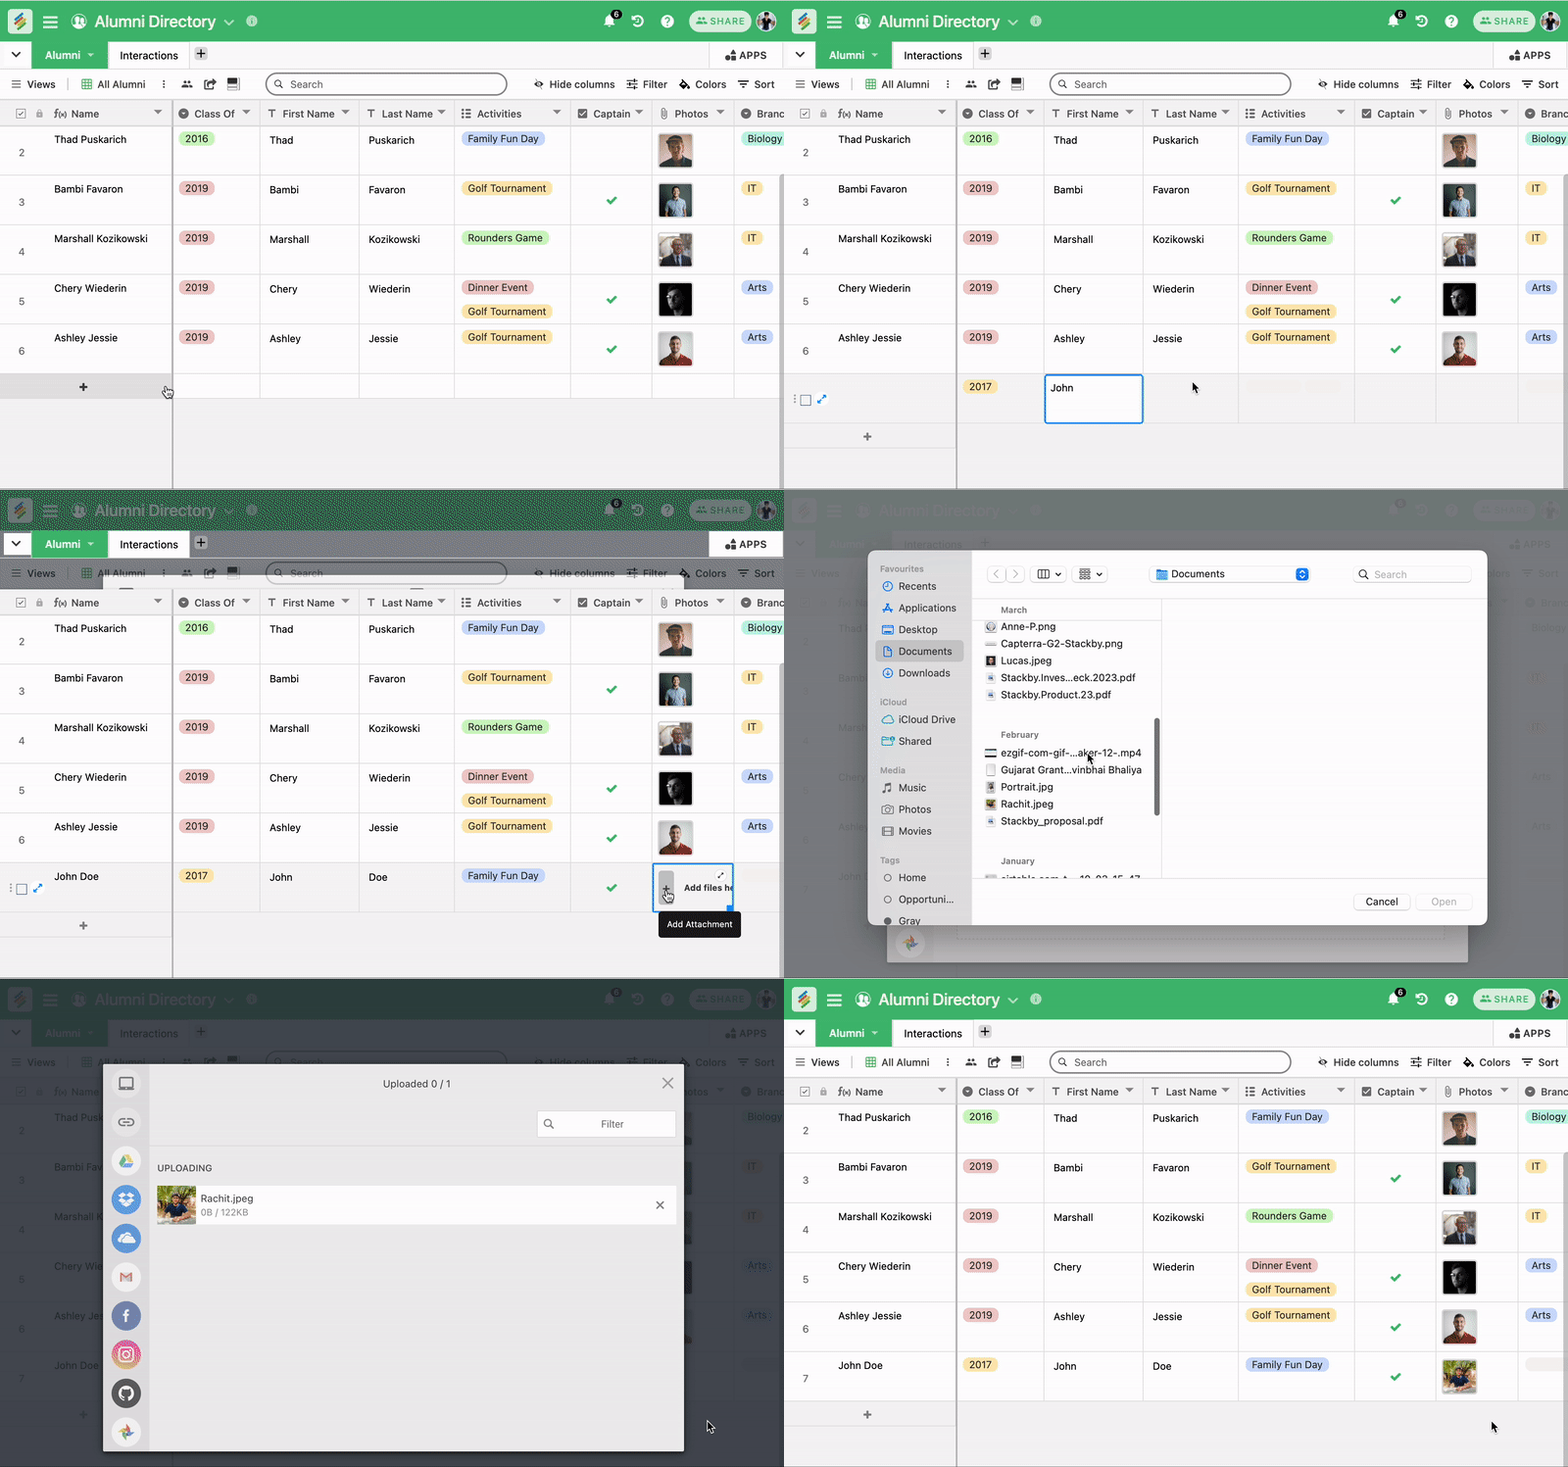
- If you have right user permission to the stack (Owner or Creator), you can add a row by simply clicking the '+' button in the bottom left corner of the table. This will create a new empty row at the bottom of your table.
- You can also use a keyboard shortcut (Shift + Enter) on your PC or Mac to add new rows in the table from anywhere in the table
- Inserting rows -- You can also insert a row by right clicking on a row and selecting 'Add row above' or 'Add row below' from the drop-down menu.


Deleting Rows
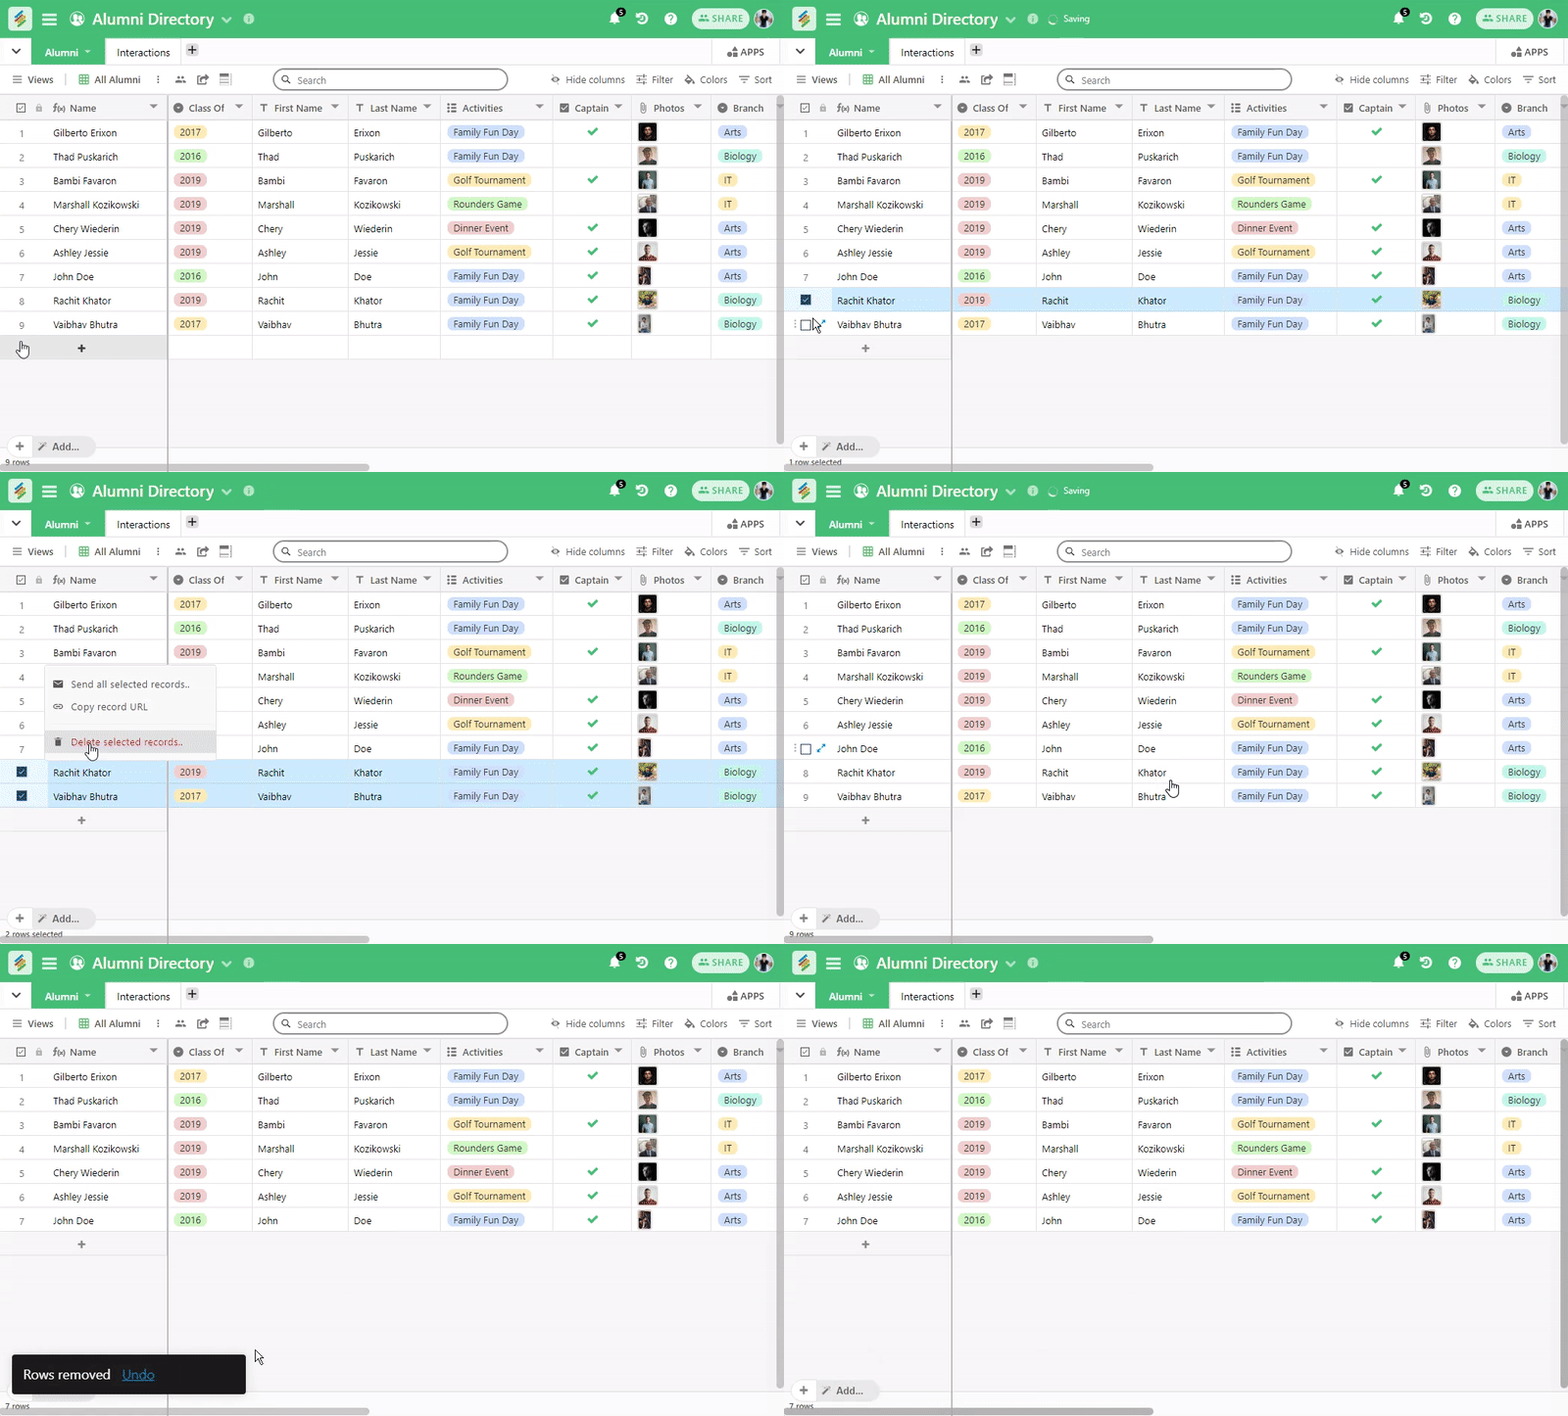
You can delete the rows in the table one by one or multiple records at once.
- Deleting a single row -- You can delete a single row from the table by right clicking anywhere on the row and selecting the 'Delete Row' option from the drop-down menu.
- Deleting multiple rows -- You can also delete multiple rows by selecting multiple of them by using 'Checkbox' icon before each row and right clicking on them to delete multiple rows at the same time.
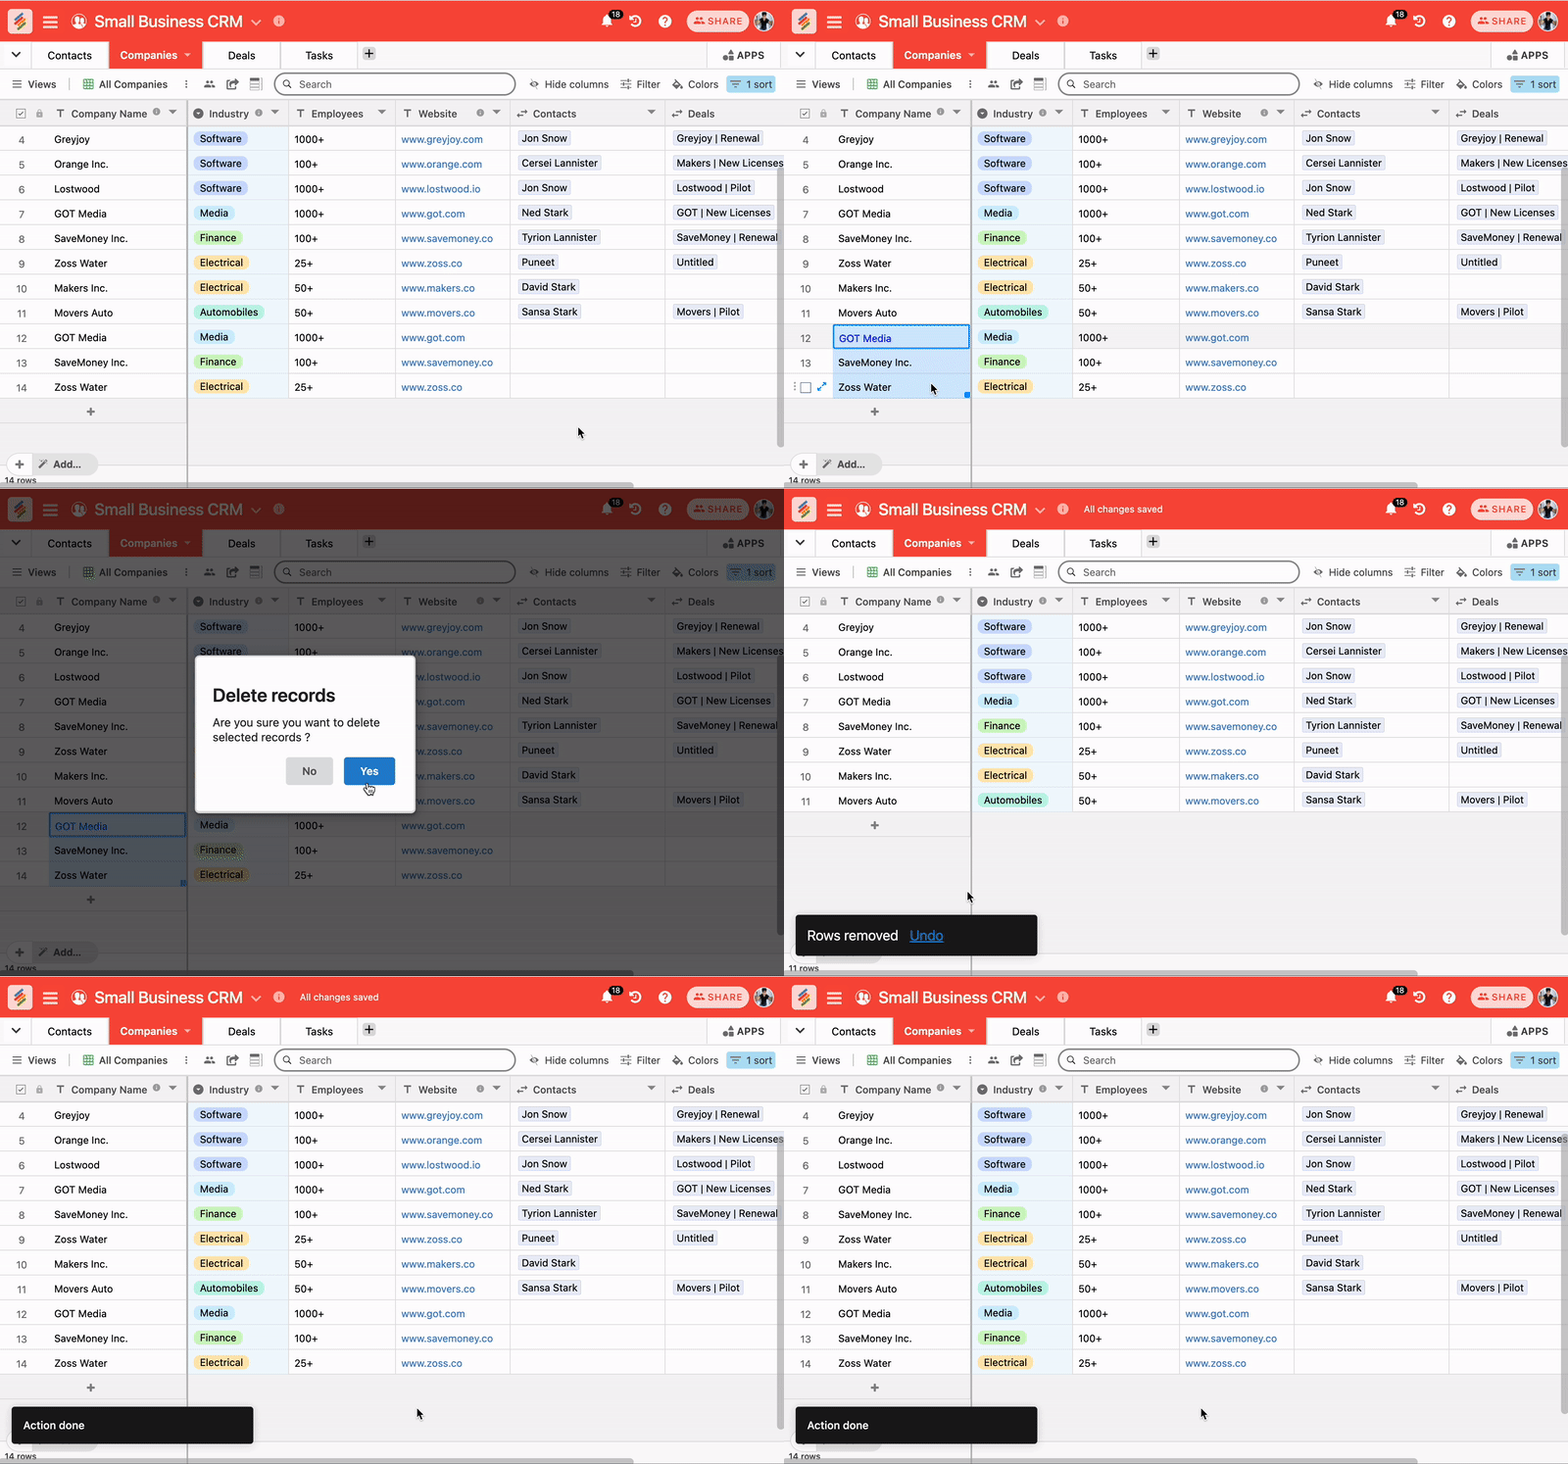
- Mass deleting rows through mouse selection - You can also select rows by clicking and dragging the mouse (or through Shift + Arrow shortcuts to select) on particular rows in the table and right clicking it to select 'Delete selected rows' to delete them at the same time.

Rows FAQs
What if I accidentally delete rows?
You can always recover the rows using Undo (Ctrl or Cmd + Z) if you're still in the same stack.


