Records or rows in your stack have the power to do a lot more for your stack than just stay as rows.
Each row can be expanded into a detailed form style view to show all it's fields and their data.
You can navigate your rows by clicking arrows on top or by using shortcut keys. In this article, we will look at:
Checking History of Your Stack
Move column position from expand row
How to expand a row?
From the table view, you can expand the row in two ways -
- By clicking 'Expand' symbol, which appears when you hover your mouse over that row.
- You can also expand a row by pressing 'SPACEBAR' when any cell is selected in that row.
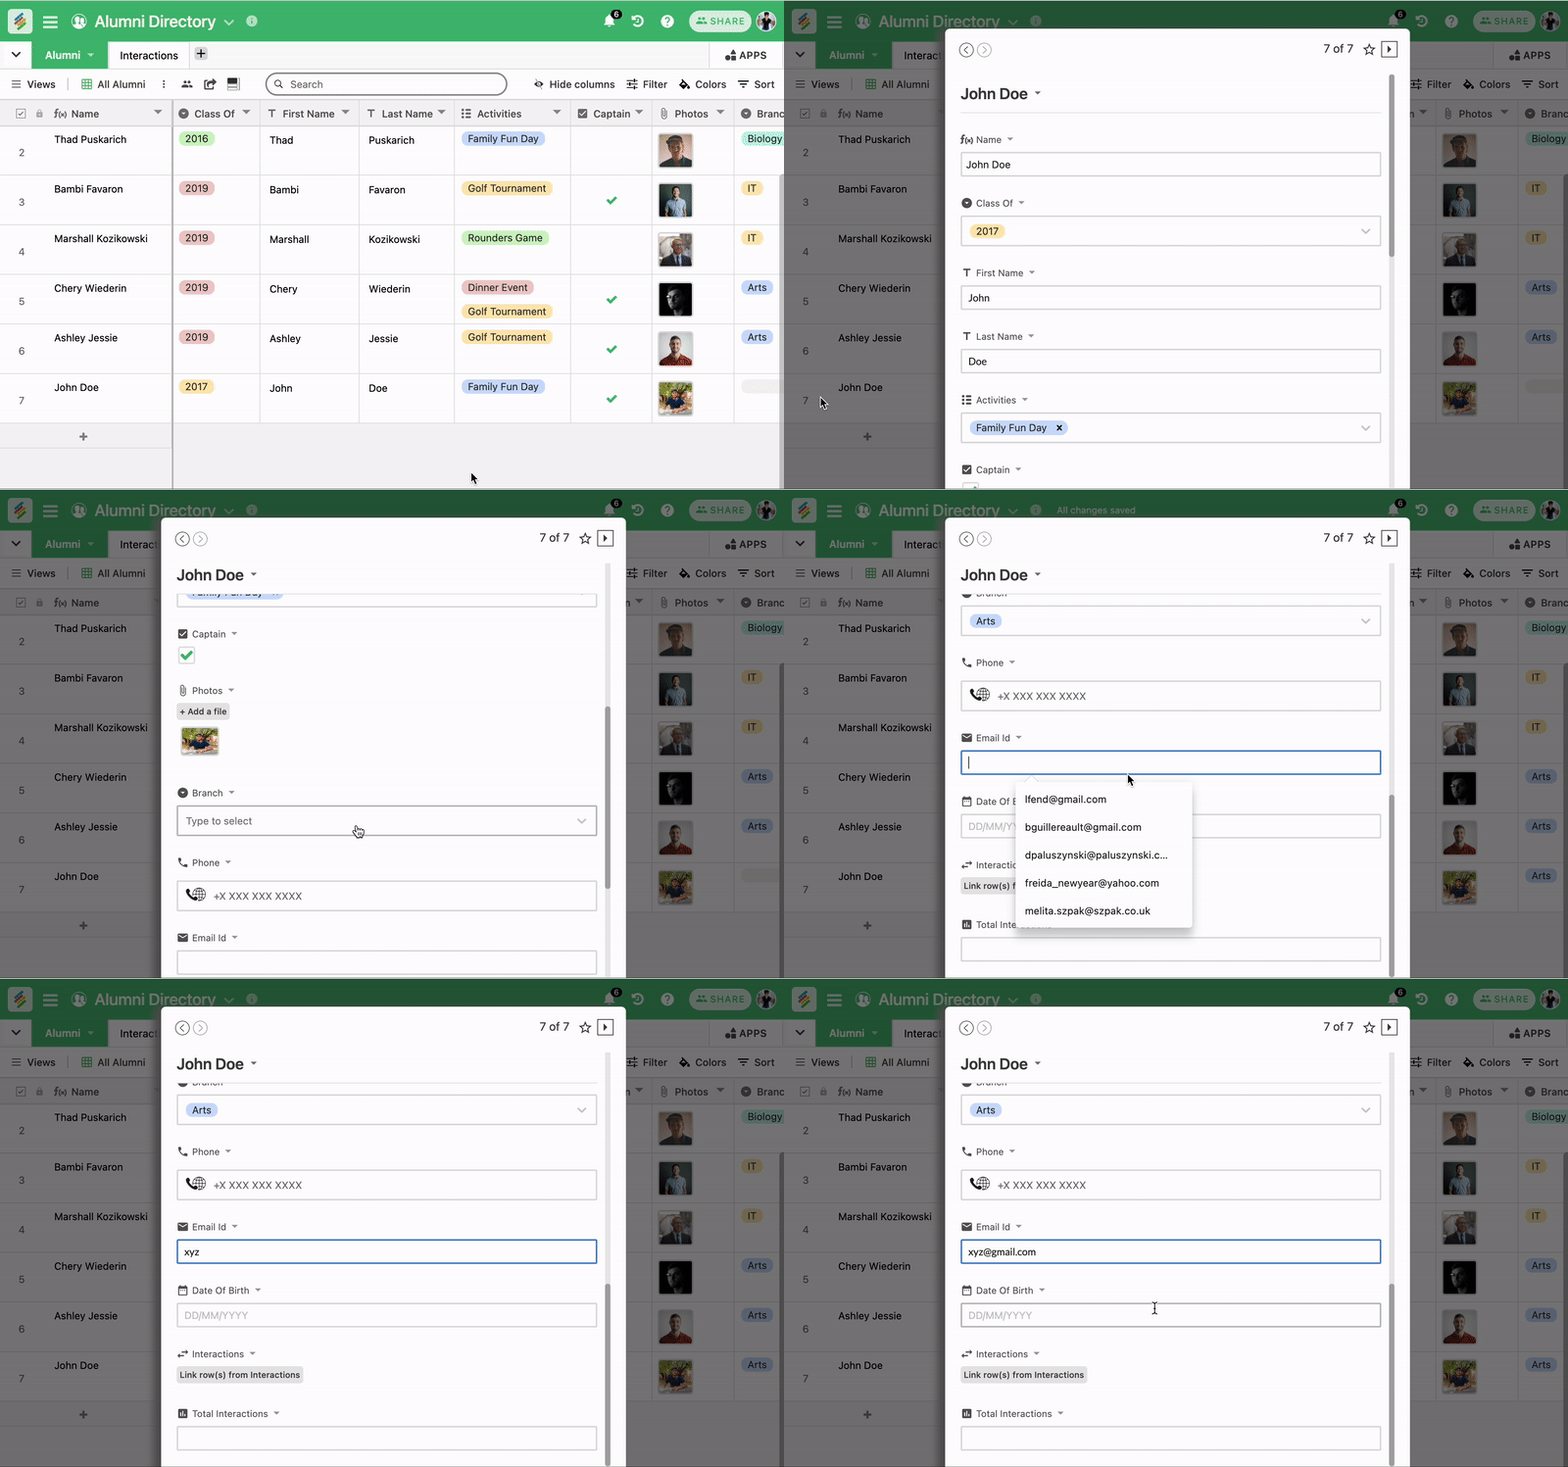
Before we start, there is one thing that you need to remember. Commands do not work at cell level within Stackby. So even if you right click inside a cell, the menu applies for the entire row. Here is more what you can do with rows than just entering your data:
Favourite Rows
Got a row in your stack that has to be updated time and again and you absolutely need to know the updates as soon as they come in? Mark it as a favourite and keep real time updates every time a change is made to that row. To mark a row as a favourite you must:
- Click on the double-sided diagonal arrows at the start of the row and a dialogue box will pop up
- Click on the star icon on the top left side of the dialogue box
- There - you have marked that row as a favourite
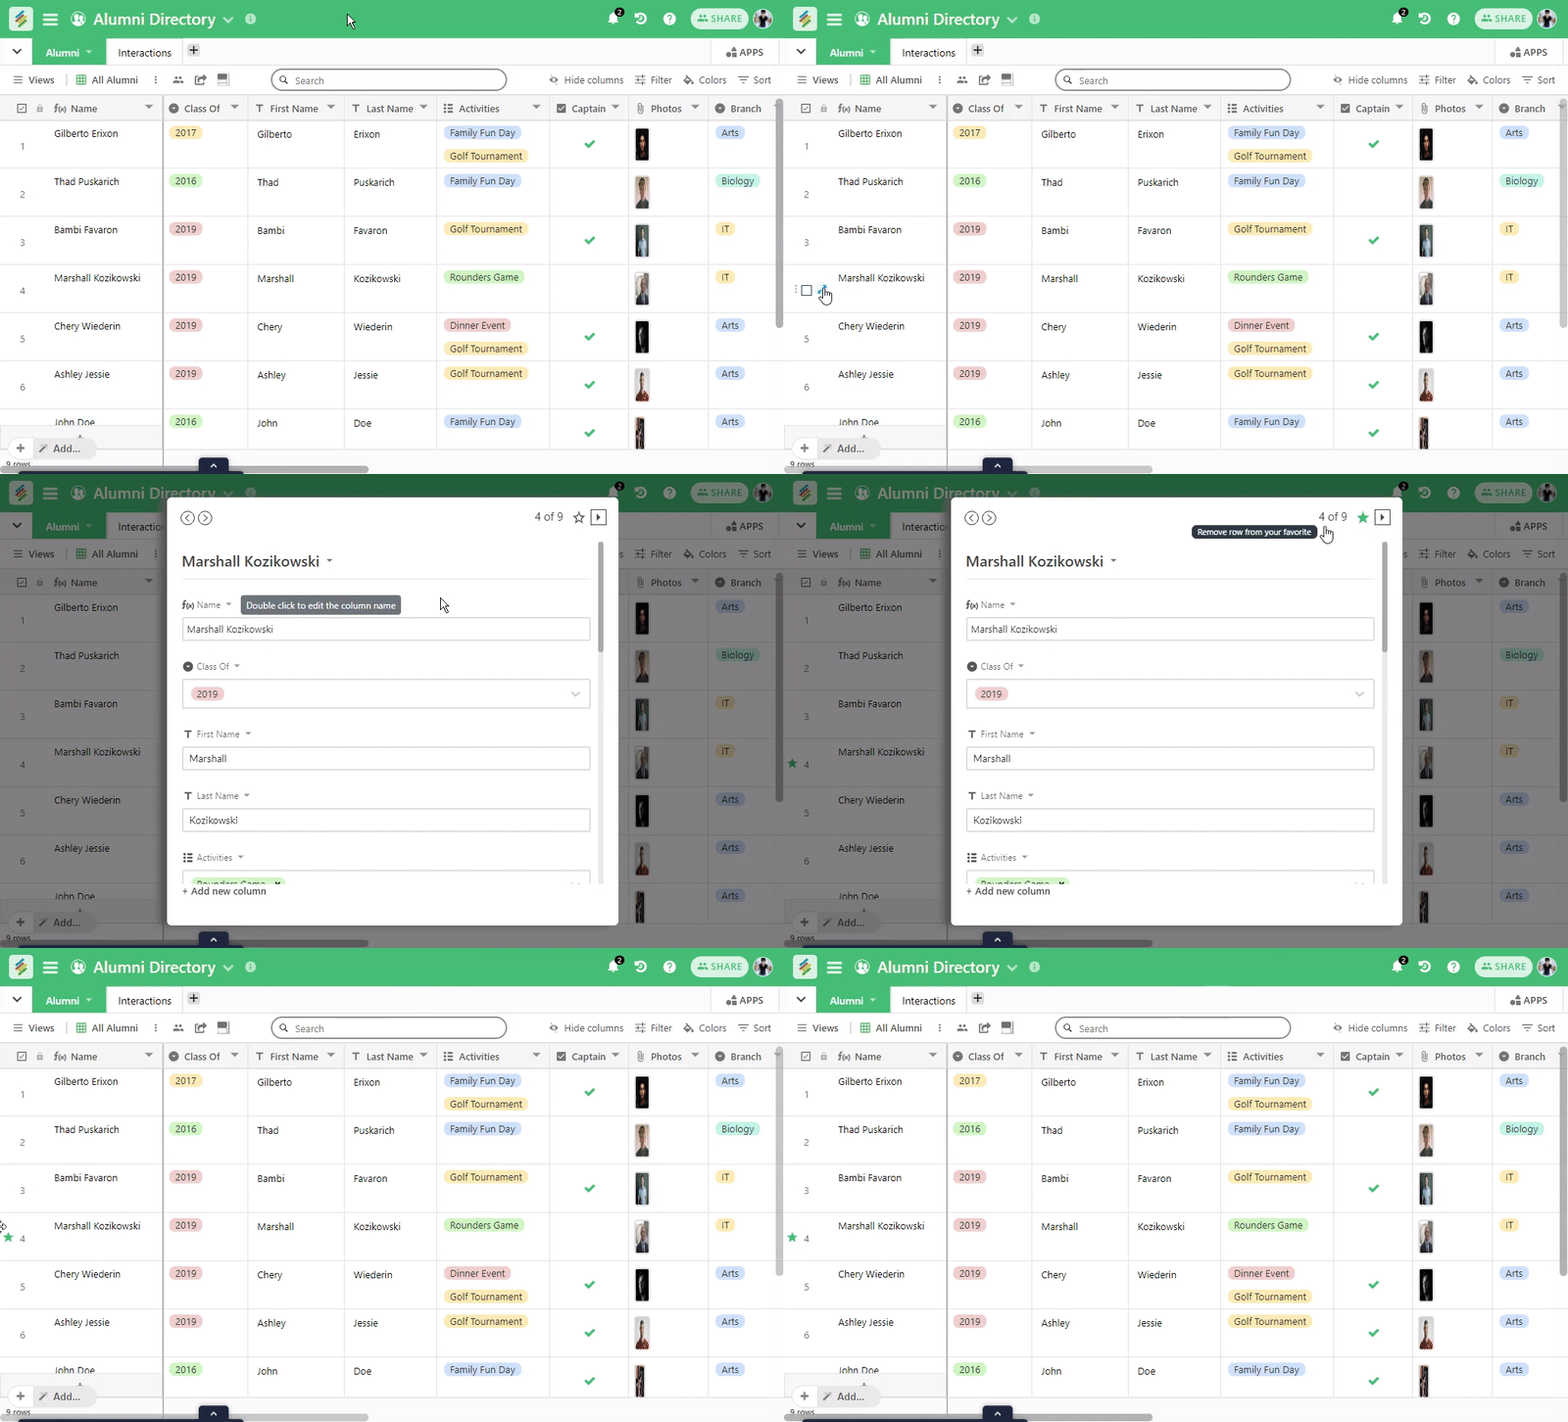
You can also add a Slack notification on your favourite row (Link to what you can send to Slack)
Creating Checklists
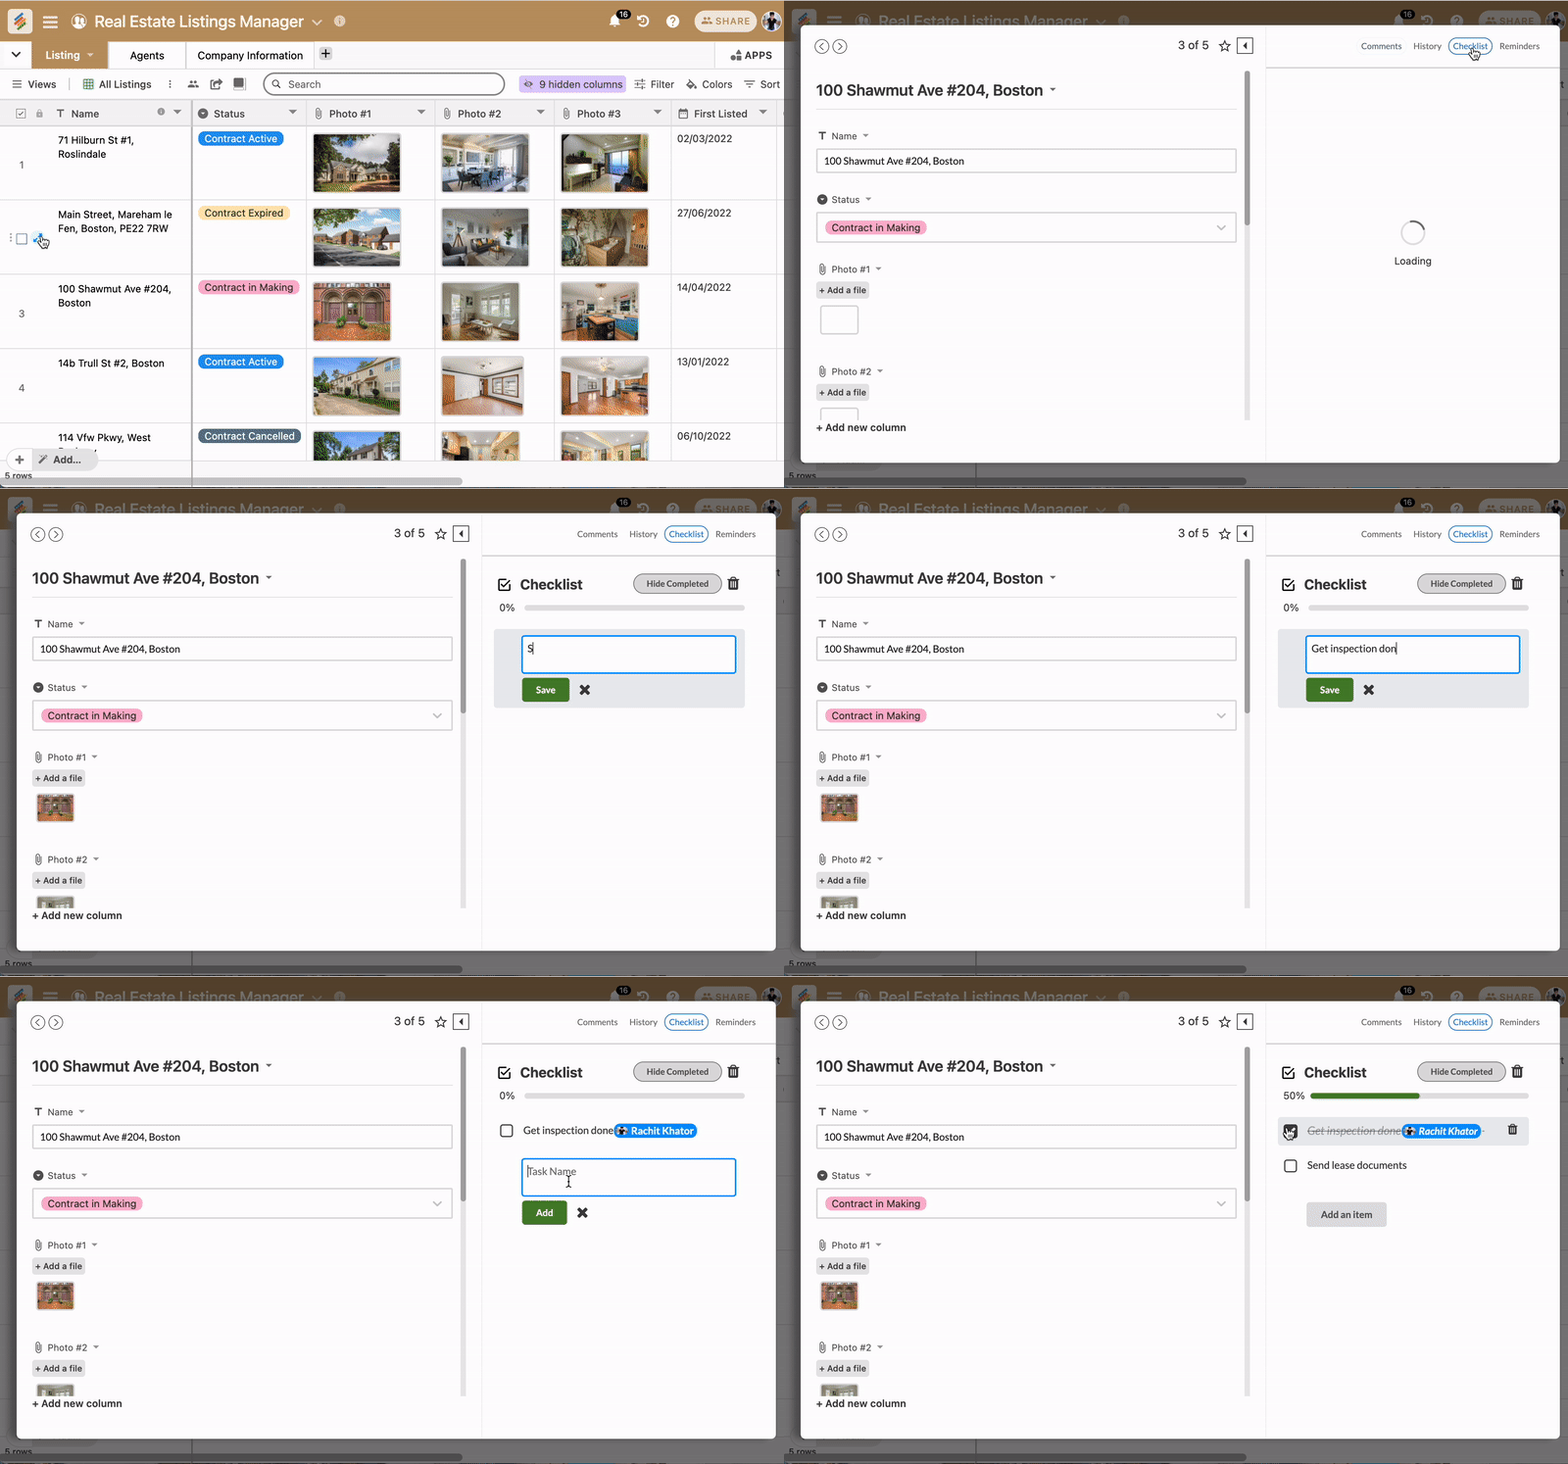
Need to create checklists for a particular row in your stack or perhaps leave instructions in the form of a checklist. It is easy to do that in Stackby. Here is how you can do that:
- Click on the double-sided diagonal arrows at the start of the row and a dialogue box will pop up
- Click Checklist button on the top right side of the dialogue box
- Click on the Create button and write add the to do lists and you are done
@Mention Comments
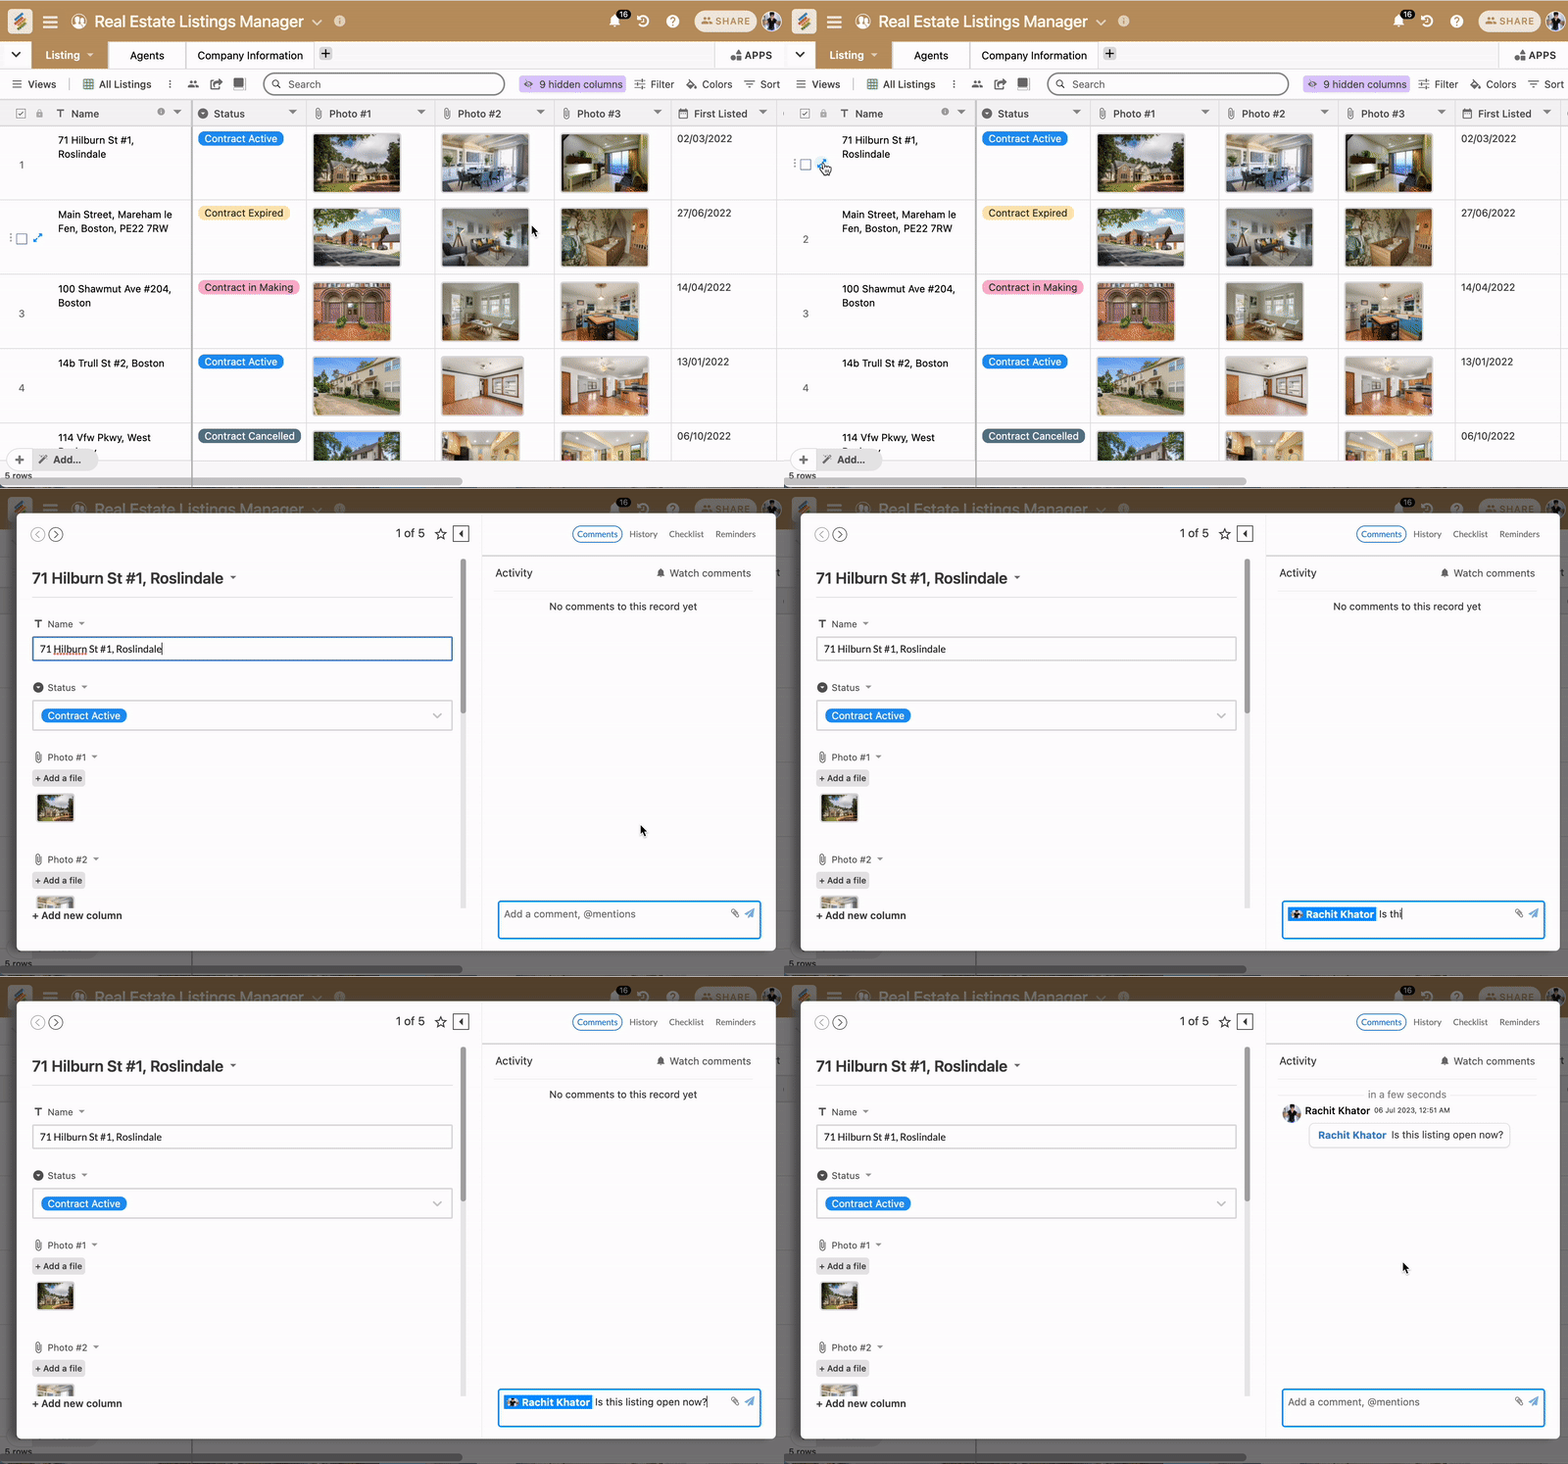
What makes Stackby the best tool for workflow and database management is its real-time collaboration feature. One of the ways that you can collaborate easily on Stackby is by adding in @mention comments. Again, this is at the row level and here is how you can do that:
- Click on the double-sided diagonal arrows at the start of the row and a dialogue box will pop up
- Click Comment button on the top right side of the dialogue box
- And a chat box will open that you can easily connect with your team by adding @mention comments and that team member will get real-time notifications
Checking History of Your Stack
With a team working on your stack, it is of utmost importance that changes are tracked to maintain transparency. You can check the history of changes made for each row in your stack. Here is how you can do that:
- Click on the double-sided diagonal arrows at the start of the row and a dialogue box will pop up
- Click History button on the top right side of the dialogue box
- And you can see the list of all changes made to the row
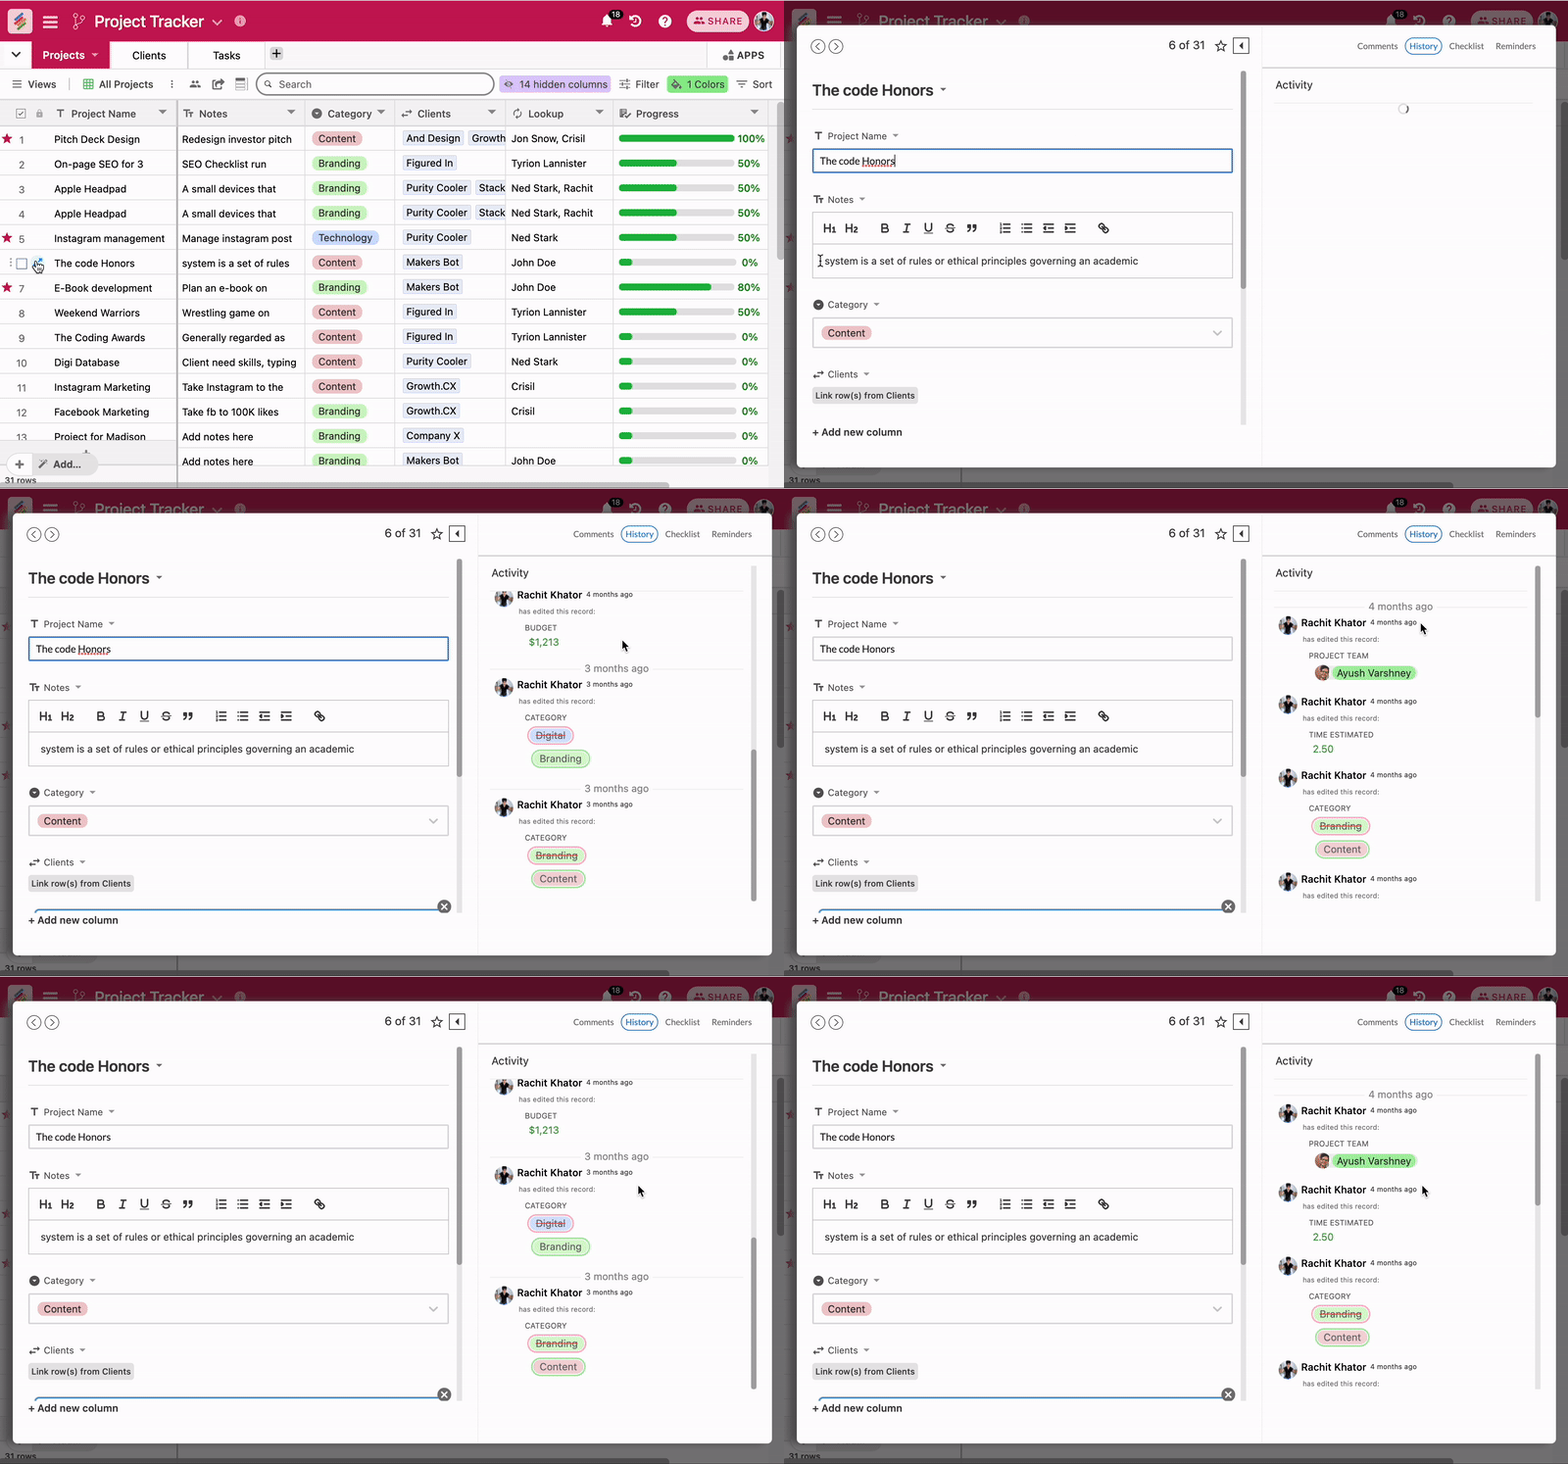
Note: Different plans have different activity history starting from 2 weeks to 1 year.
Setting Reminders
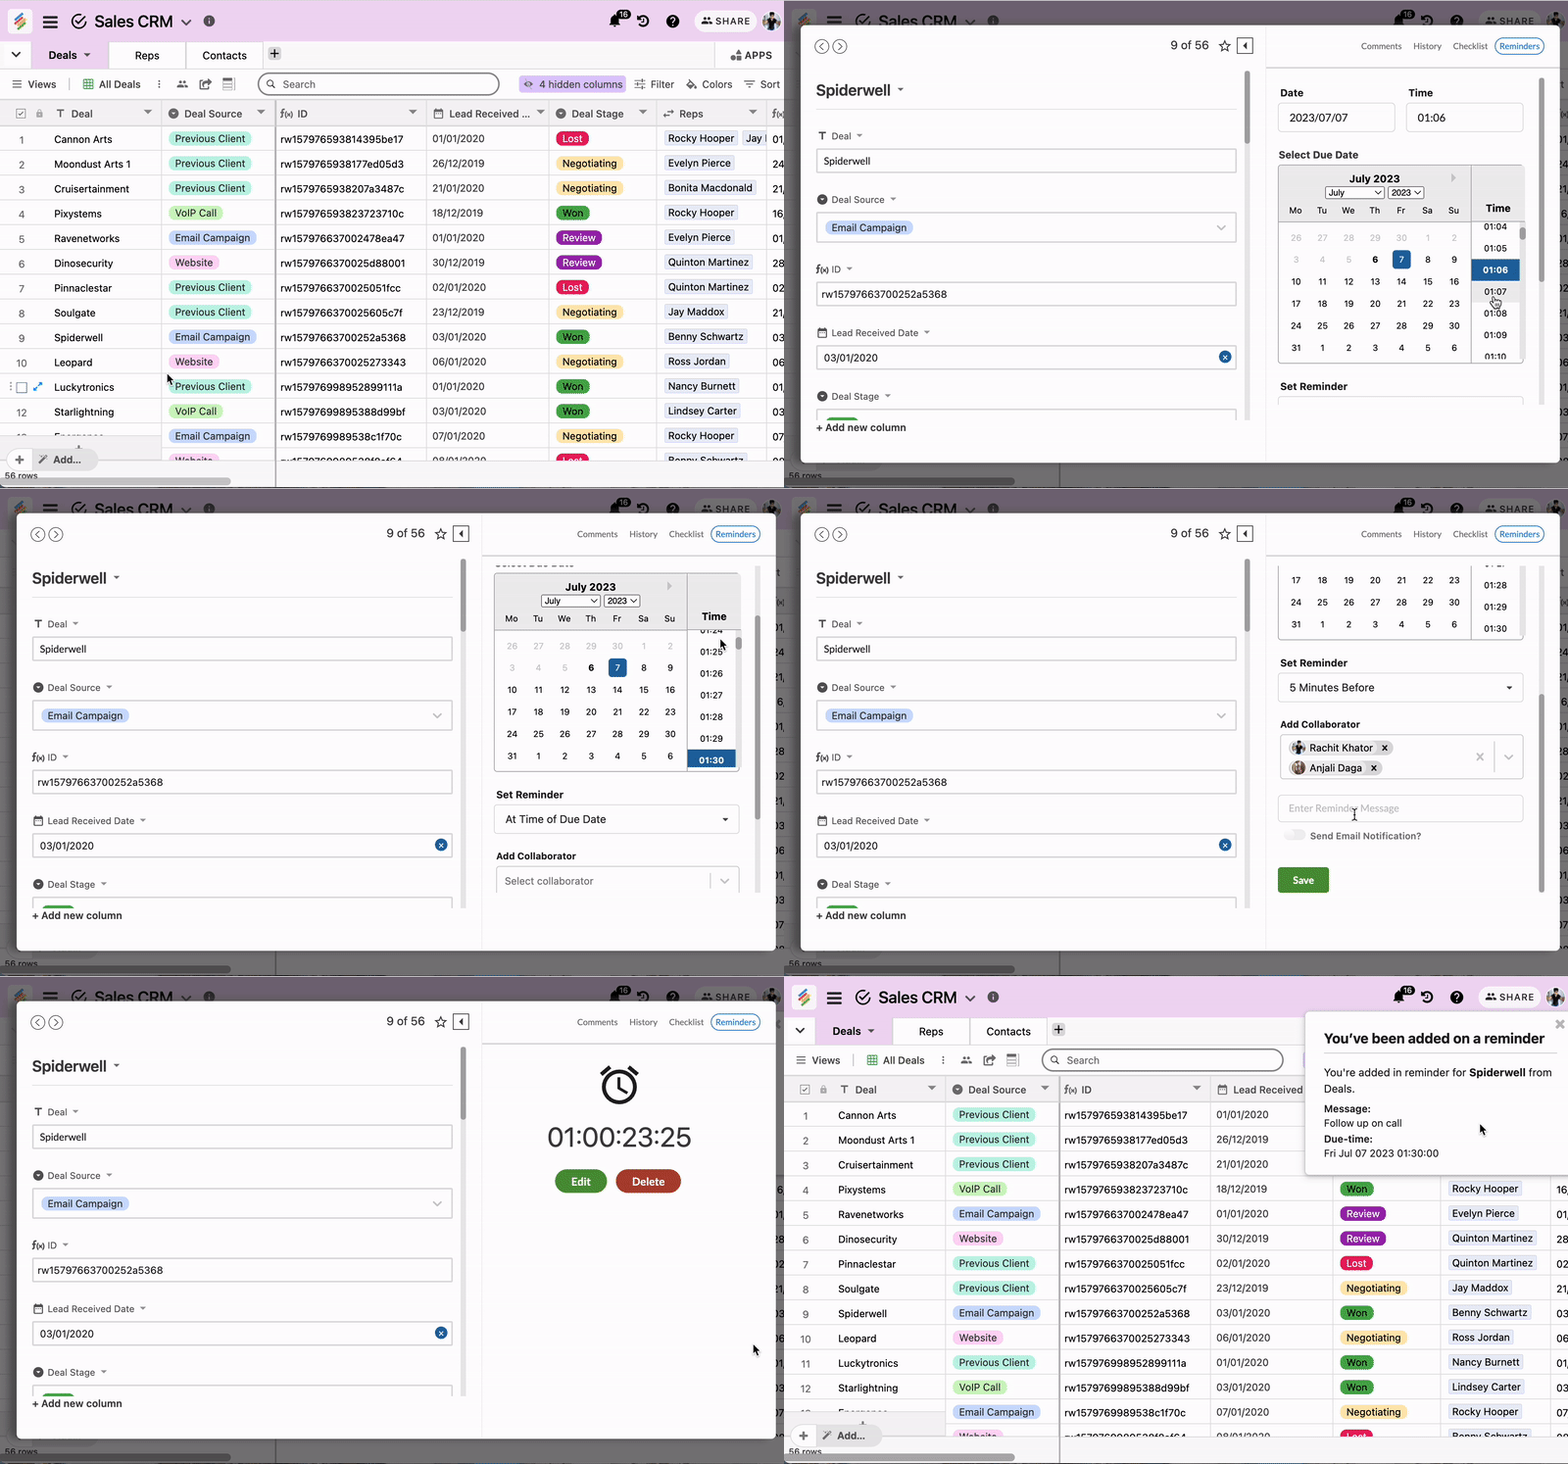
Want to set up a reminder for yourself or your team? You can do that at row level on your stack. Here's how to do that:
- Click on the double-sided diagonal arrows at the start of the row and a dialogue box will pop up
- Click Reminder button on the top right side of the dialogue box
- A date and time calendar will pop up, set the date and time reminder and Stackby will send you an alarm at the set time
Move column position from expand row
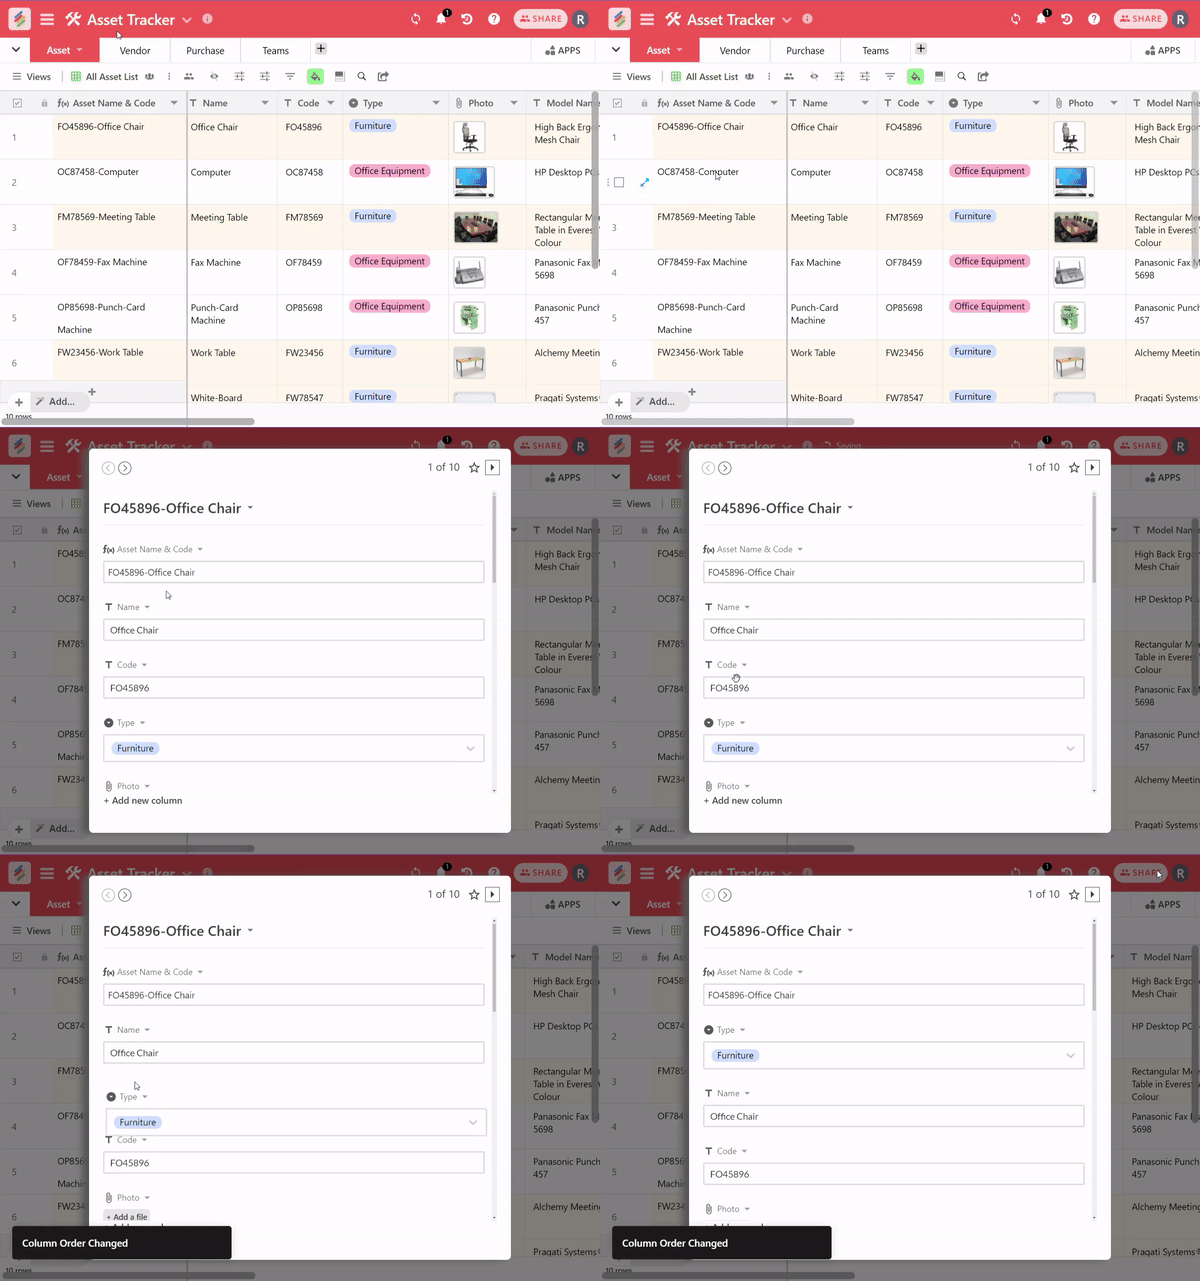
Users can move column position from an expanded row and can streamline their workflow and reduce the time spent navigating between columns, leading to increased productivity and efficiency.
Steps:
Click on the double-sided diagonal arrows at the start of the row and a dialogue box will pop up.
Within the expanded row view, locate the columns that you wish to rearrange or move.
Hover over the column header that you want to move. You should see a handle or drag icon appear next to the column header.
Click and hold the handle icon, then drag the column to the desired position within the expand row.
Release the mouse button to drop the column into its new position. The column position will be updated automatically within the expand row view.
You can also add a Slack notification on your reminders. Read the Slack Actions article here.


