View Permissions allows you to control access by assigning specific individual views to collaborators within your stack.
Follow these steps to manage view permissions in Stackby:
Step 1: Open the stack where you want to manage view access.
Step 2: At the top-right corner of the stack, click Tools.
Step 3:From the dropdown menu, select Manage Views.
This opens the View Configuration page where all views are listed.
Step 4: Inside the View Configuration page:
Select the desired view
Add collaborators
Assign access permissions
Control who can view or edit that specific view
The View Tools section in Stackby provides multiple controls to manage views efficiently.
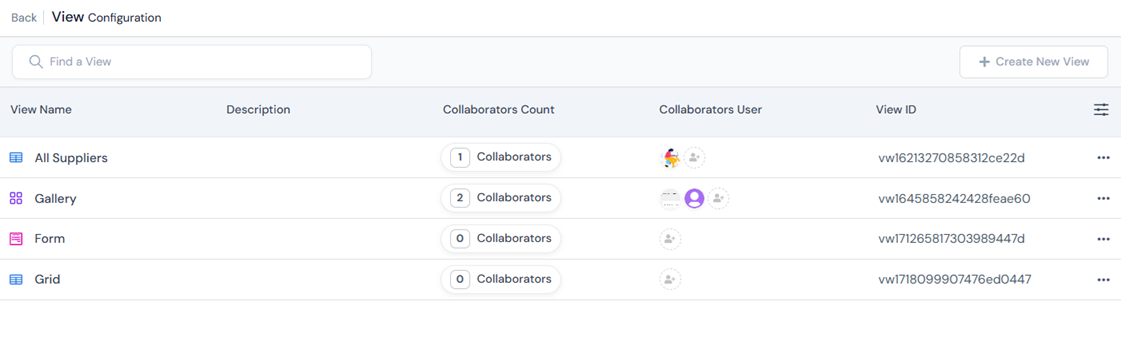
1. Find a View: Use the search bar to quickly locate views in large stacks.
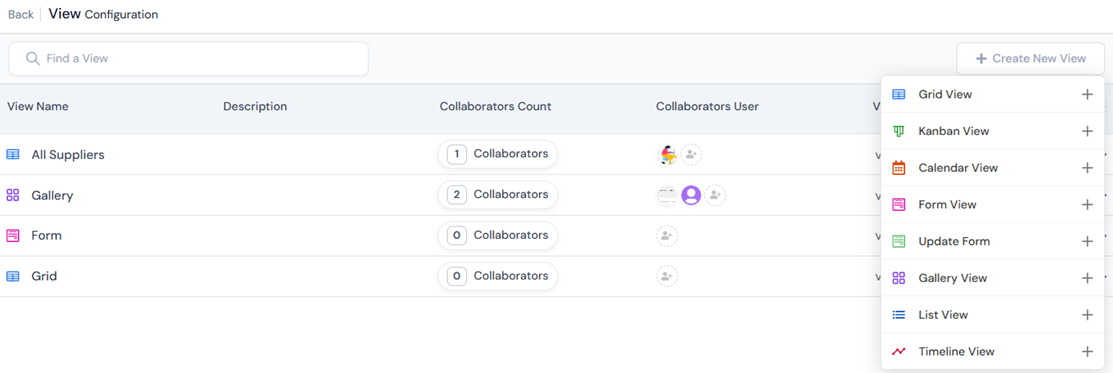
2. Create New View: Create additional views from existing stack data.
Supported View Types
Grid
Calendar
Kanban
List
Form
Gallery
Timeline
3. View Name: Displays the name of each view available in the stack.
Each view can have separate collaborators and permissions.
4. Description Displays additional details about the purpose of a view.
5. Collaborators Count: Shows how many users have access to that view.
Example
0 Collaborators → Private view
2 Collaborators → Shared with two users
6. Collaborators User: Displays profile icons of users who can access the view.
Benefits
Quickly identify shared users
Audit permissions easily
Prevent accidental sharing
7. View ID: Each view has a unique View ID.
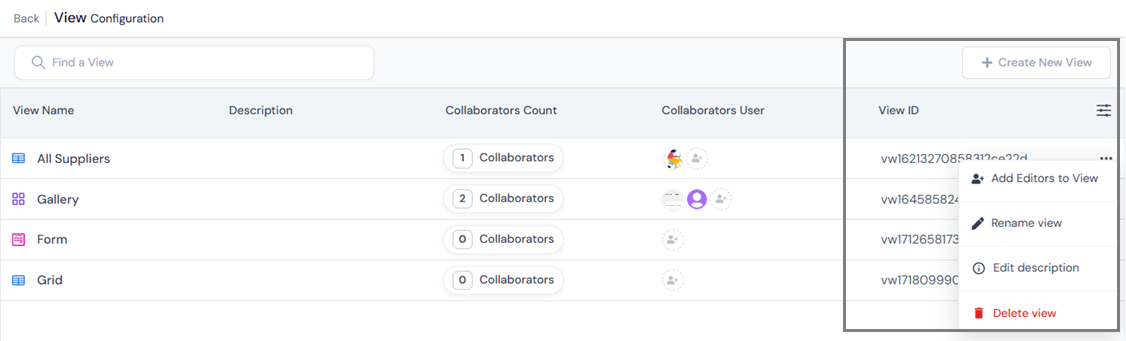
8. More Options (⋯): The action menu provides additional controls such as:
Add editors to the view
Rename view
Edit description
Delete view
Related Articles