The Calendar layout displays records as events on an interactive time-based calendar. It is the ideal Interface layout for any data that has a temporal dimension — deadlines, schedules, events, campaigns, sprints, and milestones. Users can navigate between month, week, and day views and interact with records directly from the calendar.
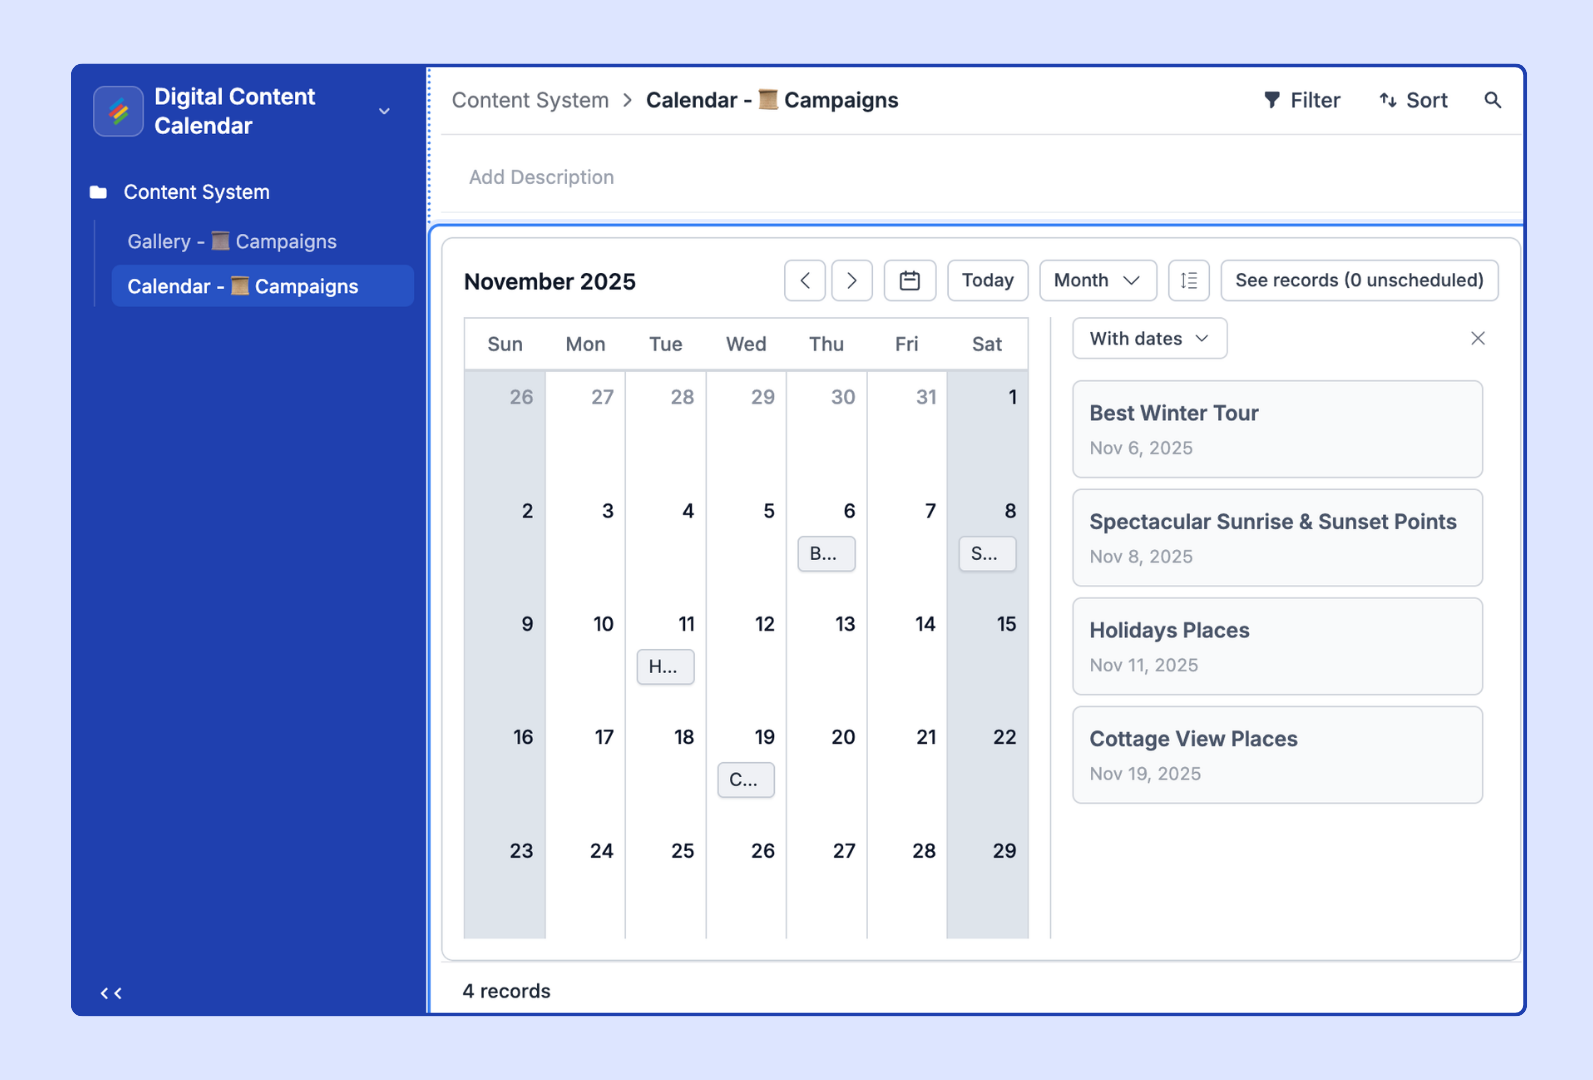
Content calendar — Schedule blog posts, social media, and campaign launches by publish date
Project milestones — Visualize deadlines and delivery dates across all projects
Event management — Track events, sessions, bookings, or appointments
Sprint planning — Map tasks to sprint start/end dates on a shared team calendar
Leave/holiday tracker — Display approved leave dates by employee
Editorial calendar — Plan and schedule articles from draft to publications.
In the Interface editor, click + Add Page in the left panel.
Select Calendar from the Layout Picker. Click Next.
Choose the source Stack and click Finish.
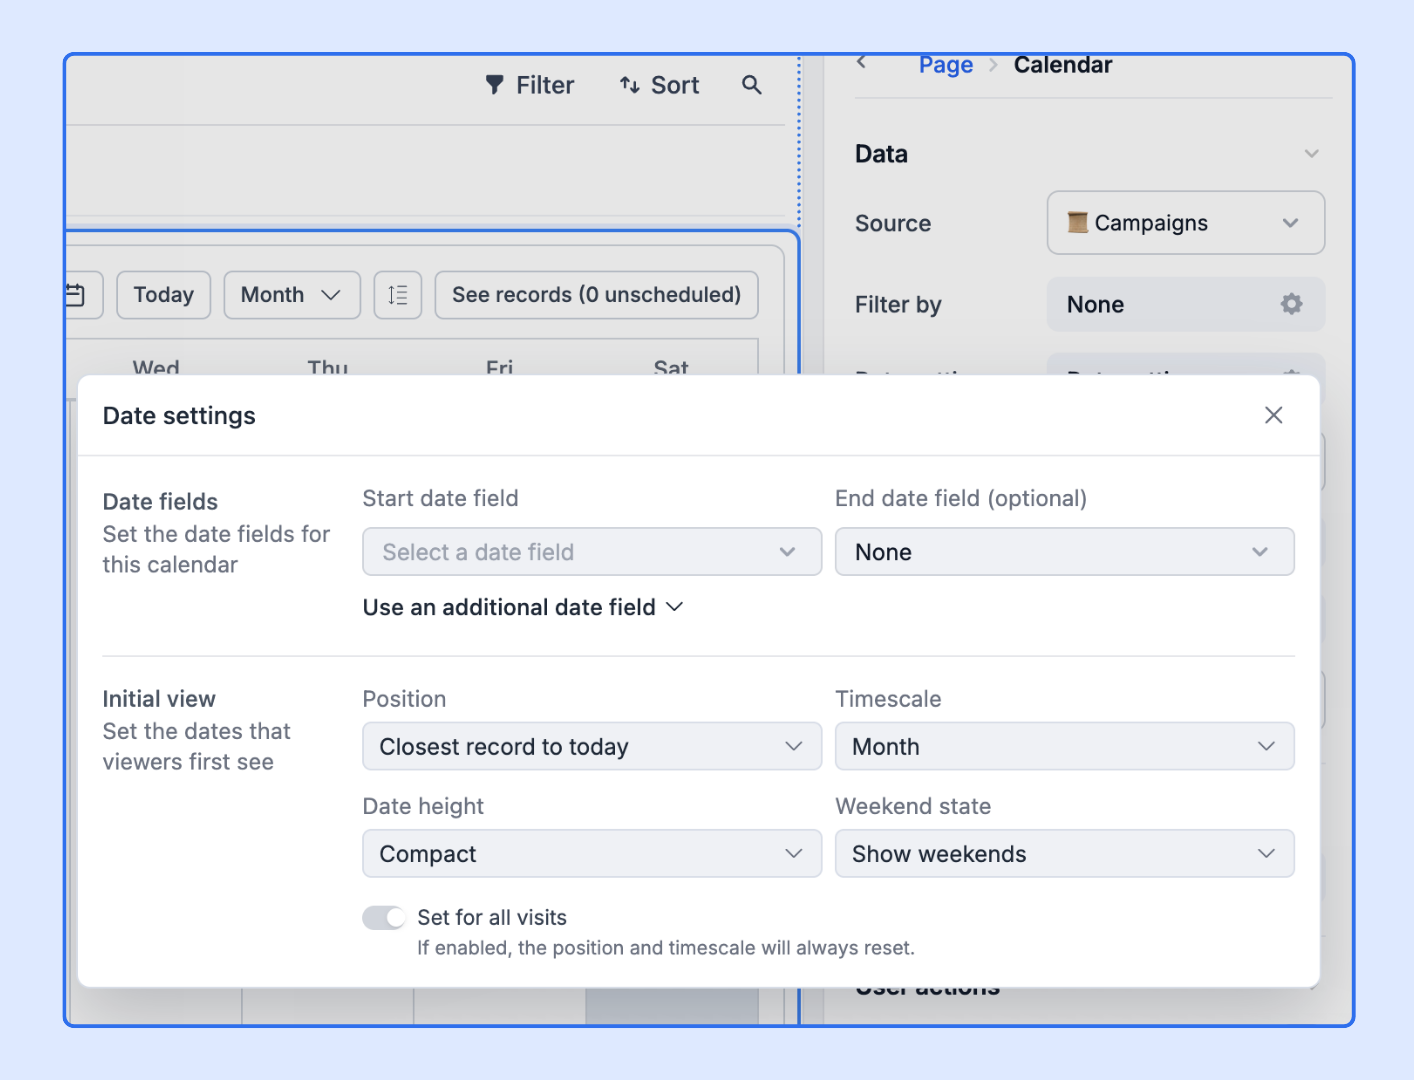
Configure the Date settings to select the date field(s) for the calendar.
The date settings are the most critical configuration for a Calendar layout:
Select the date field from the source Stack that determines when each record (event) appears on the calendar. This is required.
Select a second date field that represents when the record ends. When an End Date is configured, records span across multiple calendar days as range bars rather than appearing as single-day events. Ideal for projects, events, or any record with a start and end period.
Set the default calendar timescale that users see when they open the page:
Month — Shows a full month grid (default). Best for high-level scheduling and deadline awareness.
Week — Shows a 7-day week with hourly slots (if times are enabled). Best for detailed scheduling.
Day — Shows a single-day hourly view. Best for day-specific event management.
Set where the calendar initially scrolls to — Today (default), or a specific date. "Today" is recommended for live operational calendars.
When toggled on, the initial view and position settings are locked for all users — they always see the same starting state when they open the page. When toggled off, users can change their view (month/week/day) and the calendar will remember their last position on return visits.
Sort by — When multiple events fall on the same day, set how they are ordered within the day slot.
Filter by — Limit which records appear as events. Examples: show only records with Status = "Confirmed," hide cancelled events, show only events belonging to the current user.
Fields — Choose which fields appear in the event preview popup when a user clicks on a calendar event.
Label — Configure which field's value is displayed directly on the calendar event tile. Due to space constraints, short text fields (name, title) work best. You can configure up to 2 label fields.
Label image — Choose an attachment field to display a thumbnail image on the event tile. Useful for photo-heavy calendars like content or product calendars.
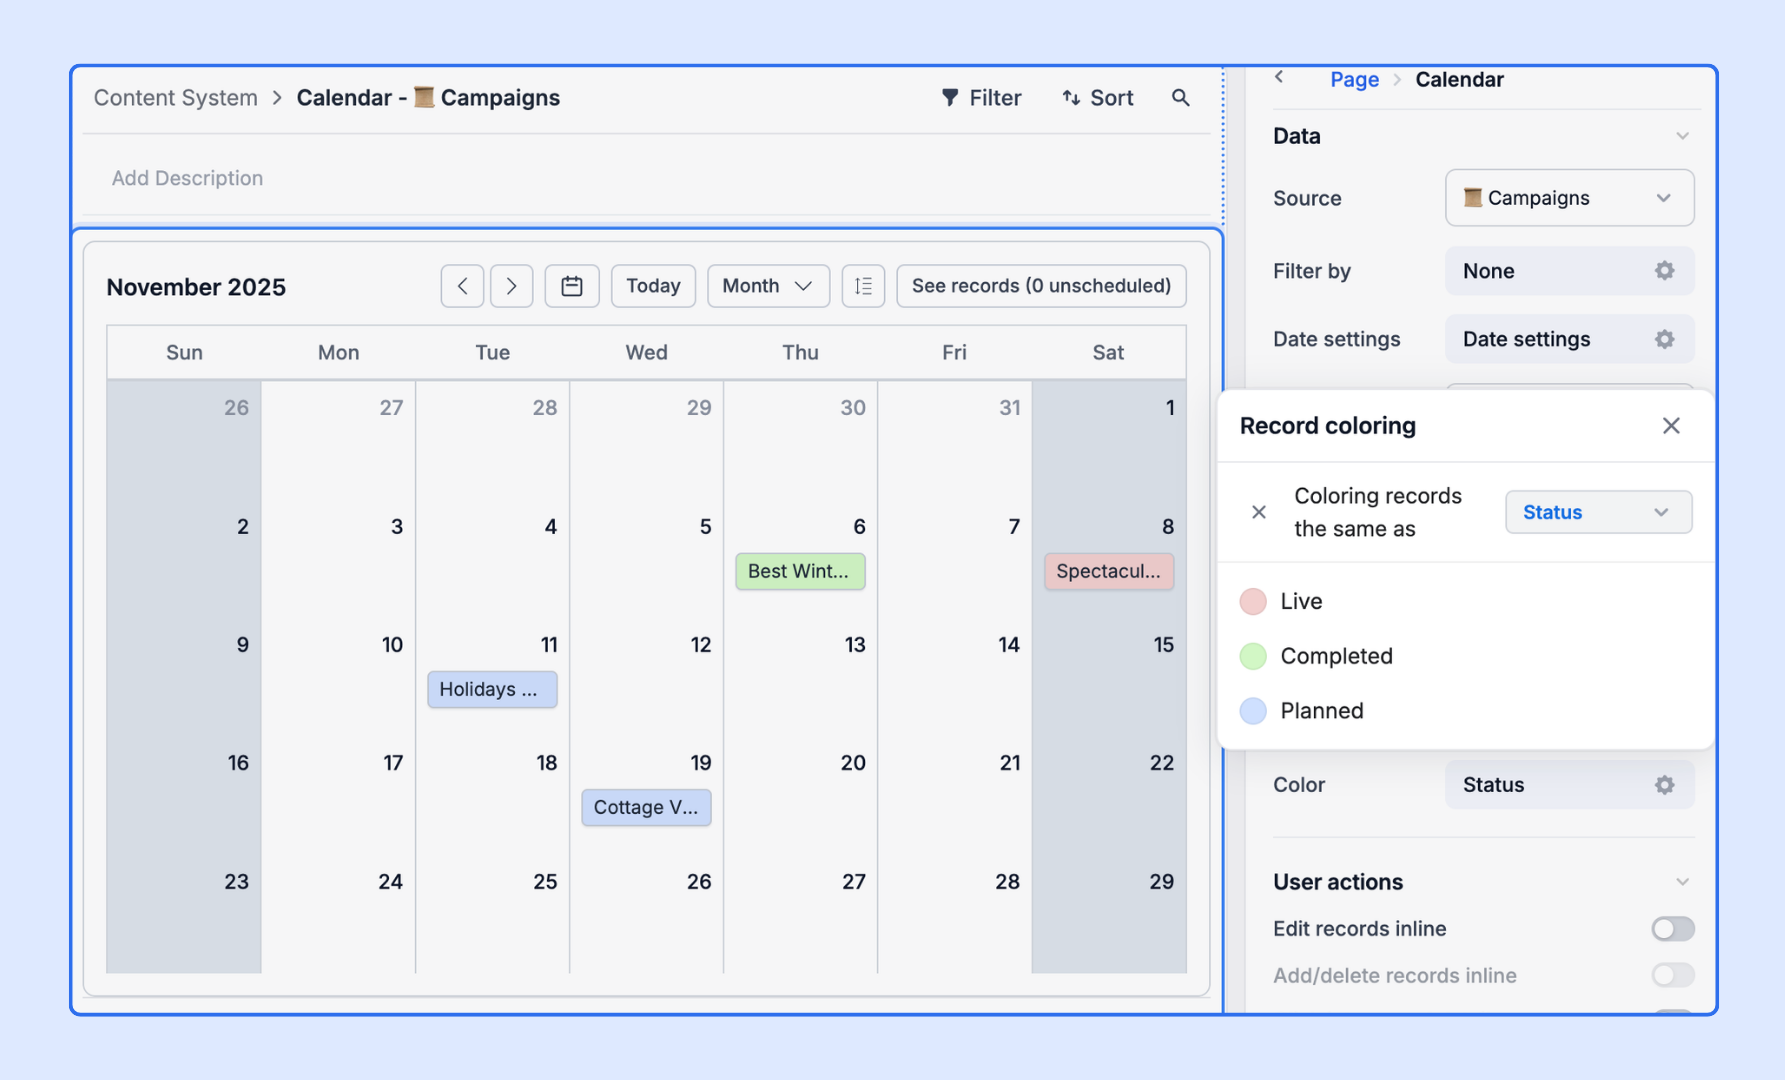
Color by — Apply color to calendar event tiles:
By Select field — Event tiles inherit the color of the record's selected option.
By Conditions — Custom color rules (e.g., red for overdue, green for completed).
Fit image size — Resize label images to fill the tile area without overflow.
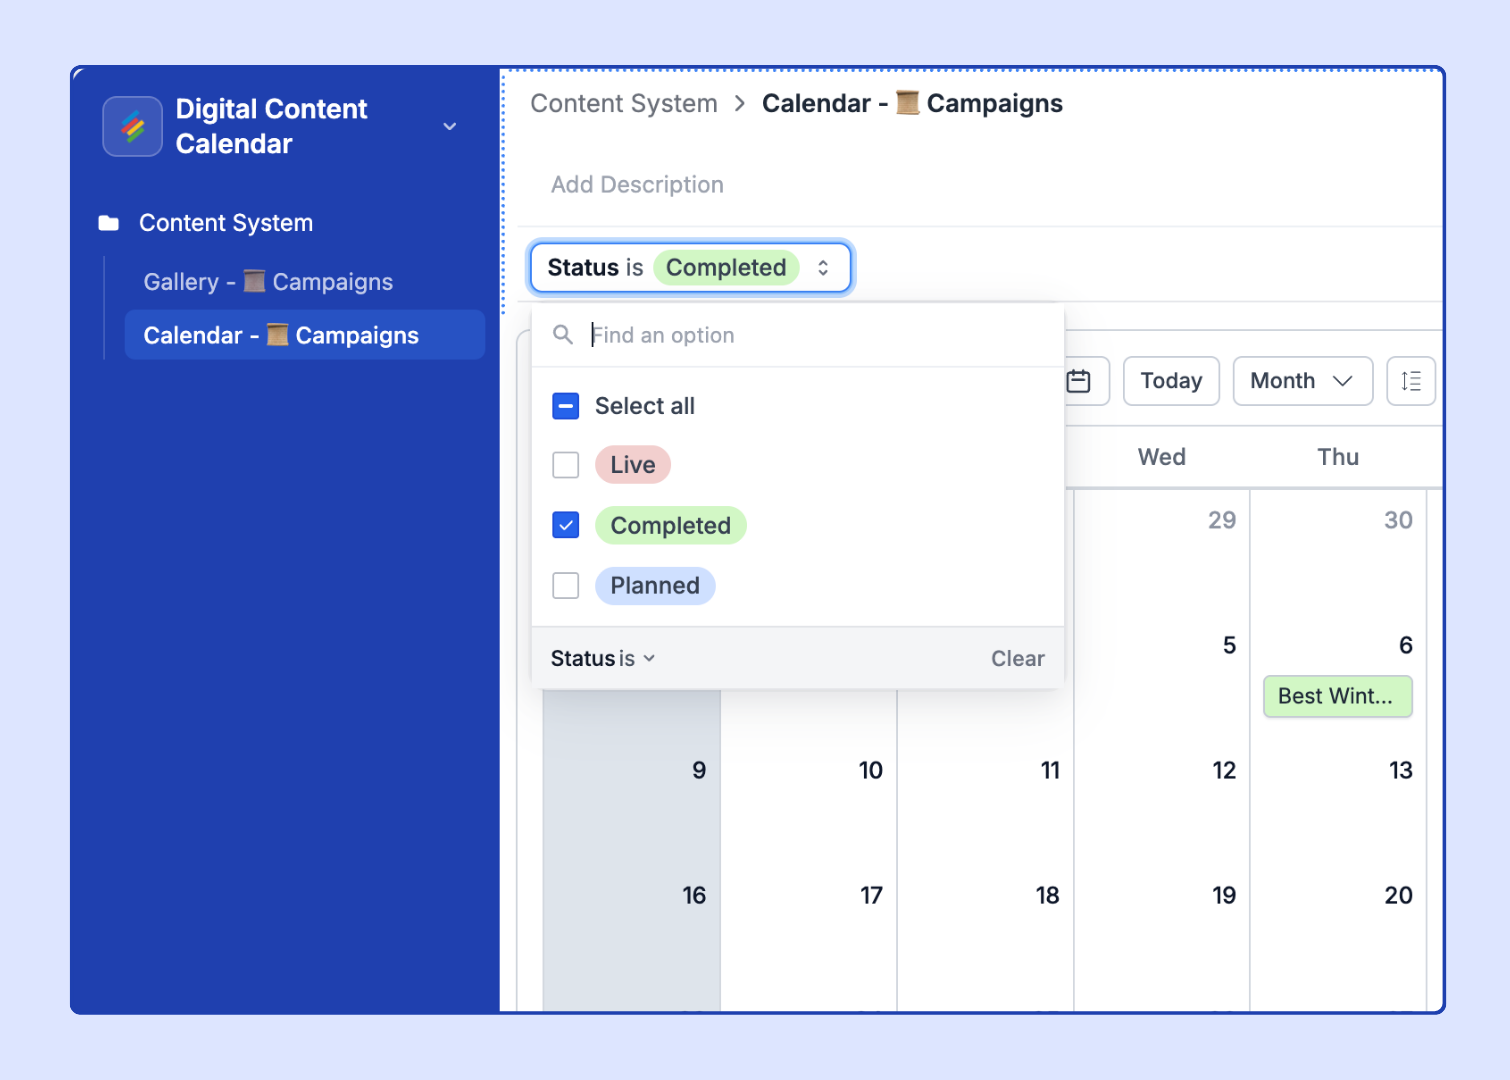
Configure Tabs or Dropdown filters to let users filter the calendar. For example:
Tabs: "All Events," "My Events," "This Week's Deadlines"
Dropdown: Filter by Team, Project, or Status.
Edit records inline — Allow users to click an event tile and edit field values in a quick-edit popup without opening the full record detail panel.
Add / delete records inline — Show a + button on each day slot so users can create new events directly on the calendar. New events are pre-filled with the clicked date. Users can also drag existing events to a different date to update the date field.
Click into record details — Click an event to open the full record detail panel for deep editing.
Allow users to export data as CSV — Export visible calendar records as a CSV.
Allow users to print — Print/PDF the current calendar state. The print output shows the calendar in the current view (month/week/day) and zoom level.
Using both a Start Date and End Date field creates spanning event bars that visually communicate duration. This is particularly powerful for project timelines and content schedules where knowing how long something runs is as important as knowing when it starts.
If your date field includes time (date + time format in the Stack), the Calendar layout will show events with specific hour slots in Week and Day views. This enables scheduling tools like meeting calendars, class schedules, or shift planners.
Add multiple Calendar pages to the same Interface — each connected to a different Stack — to create a multi-source calendar view. For example: a "Marketing Calendar" page sourced from the Content Stack, and a "Product Calendar" page sourced from the Features Stack.
Check the following: (1) Confirm the correct date field is selected in Date settings. (2) Verify the records are not filtered out by page-level or visualization-level filters. (3) Check that the date values in the records are within the current calendar month/week/day being displayed. (4) Ensure the date field contains actual date values, not text that looks like dates.
Not on a single Calendar page — each page is connected to one source Stack. To see events from multiple Stacks, enable multiple Calendar pages (one per Stack) and let users toggle between them, or use a Dashboard page with multiple Calendar visualizations from different Stacks.
The Calendar layout displays individual records as events. Stackby does not natively generate recurring event instances. For recurring events, use Stackby Automations to create records on a schedule, or manually create multiple records (one per occurrence) and filter the calendar to show only upcoming instances.
Dragging requires: (1) Edit records inline to be enabled in User Actions, (2) the date field to be a writable date field (not a computed field like Formula or Created Time), and (3) the user to have Editor permissions on the Interface.