Stackby recently introduced powerful Jira automation actions that let you automate creating and updating Jira issues directly from your Stackby workspace — no coding required.
With these new actions, you can:
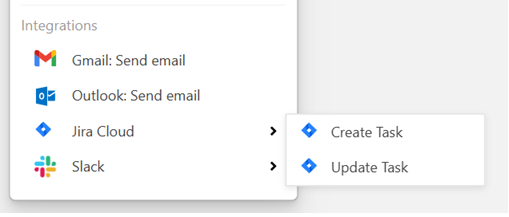
Create a new Jira Issue using the “Create Issue” action
Update an existing Jira Issue using the “Update Issue” action
In this article, we'll learn — from connecting your Jira account to setting up each automation.
Before you can automate anything, you need to connect Stackby to your Jira Cloud instance.
Open your Stack where you want to automate tasks.
Go to Automations from the top toolbar.
Click + Create New Automation.
Choose a Trigger — this tells Stackby when to run the automation (e.g., when a new record is added to a view, when a record is updated, etc.)
After selecting the trigger and testing it, add a new action.
Choose your Jira automation action (either Create Issue or Update Issue).
When prompted, select or connect your Jira account.
You may need to login with your Atlassian credentials and grant permissions.
Once connected, Stackby will be able to read your Jira projects, site, and issue types.
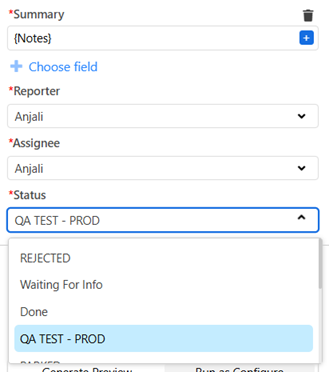
Here’s how you set up the Create Issue action:
After connecting your Jira account, you’ll see fields like:
Site – your Jira Cloud domain
Project – which Jira project to create the issue in
Issue Type – e.g., Bug, Task, Story, etc.
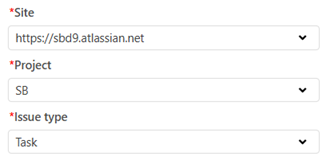
Select the appropriate values that match your workflow.
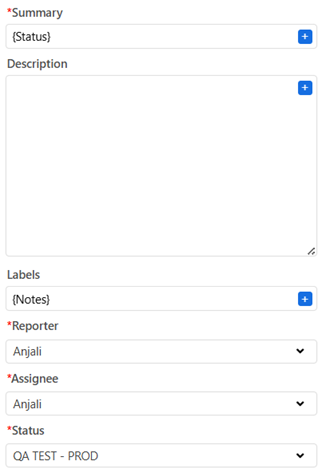
Map issue details from your Stackby record to the Jira issue:
Summary — the issue title
Description — longer details about the task/bug
Reporter — who created it (if your Jira permissions allow)
Assignee — who should be assigned
Status - status of the ticket (QA test PROD, to do)
Labels — tags to categorize the issue
Other fields — custom fields depending on your Jira issue configuration
After configuring all the fields, test the action to make sure Stackby can successfully create a Jira issue.
Once the test passes, save and turn on the automation.
Now Stackby will automatically create new Jira issues when your trigger condition is met.
Now let’s look at updating issues you already have.
Add a new action after your trigger in the automation editor.
Choose “Update Issue”.
Select your Jira account again (if needed).
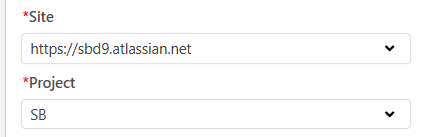
Choose the Jira Site and Project where the issue exists.
Now you’ll be asked to provide:
Issue Key or Issue ID — Use the field you may have saved earlier from a Create Issue step, or enter it manually.

Pick which fields in Jira you want to update:
Summary
Description
Status
Assignee
Priority
Any custom field
You can leave a field blank if you want it cleared in Jira — so map carefully.
Test the action to make sure your update works properly.
Save and enable the automation.
Once live, any changes in Stackby that meet your trigger condition will update the corresponding Jira issue automatically.
Yes. You can:
Create separate automations for different Jira projects, or
Dynamically select projects if Stackby supports field-based mapping for the Project field.
Each automation action can point to one Jira project at a time.
Yes, as long as:
The Status field is available for the selected issue type, and
The status transition is allowed in Jira’s workflow.
If a status change fails, it’s usually due to Jira workflow restrictions.
For the Update Issue action:
The automation will fail if no valid Issue Key or Issue ID is provided.
Best practice is to store the Issue Key returned from the Create Issue action in a Stackby column and reuse it later.
Yes. Stackby supports custom Jira fields, provided:
They are available for the selected project and issue type
Your Jira user has permission to view and edit them
Custom fields will appear automatically in the action setup when supported.