The OpenAI connector in Stackby allows you to seamlessly integrate powerful AI models like GPT-4 and GPT-3.5 directly into your workflows. You can leverage this integration for a wide range of tasks, including content generation, text summarization, data classification, and more, all within your Stackby tables.
This guide will walk you through the process of setting up and configuring the OpenAI connector in your Stackby workspace.
Advanced Content Generation: Create blog posts, product descriptions, marketing copy, and more.
Text Summarization: Condense long articles, meeting notes, or reports into concise summaries.
Data Analysis: Classify and categorize text data, such as customer reviews, support tickets, or survey responses.
Translation: Translate text between different languages.
Code Generation: Generate code snippets for various programming languages.
To integrate OpenAI, you will need:
A Stackby Account: With access to AI Field Agents (Business or Pro plan).
An OpenAI Account: An account with OpenAI is required to generate your API key.
OpenAI API Key: You will need an API key to authenticate your requests to the OpenAI API.
How to Get Your OpenAI API Key:
Log in to your OpenAI account.
Navigate to the API keys page: https://platform.openai.com/api-keys.
Click on "Create new secret key".

Give your key a name for easy identification (e.g., "Stackby Integration").
Click "Create secret key".
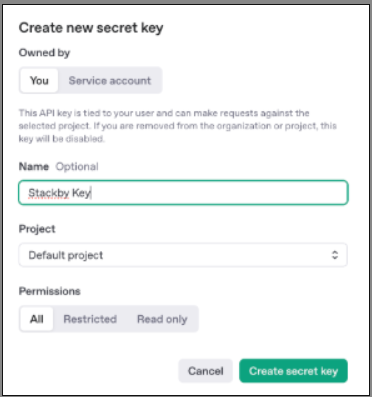
Copy the key immediately. You will not be able to see it again after this pop-up is closed.
Security Note: Treat this key like a password. Do not share it publicly or commit it to your codebase.
Step 1: Add the OpenAI Integration to Your Workspace
Log in to your Stackby account.
Navigate to your Workspace Settings by clicking on your workspace name in the top left corner.
From the left-hand menu, select Integrations.
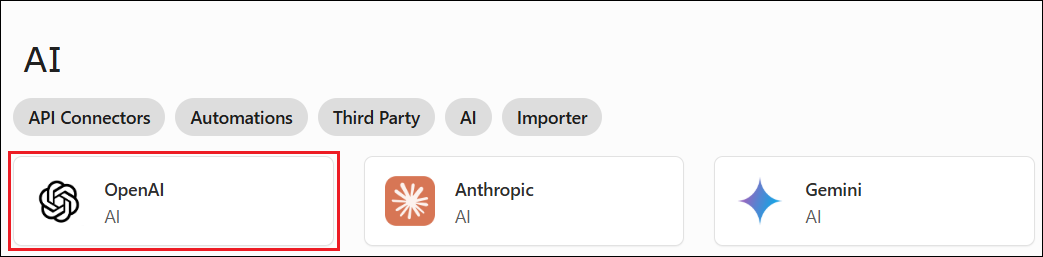
Scroll down or search for "OpenAI" and click on the 'Connect' button next to it.
Step 2: Configure Your OpenAI Connection
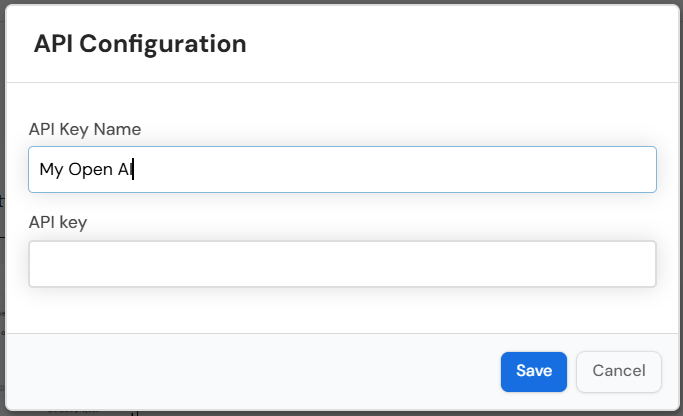
A configuration window will appear.
API Key: Paste your copied OpenAI API key into the designated field.
Connection Name (Optional): Give your connection a descriptive name (e.g., "My OpenAI Key").
Click 'Save Connection'.
You should now see "OpenAI Connected" under your Integrations, indicating that the connection has been successfully established at the workspace level.
Step 3: Utilize OpenAI in Your Stack
Once connected, you can add AI Columns to your Stackby tables and select OpenAI as your provider.
Open Your Stack: Go to the Stackby stack where you want to use OpenAI.
Add an AI Column: Click the '+' icon to add a new column and select 'AI' as the column type.
Configure the AI Column:
Column Name: Give your AI Column a clear name (e.g., "AI Summary," "Product Description").
AI Provider: From the dropdown, select 'OpenAI'.
AI Model: Choose the specific model you wish to use (e.g., gpt-4, gpt-3.5-turbo).
Prompt: Craft your prompt. Use @ to reference other columns in your table to provide context to the AI.
Example Prompt (Product Description): "Write a short, engaging product description for a product with the name: @[Product Name] and features: @[Features Column]."
Output Type: Select the expected output format (e.g., Text, Number, JSON).
Advanced Settings (Optional): Adjust parameters like Temperature (for creativity) or Max Tokens (for response length) if available.
Save Column: Click 'Save Column' to add the AI Column to your table.
The AI Column will automatically populate with OpenAI's AI-generated content based on your prompt and the referenced columns.
API Key Issues: Ensure your API key is correctly entered and is not expired.
Rate Limits: If you encounter errors, you may have reached your API rate limits. Check your usage on your OpenAI dashboard.
Prompt Quality: A well-written, specific prompt will yield better results. Experiment with different phrasings.
Plan Eligibility: Remember that AI Field Agents (which enable AI Columns) are available only on Stackby's Business and Pro plans.
By following these steps, you can harness the power of OpenAI to automate and enhance your workflows directly within Stackby.