
With Outlook Automation in Stackby, you can directly send emails from your Microsoft Outlook account whenever a trigger is activated in your table. This helps you automate communication with clients, teammates, or stakeholders without leaving Stackby.
How to Set Up Outlook Automation in Stackby
Step 1: Go to your table in Stackby. Click on the Automations tab at the top. Click + Add Automation.
Step 2: Choose a Trigger: Select what should start the automation. Example triggers
When a row is created
When a row is updated
On a scheduled time
Step 3: After selecting the trigger, click + Add Action.
Step 4: Choose Outlook → Send Email.
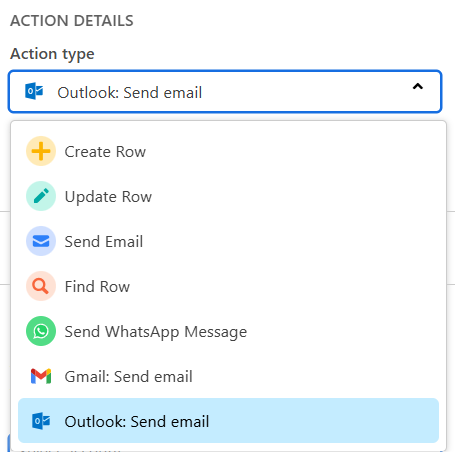
Step 5: Authenticate your Outlook account with Stackby (one-time connection).
Step 6: Configure Email Setting and Set up the details for your email:
To: Select an email column from your table or enter an email address directly.
CC / BCC (optional): Add additional recipients.
Subject: Type in a subject line or use dynamic fields from your table (like {Client Name}, {Project}).
Message Body: Write your email. Use placeholders from your table to personalize it.
Attachments: Attach files directly from your Stackby rows.
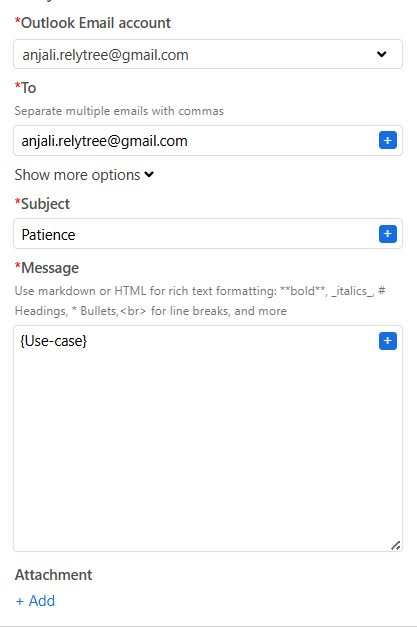
Step 5: Click Test Action to check if the email sends correctly.
Step 6: Once it works, turn Automation ON.
Now, your Stackby table will automatically send emails via Outlook whenever the trigger conditions are met.