To create a custom form:
Navigate to any table within your stack.
Click on “Views” on the left side panel.
Select “Form” or click “+” under “Create view” and choose Form.
Display Elements
The Display Elements section lets you enrich your form visually and contextually. Here are the key components available:
➖ Divider
Use this to separate sections in your form.
Helps organize the form into logical parts, improving readability and user experience.
🖼 Image
You can add an image anywhere in the form.
Useful for branding, visual instructions, or decoration (e.g., company logo, banners).
🎥 Video
Embed a video to provide visual instructions, tutorials, or promotional content.
Great for onboarding or showcasing product demos directly in the form.
These elements are non-interactive, meaning they don’t collect data but enhance the form presentation.
A new element has been introduced called ‘Divider’; an element that can be used in forms to visually separate sections without relying on workaround methods.
Check this guide on how to create powerful forms in Stackby
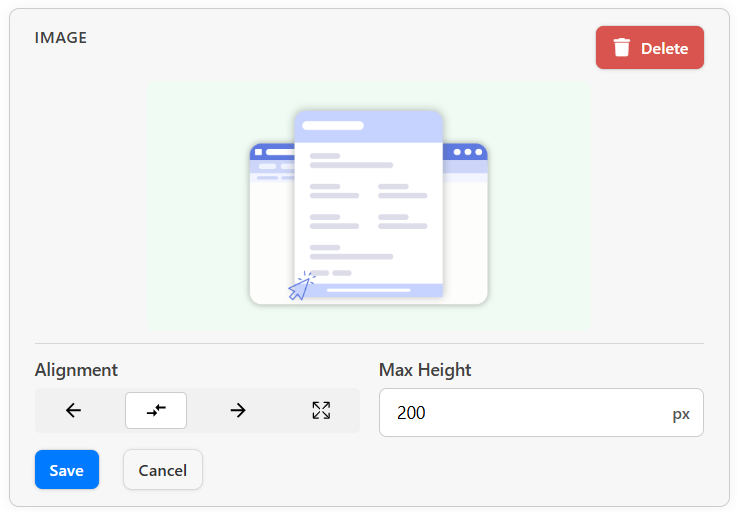
It's used for visual placeholder for your form —such as logos, banners,QR codes, instructions, or branding in your form.
🔧 Editable Settings
1. Alignment: This controls the horizontal placement of the image within the form:
← Left-aligned: Image will appear on the left side.
⇔ Centered: Image will be centered in the form.
→ Right-aligned: Image will align to the right.
⛶ Full Width: The image will stretch to the full width of the form.
2. Max Height
Allows you to restrict the image's vertical size.
Example: 200 px will limit the image height to 200 pixels, maintaining its aspect ratio.
Useful for keeping the form compact or ensuring the image doesn’t dominate the layout.
🔘 Action Buttons
Save: Applies and saves your image display settings.
Cancel: Discards changes.
Delete: Removes the image from the form.
Embed a video to provide visual instructions, tutorials, or promotional content.
Great for onboarding or showcasing product demos directly in the form.

Video URL Field
You can paste any valid YouTube video link here.
Example: https://youtu.be/vmNQgvxj4Vk?si=os...
Stackby automatically loads the video preview when a valid link is entered.
Only YouTube links are supported at this time.
Max Height
Controls the vertical size of the embedded video in pixels.
Actions Available
Save: Applies and saves the video settings to the form.
Cancel: Discards any changes made.
Delete: Removes the video element from the form.