As we discussed in the Overview of Tables article,
Stackby columns are essentially specific 'field types' that allows you to store rich data on each of your rows.
You can customize each of these columns, your way, per your needs & workflow.
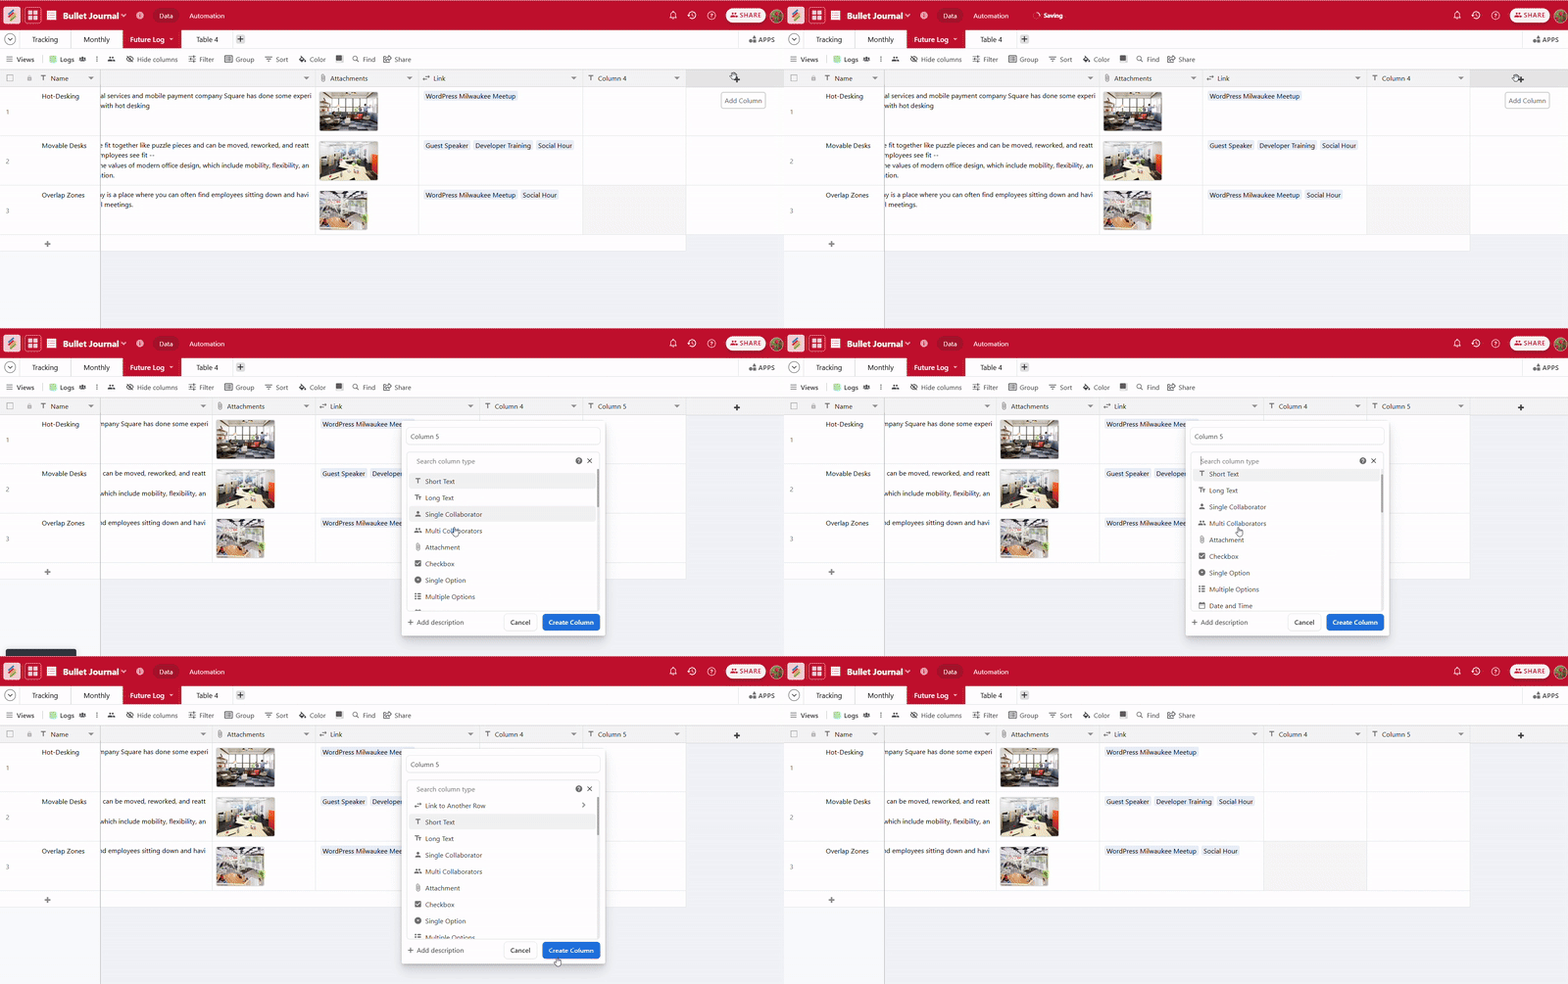
You can add a field by clicking on the '+ button' on the right side of your last added column. This should automatically open the column properties panel on the right.
Protip: If you ever need to change the column properties again - you can click on the column menu to open a dropdown and select 'Change Column Property'. Alternatively, you can double click the column header to open the same panel.
You can then choose between different field types by clicking on the 'Single line text' that will open a dropdown menu comprising of different column types we currently support.

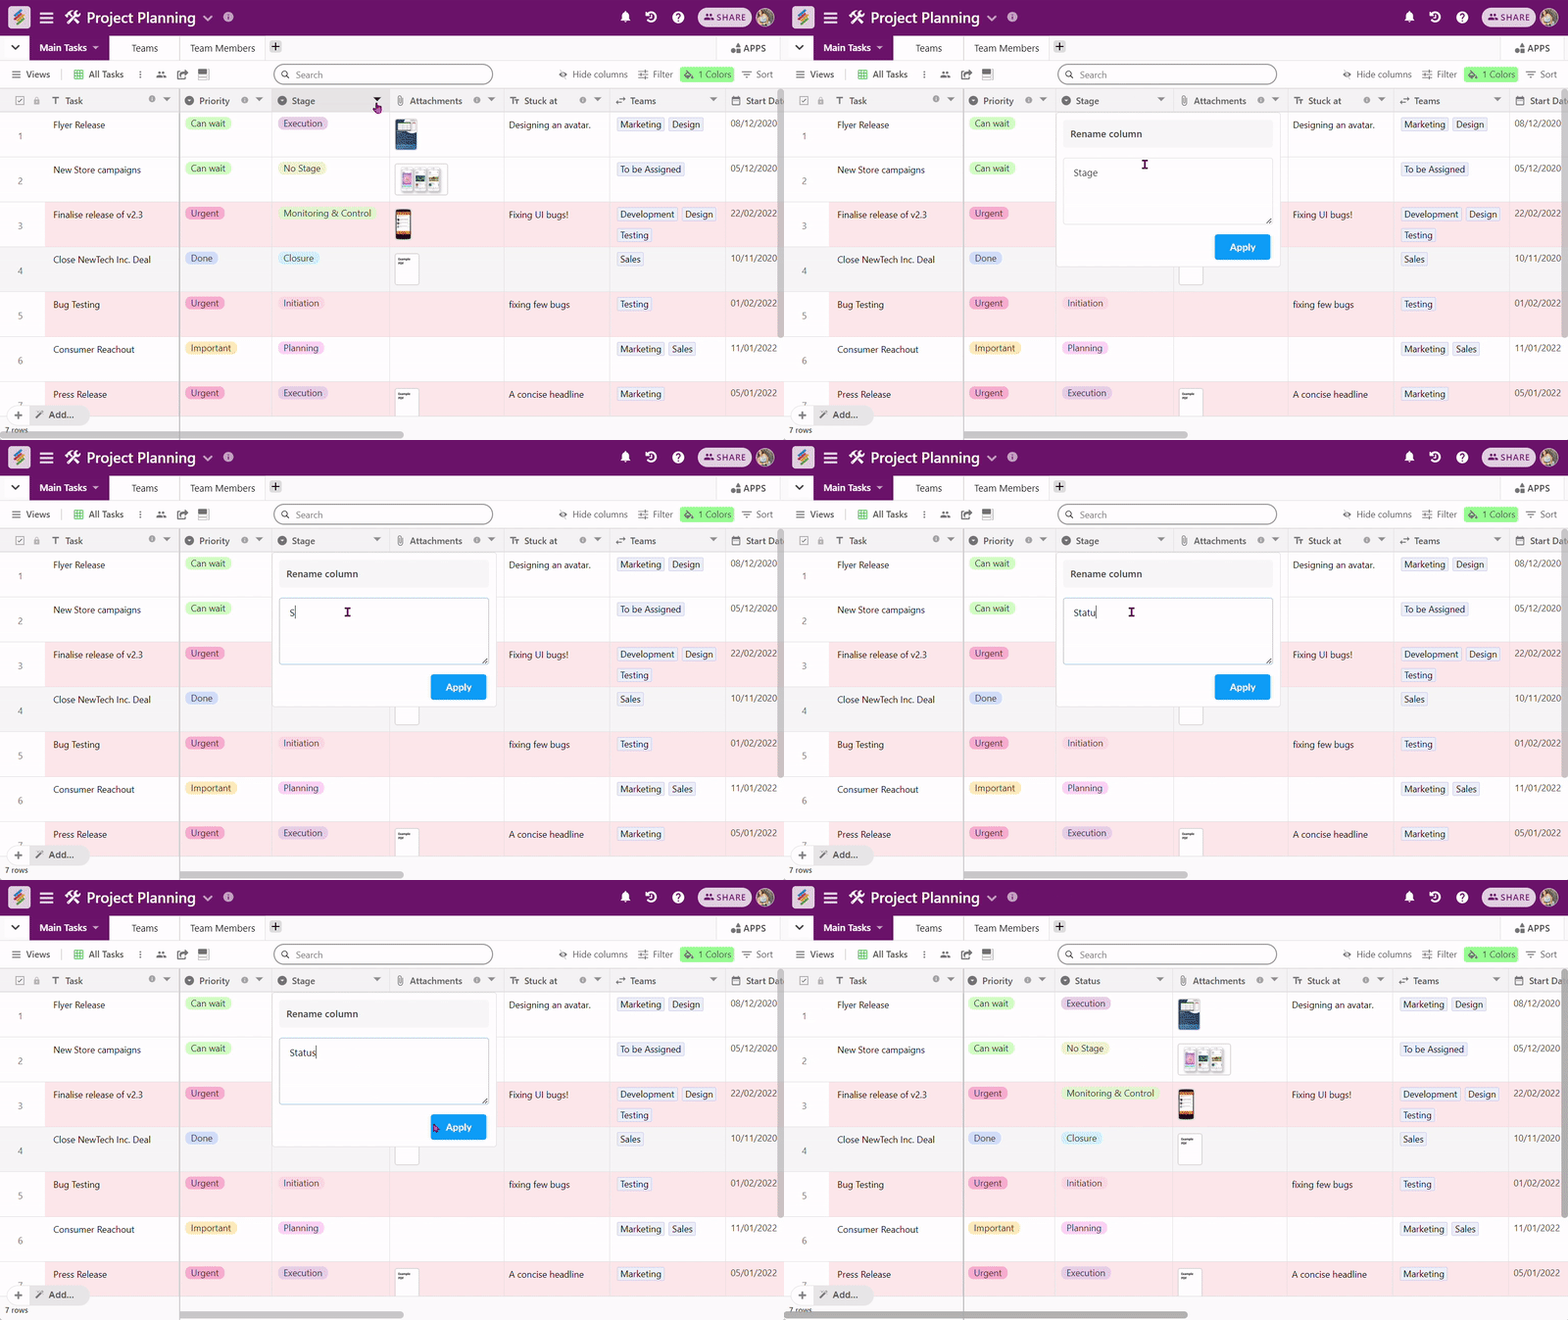
You can rename the column by clicking 'Rename column' in the dropdown menu. It will open a model for you to rename that field to your liking.

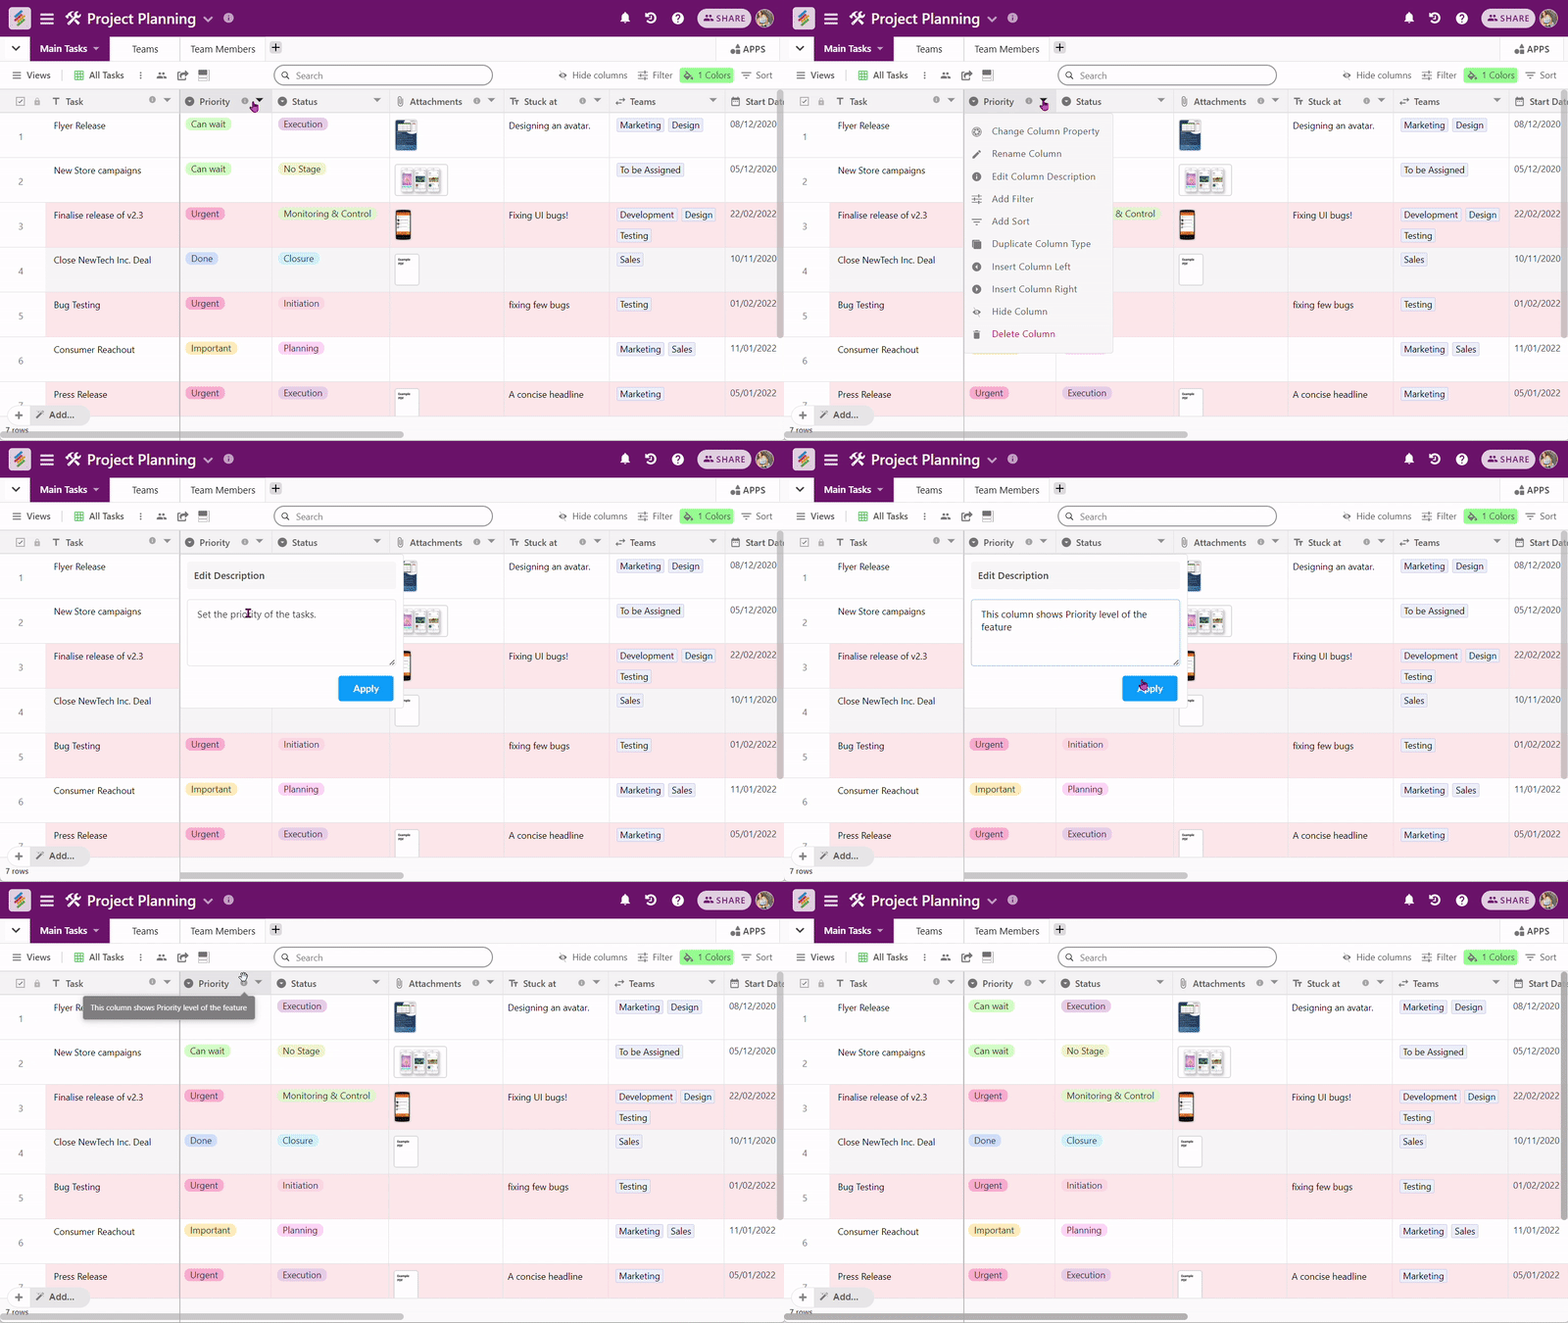
You can also add description to your columns by clicking on 'Edit column description' in the dropdown columns menu and adding any text to describe that column.
As soon as you add a column description, a small 'info' icon will show up on your right side of your column bar and if you hover on it will show the column description you just added.
