Row Locking is a feature that allows users to restrict editing of individual rows in a table. Once a row is locked, users who do not have the required permissions cannot modify the information stored in that row.
It helps maintain data accuracy, prevent accidental changes, and protect important records.
User role | Lock row | Unlock row | Edit locked row |
|---|---|---|---|
Owner / Creator | Yes | Yes | Yes |
Editor | No | No | No |
Commenter | No | No | No |
Read Only | No | No | No |
When a row is locked in Stackby, the following behavior is expected:
Editing restriction: Users without the required permissions cannot modify the cells in the locked row.
Data protection: Existing information remains protected from accidental changes.
Row visibility: The locked row remains visible to users who have access to the table.
Lock indicator: A lock icon should appear alongside the row to indicate that it is locked.
Unlocking: An authorized user can unlock the row to allow editing again.
Collaboration: Other team members can continue viewing the record without modifying its protected information.
Follow these steps to lock a row:
Open your Stackby stack.
Navigate to the table where you want to lock a row.
Locate the row you want to protect.
Click the row with right-click the row.
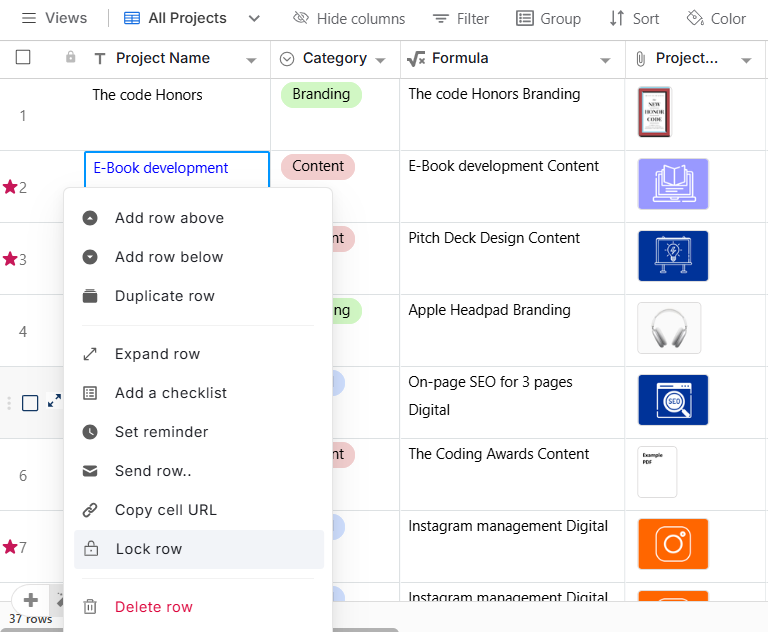
Select the Lock Row option.
The selected row will be locked, and a lock indicator will appear next to it.
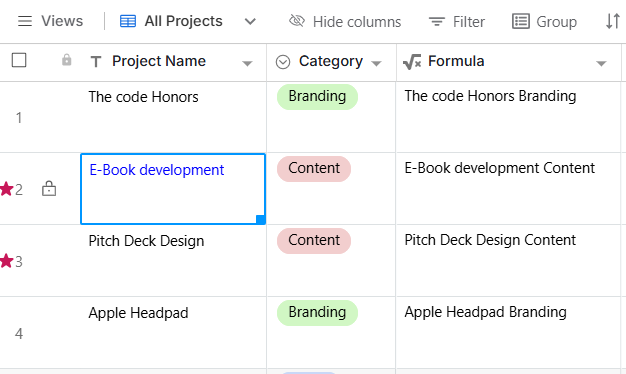
If you need to make changes to a locked row, an authorized user can unlock it.
Follow these steps:
Open the table containing the locked row.
Locate the row displaying the lock icon.
Click the row options menu or right-click the row.
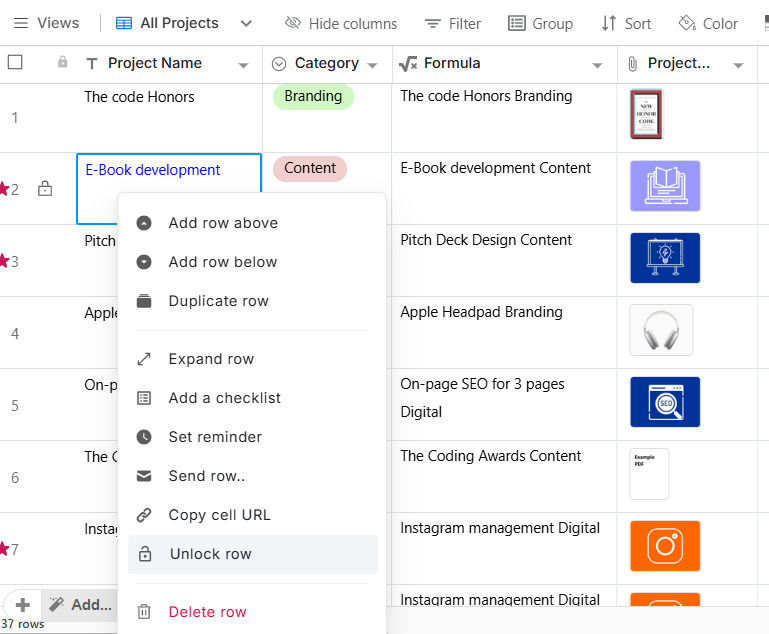
Select Unlock Row.
Once unlocked, the row becomes editable again for users with editing permissions.
Does locking a row delete or hide its data?
No. Locking does not delete or hide the record. It protects the information from unauthorized modifications.
Can I lock multiple rows?
Row locking can be applied to individual records.