Interfaces is Stackby's no-code App Builder that lets you transform your raw database tables into polished, purpose-built applications — without writing a single line of code. Whether you're building an internal dashboard for your team, a client-facing portal, or a simple data entry form, Interfaces gives you the tools to create exactly what you need on top of your existing Stackby data.
An Interface is a visual application layer that sits on top of one or more of your Stackby Stacks. While your Stacks hold the raw data (rows, columns, fields), an Interface presents that data in a way that is optimized for a specific audience or workflow.
Think of the relationship this way:
Your Stack is the database — the source of truth.
Your Interface is the application that people use to interact with that data.
A single Stack can power multiple Interfaces. For example, a "Projects" Stack could power:
A Dashboard Interface for your leadership team to track KPIs and completion rates
A Form Interface for team members to submit new project requests
A Record Review Interface for project managers to triage tasks one by one
A Portal Interface for external clients to view only their project status
Interfaces vs. Views
Views (Grid, Kanban, Calendar, Gallery) are different ways to look at your data within a Stack. Interfaces are separate experiences built on top of your Stacks. Views are for your team working in the database; Interfaces are for presenting that data to any audience, internal or external, without exposing the full database.
Interfaces and Pages
An Interface can contain one or more Pages. Each Page uses a Layout — a pre-designed framework that determines how data is presented on that page. A single Interface might have:
An Overview page as a home/landing page
A Dashboard page for metrics and charts
A Form page for data entry
A Record Review page for triage workflows
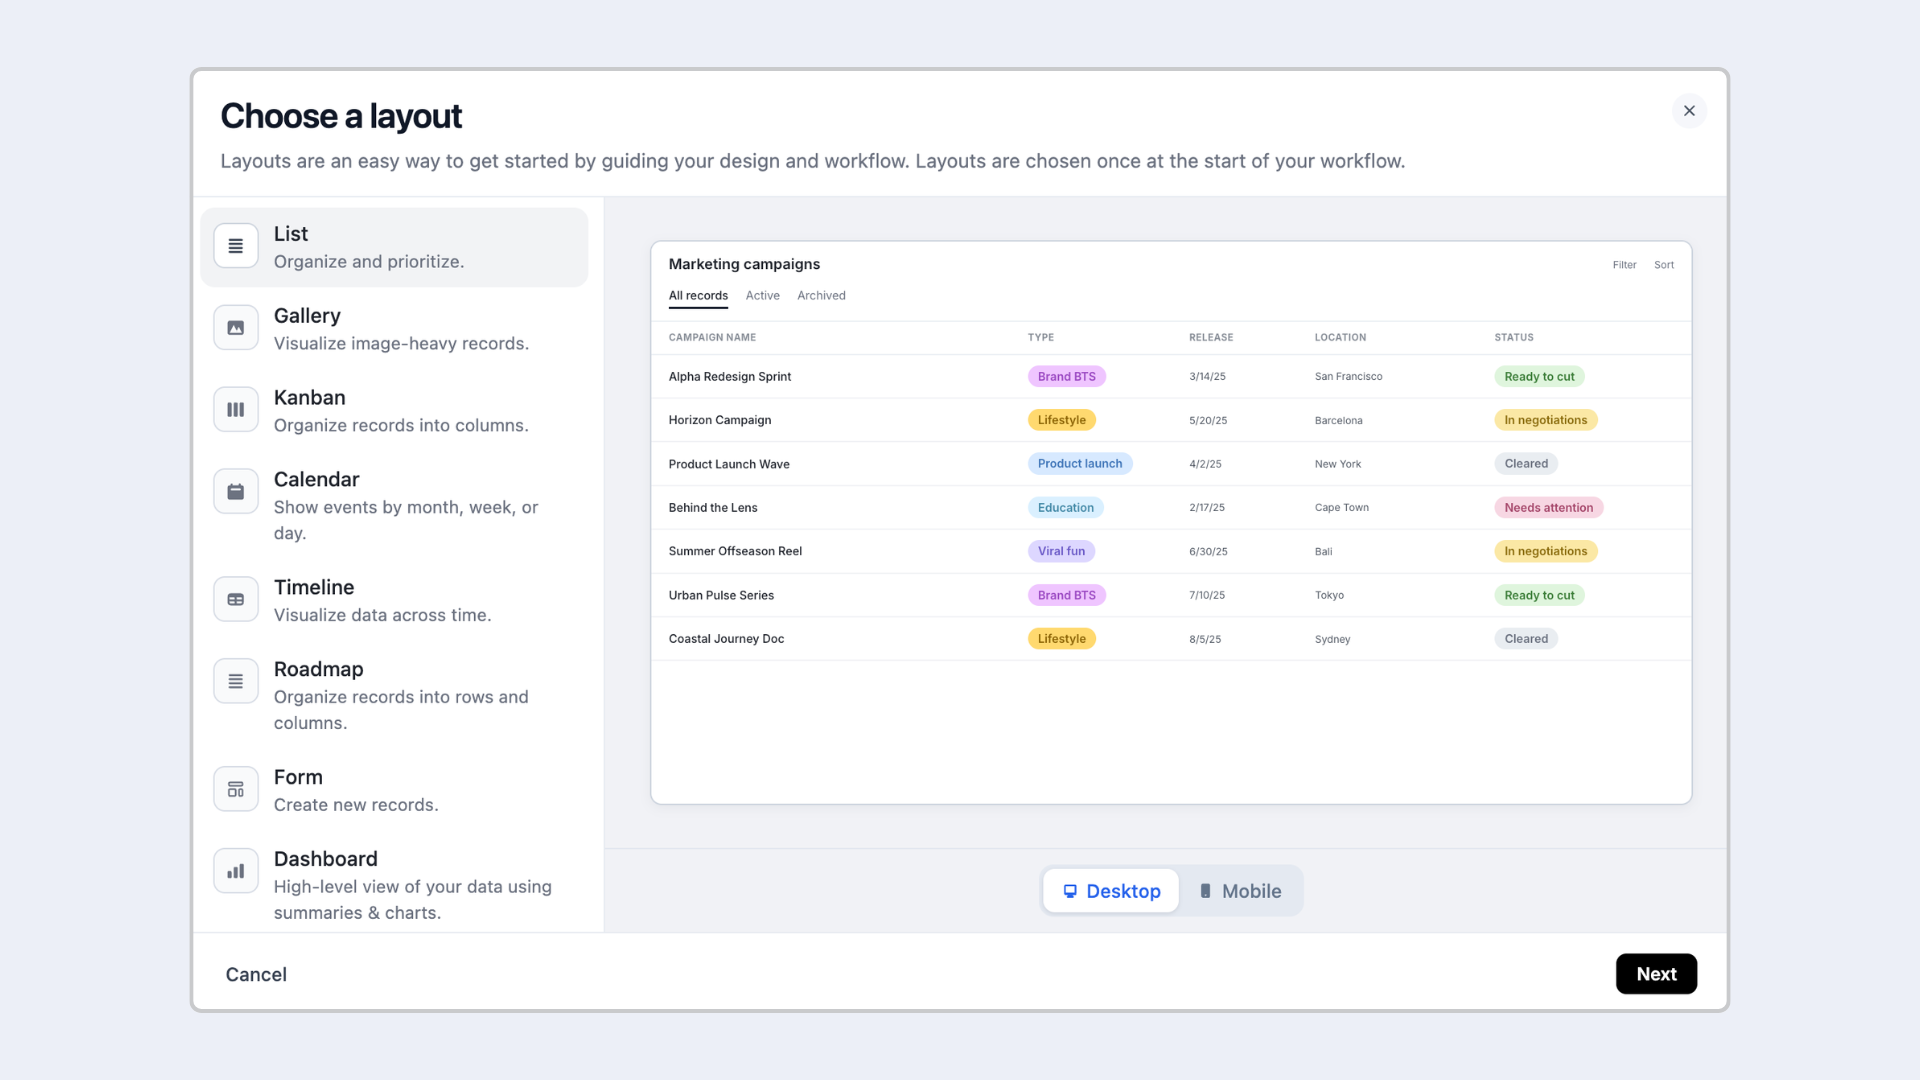
A Layout is the structural template for an Interface page. Choosing the right layout is the first step when adding a new page. Stackby offers the following layouts:
Step 1: Open Interfaces
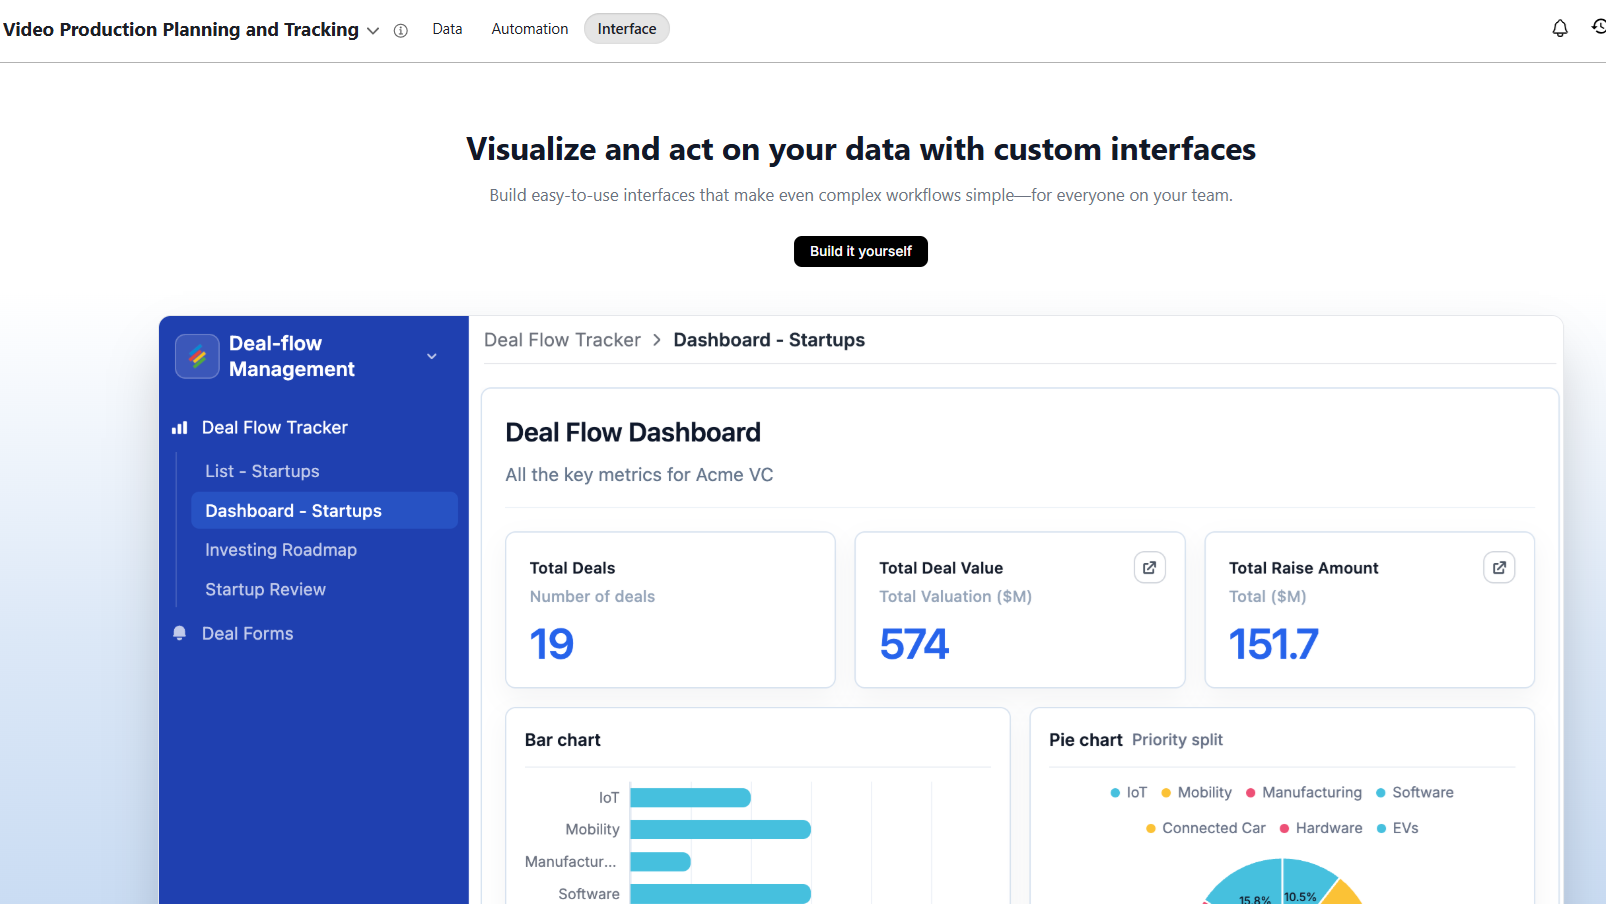
From any Stack, click the Interfaces tab in the top navigation bar. If this is your first time, you'll see a welcome screen. Click Build it yourself Interface to begin.
Step 2: Name your Interface
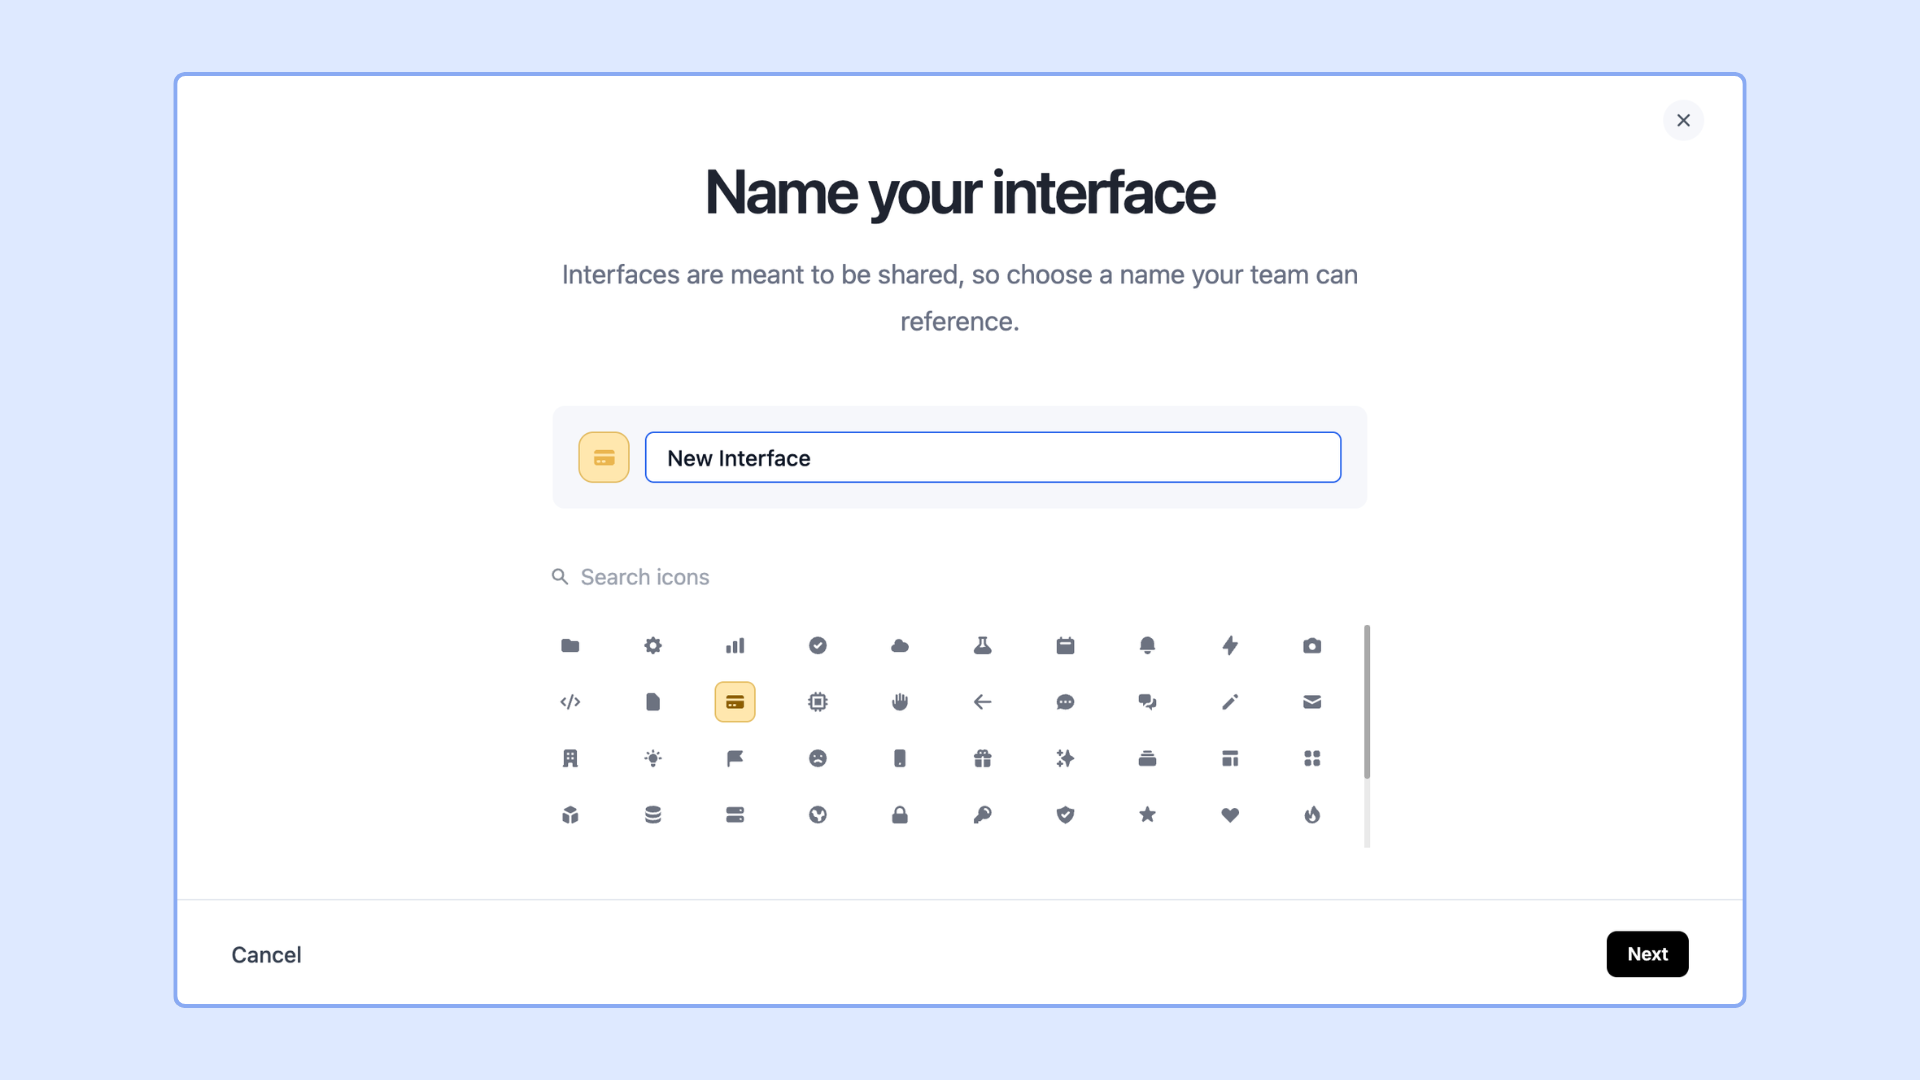
Give your Interface a descriptive name and choose an icon. The name is visible to anyone you share it with, so choose something that communicates the purpose clearly. Examples:
"Marketing Dashboard" — for the marketing team's KPI view
"Client Project Portal" — for an external client-facing app
"Support Ticket Inbox" — for a triage workflow
Step 3: Add a Page
Every Interface needs at least one Page. Click + Add Page in the left panel. You'll be shown the Layout Picker — choose the layout that matches what you want to build on that page.
💡 Tip: Each page is connected to exactly one Stack (table) from your workspace. You choose the source Stack when setting up the page. You can add pages connected to different Stacks within the same Interface, letting you build cross-data apps.
Step 4: Configure the Page
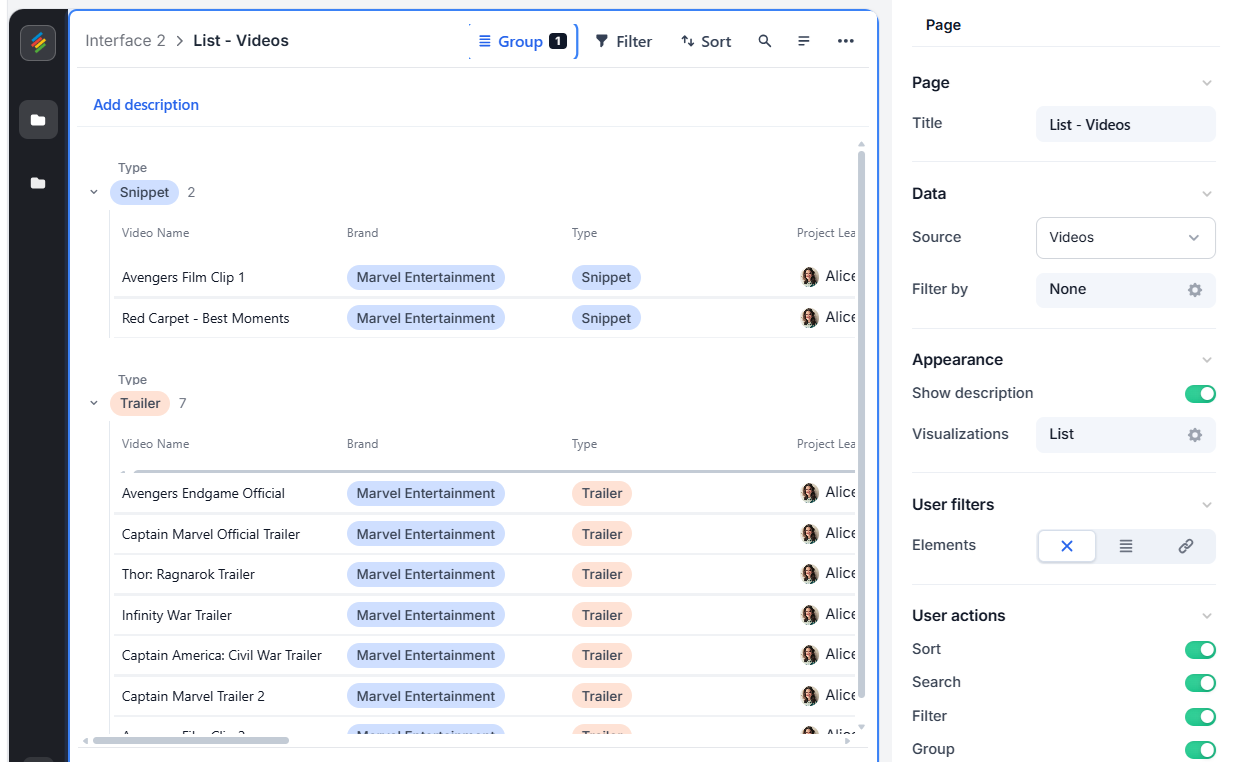
After choosing a layout, configure it using the settings panel on the right side of the editor. What you configure depends on the layout type — each layout's configuration options are covered in detail in the dedicated articles below.
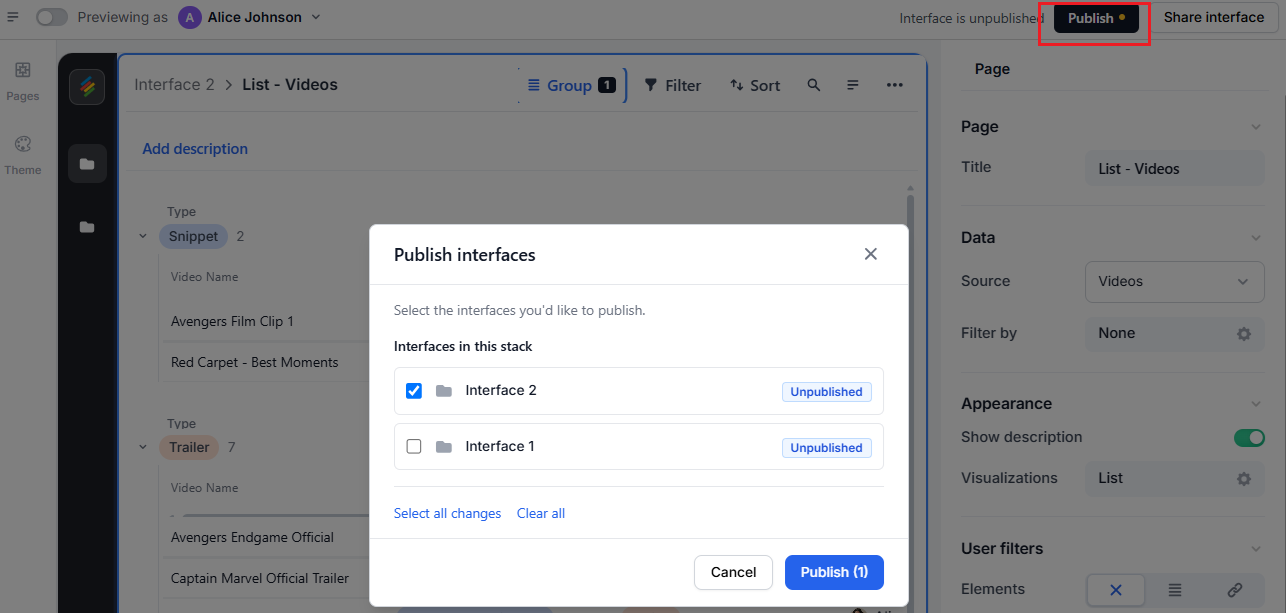
Step 5: Publish
When you're ready for others to see the Interface, click the black Publish button in the top right corner of the editor. Unpublished changes are visible only to you in Edit mode — end users always see the last published version.
Important: Always publish after making changes. Edits in the Interface editor are not visible to collaborators or viewers until you click Publish.
Sharing with Workspace Members
By default, all members of your Stackby workspace who have access to the underlying Stack can see the Interface. You can further restrict access by setting Interface-specific permissions from the Share menu in the Interface editor.
Sharing via Link
Generate a shareable link from the Share button. Recipients can view the Interface in their browser without needing to log in to Stackby (for publicly shared interfaces) or after logging in with their Stackby account (for restricted interfaces).
Interface-Only Access
You can invite collaborators to an Interface without giving them access to the underlying Stack. Interface-only collaborators can interact with the Interface (view data, submit forms, add records) without seeing the raw database. This is ideal for:
External clients or stakeholders
Team members who only need a simplified workflow view
Portal end users
Interface-only collaborators who can view and interact with an Interface but cannot access the underlying Stack do not consume seats on most Stackby plans. Consult the Stackby Pricing page at stackby.com/pricing for the latest billing details.
Interface permissions control what collaborators can see and do. There are three levels:
Viewer — Can see the Interface and all published data. Cannot edit records.
Editor — Can view and edit records, submit forms, and interact with the Interface. Cannot change the Interface design.
Builder (Creator/Owner) — Full access to design, configure, and publish the Interface.
Field-level permissions can also be configured per layout: individual fields can be set to View-only or Editable within a specific Interface page, regardless of the user's overall permissions. This gives you fine-grained control over which parts of your data can be updated from an Interface.
Yes. A single Interface can contain multiple pages, each connected to a different Stack. However, each individual page is connected to only one Stack at a time.
Yes. From the Interface list, hover over any Interface and click the ··· menu, then select Duplicate. The duplicated Interface will include all pages and configurations.
Some changes can affect your Interface. Deleting a column that is used in an Interface page will remove it from that page. Renaming a column is safe — the Interface will automatically reflect the new name. We recommend reviewing your Interfaces after major structural changes to a Stack.
Interfaces are accessible on mobile browsers. The layout adapts to smaller screens. For the best experience when building Interfaces, we recommend using a desktop browser.