This article will walk you through the essential tools for managing columns and rows in your Stackby database.
You can see and modify each column's properties:
Column Name: The title of your column (e.g., "Task Id", "Task Name", "Assigned To"). You can edit this directly in the "Column Name" field.
Column Type: This defines the kind of data the column can hold.
Examples
# number: For numerical data.
T text: For a single line of text.
+1 autoNumber: Automatically assigns a unique number to each new row.
link: Links to another record.
lookup: Pulls data from a linked record.
select: A dropdown list for pre-defined options.
date: For dates and times.
Description: A field to add a short note about the purpose of the column. This helps other team members understand its use.
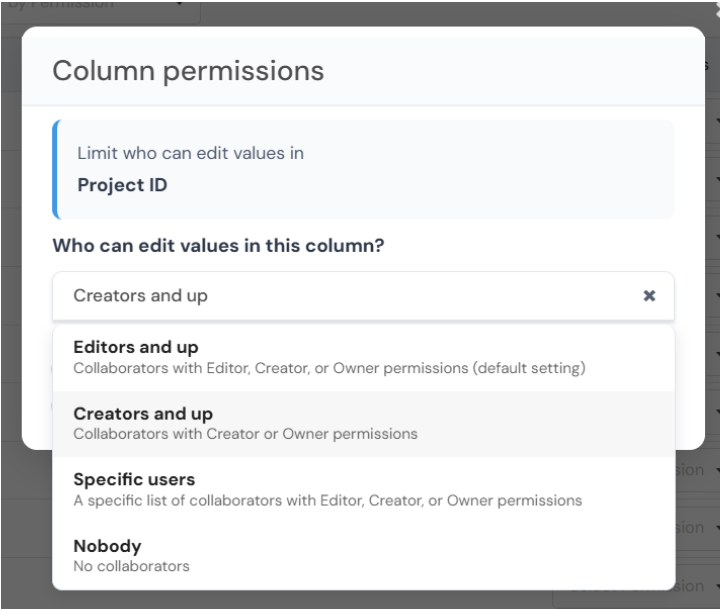
Column Permissions: This is a critical setting for collaboration. You can set permissions to control who can view and edit the data in this specific column.
From the "Fields" view, click the + Add new column button located in the top-right corner.
A new, empty row will appear at the bottom of the list.
Enter the Column Name and select the Column Type from the dropdown menu.
Optionally, add a Description and set the Column Permissions.
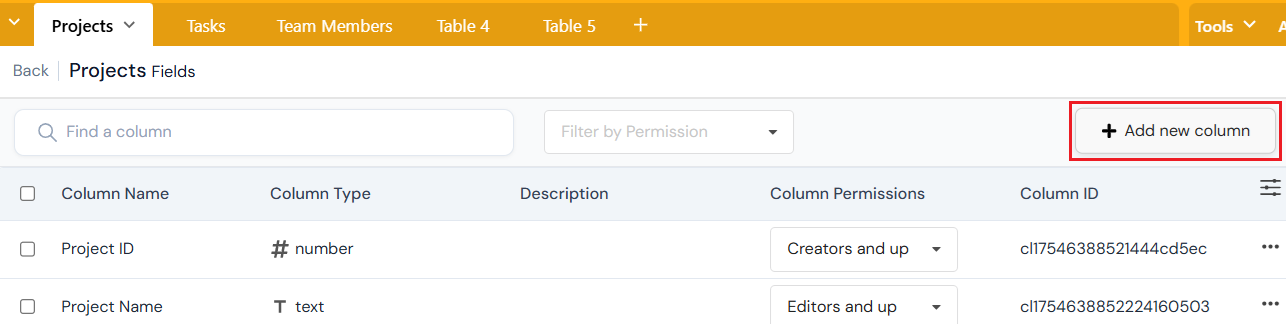
Edit Name, Type, or Description: From the "Fields" view, you can directly click on the Column Name, Column Type, or Description field of any column to edit it.
Edit Permissions: Click the Select Permission dropdown in the "Column Permissions" column for the row you want to edit. A menu will appear with options to change who can view and edit the column.
Deleting a Single Column: To delete a column, click the three-dot menu icon (...) on the far right of the column's row. From the dropdown menu that appears, select the option to delete the column. A confirmation message will pop up to prevent accidental data loss.
Deleting Multiple Columns: Navigate to the Fields view of your stack. Click on the checkbox on the left side of the column name. Click the blue All Delete button in the top-right corner.
While the image shows a "Filter by Permission" dropdown, this specifically filters the list of columns you are viewing. To filter the actual data in your stack (e.g., to only show tasks assigned to a specific person), you would go to the main data view (the "Tasks" tab). In that view, there is a separate Filter button in the top toolbar that allows you to set criteria based on column values.
To update the permission type for a column, go to the "Fields" view, find the column you wish to change, and click on the current permission setting under the Column Permissions column. A menu will appear, allowing you to select a new permission level for that specific column.