Step 1: Create a Webhook in Stackby
Open your Stackby workspace and go to the table where you want data to appear.
Click the ⚡ Automation icon (top-right).
Click “Create New Automation”.
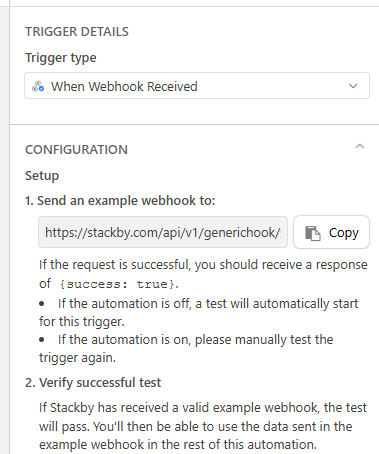
Choose “ When Webhook received” as Trigger.
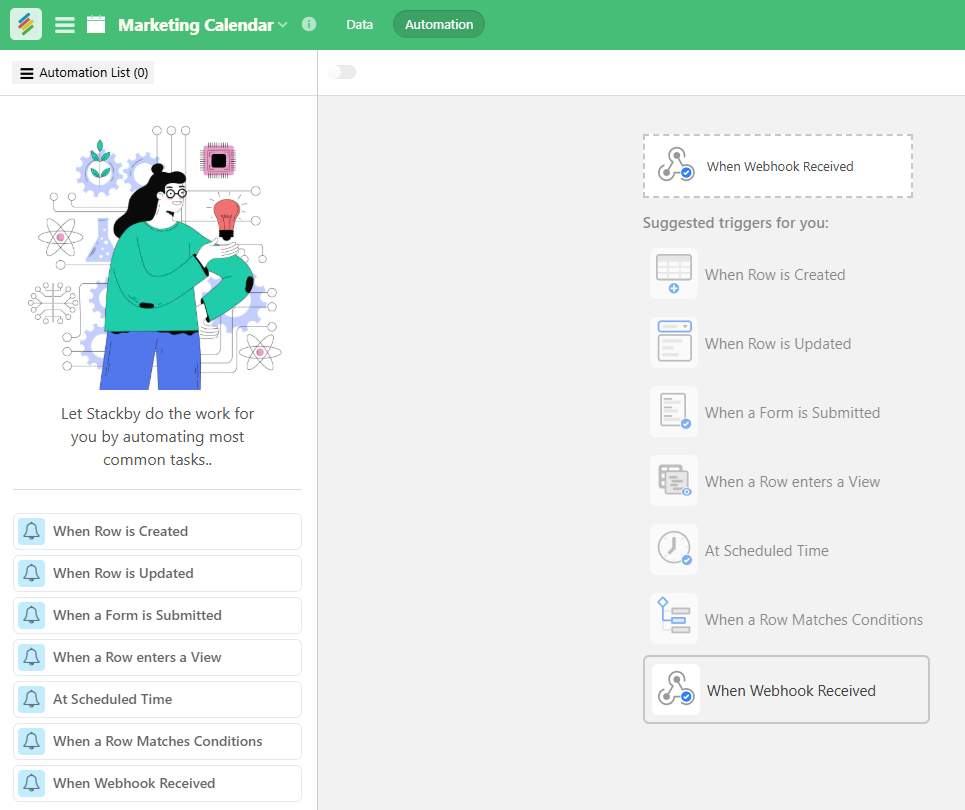
Click “Generate Webhook URL” and copy the URL. (This is where Google Sheets will send the data.)
Step 2: Prepare Google Sheets
Open your Google Sheet with the data.
Make sure the first row contains column headers (e.g., Name, Email, Message).
Every new row of data will be sent to Stackby when a script runs.
Step 3: Add the Google Apps Script
In your Google Sheet, click on Extensions > Apps Script.
Delete any existing code and paste the following:
function sendToStackby() {
const url = "YOUR_STACKBY_WEBHOOK_URL"; // Replace with your webhook URL
const sheet = SpreadsheetApp.getActiveSpreadsheet().getActiveSheet();
const lastRow = sheet.getLastRow();
const rowData = sheet.getRange(lastRow, 1, 1, sheet.getLastColumn()).getValues()[0];
const payload = {
"Name": rowData[0], // Update keys to match Stackby column names
"Email": rowData[1],
"Message": rowData[2]
};
const options = {
method: "POST",
contentType: "application/json",
payload: JSON.stringify(payload)
};
UrlFetchApp.fetch(url, options);
}
Replace "YOUR_STACKBY_WEBHOOK_URL" with the URL you copied from Stackby.
Update "Name", "Email", etc., to match your Stackby column names.
Click Save (name the project SendToStackby or anything you like).
Step 4: Set Up an Auto Trigger
To run this script every time a new row is added:
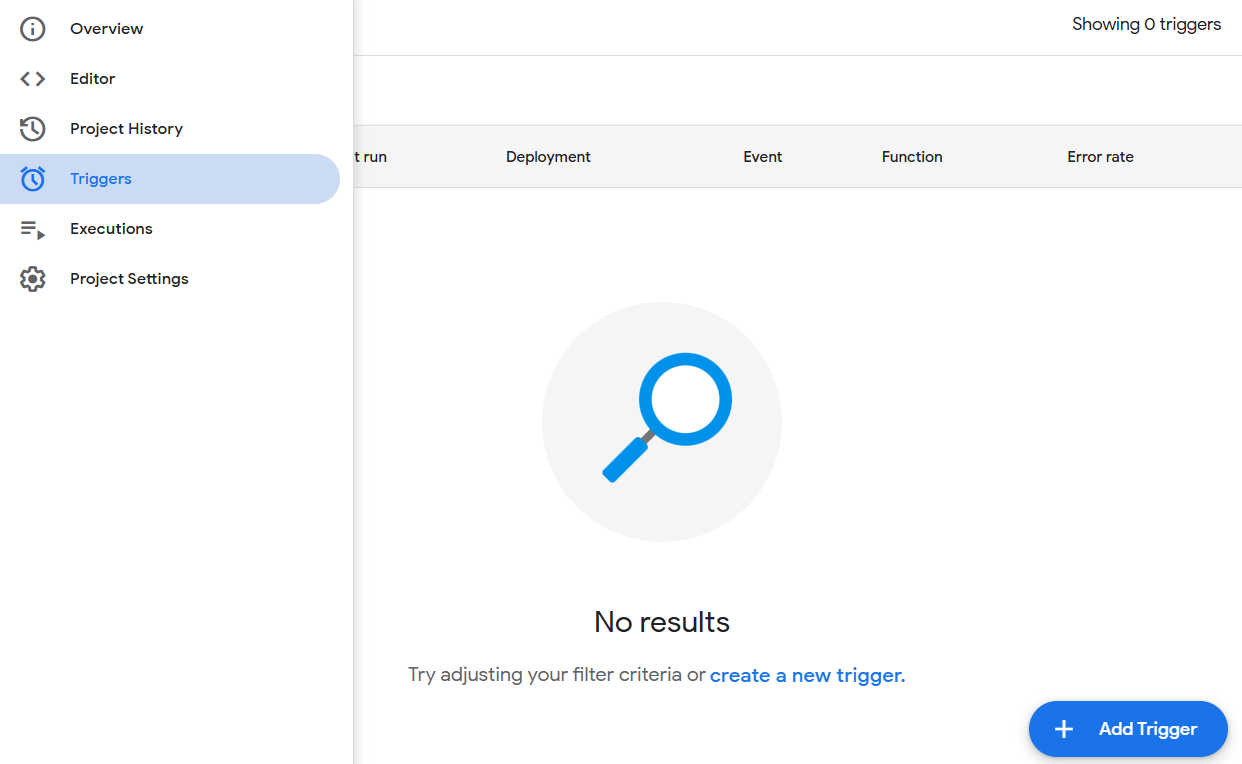
In the Apps Script window, click the ⏰ Triggers icon on the left panel.
Click + Add Trigger.
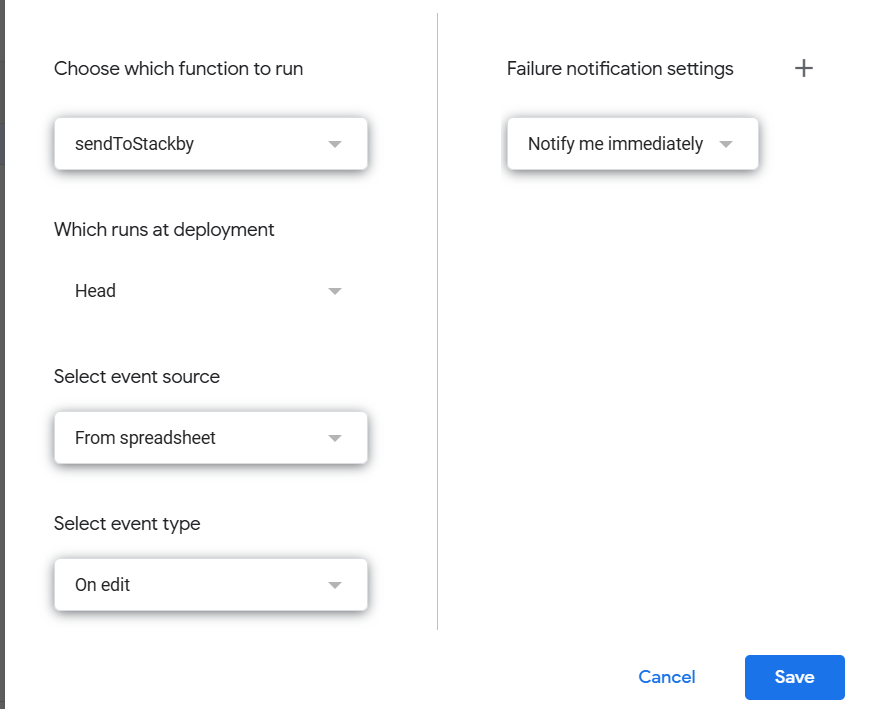
Set it up like this:
Function to run: sendToStackby
Event source: From spreadsheet
Event type: On edit or On form submit
Click Save, and authorize the script if asked.
Step 5: Test the Automation
Add a new row of data in Google Sheets.
Open your Stackby table.
You should see the new row appear automatically 🎉.