Creating a one-way sync in Stackby allows you to keep your data updated from one primary source table to a destination table without the data flowing back.
This ensures that your destination table always has the latest information from the source while maintaining control over the data flow direction.
Workspace Plan | Sync Source Per Stack | Sync Tables Per Stack | Automatic syncing |
Enterprise | 20 | 20 | Yes |
Business Plus | 15 | 15 | Yes |
Business | 10 | 10 | Yes |
Economy | 5 | 5 | NA |
Personal | NA | NA | NA |
Owners/Creators - To create or update synced table configurations, you must have creator or owner permissions in the stack/workspace where you are setting up the sync.
Column type Syncing Behavior
Columns types that sync as text - Link, Lookup, Buttons with the Open URL action, Aggregation
Columns types that will sync in the same format - Multiple Collaborators, Attachments, Date, Long text (Rich text), Multiple Options, Number, Short Text, Single option, Single collaborators, Computed formulas
Column Type - Formulas, and other computed column types that produce text, numbers, or dates will sync as their result type.
Columns types that will not sync - Authenticated attachments, API Connectors
Actions that will sync from the source view
Adding a row
Changing a field’s configuration
Changing the view’s filters or hidden columns
Editing a row, cell value
Deleting a record
Adding or deleting columns
Restoring columns
Primary field Customization
While configuring a sync, you'll reach the Advanced drop-down option in the "Select Columns to sync" section. This option enables you to select a specific column to serve as the primary field in Stackby.

Actions that will not sync from the source view
Sort, Grouping, Conditional Colors
Custom column types
Once you have configured and created a synced table, you can customize each column.
To do this, click the drop-down menu next to the column name, select "change column property," and choose the desired column type.
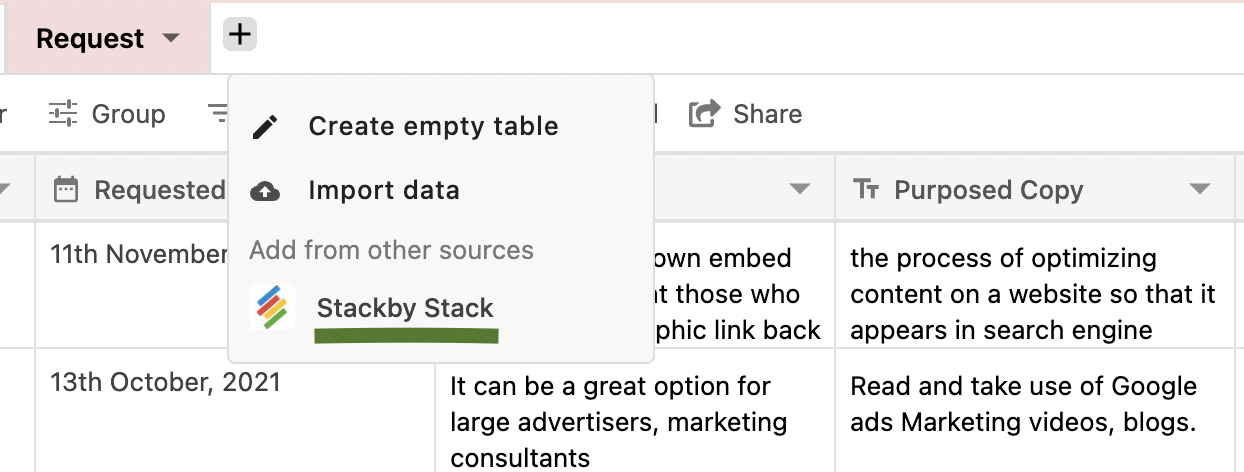
Click on + sign to add a new table then click on Stackby Stack from destination.
In Create synced table module: Select Stack, Table, View and click on Next button or you can enter a shared view link and click Next button. Please note: You need to enable Sync in that particular view you select.
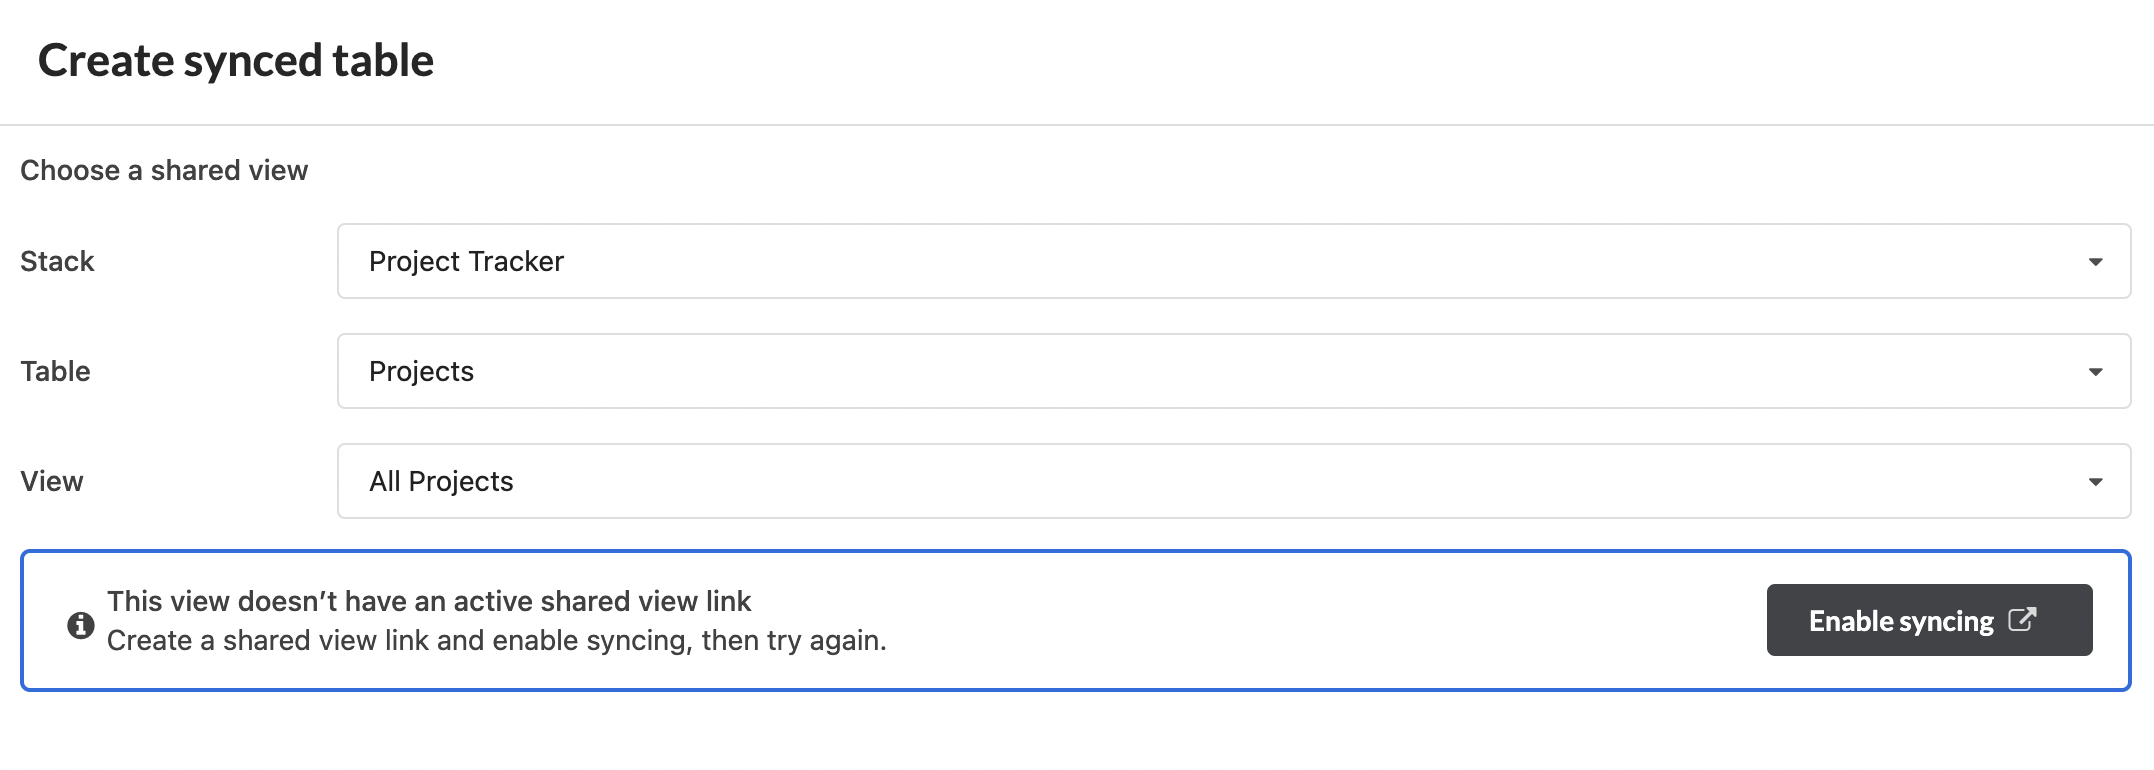
Enable Sync from the source view: Just toggle on and copy the view link and add it to the 'View URL'

From Select columns to sync module you can make such changes:
All columns in the source and columns added in the future: This will affect all the columns.
Specific columns in the source: This will work for the columns which you selected.
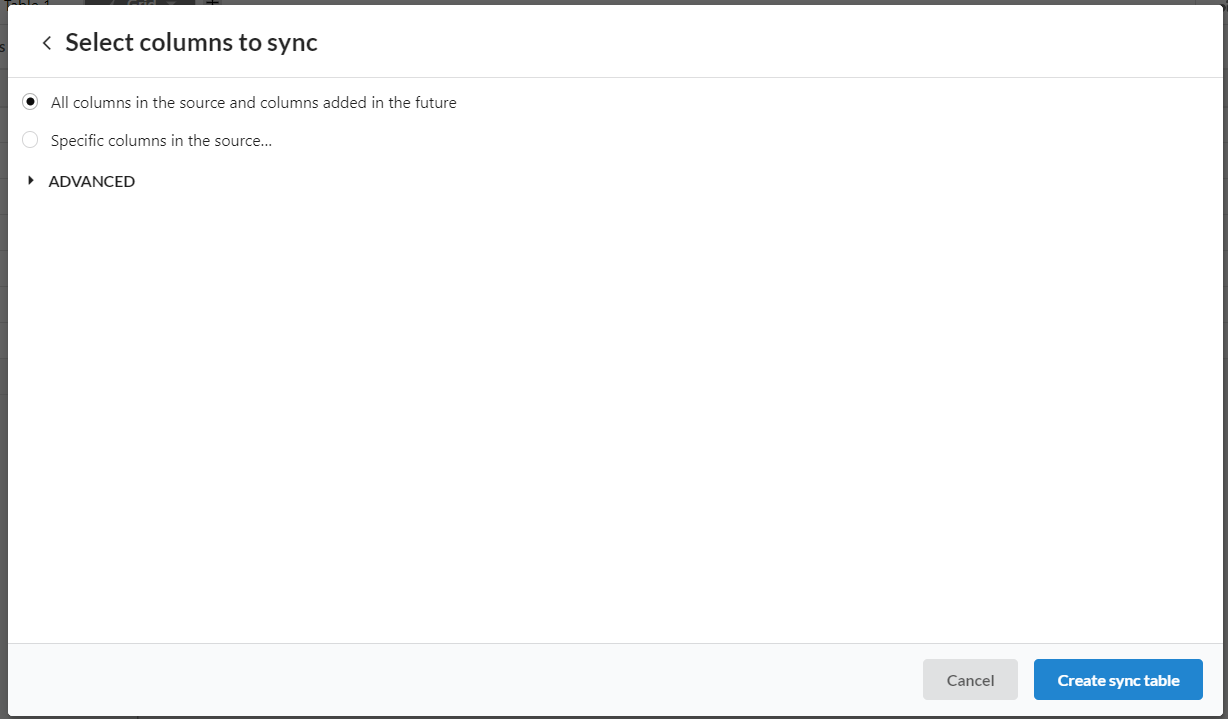
When clicking on ADVANCED drop down, you can select which column you want as the primary column in the destination table.

Click on the “Create sync table” button, sync table will be created. Review your sync settings and ensure everything is configured correctly. Once satisfied, finalize the setup and save the sync configuration. Stackby will begin syncing data according to the specified schedule.
Click on the share icon from the top bar.
Click on sync data to another stack.
Click on sync this view.
You will get the “Use this data” model, where you need to select your workspace and in which stack you want that sync. (Note: Your Workspace should have a business plan). Mark checkbox on “Create a synced table that will be kept up-to-date as this changes.
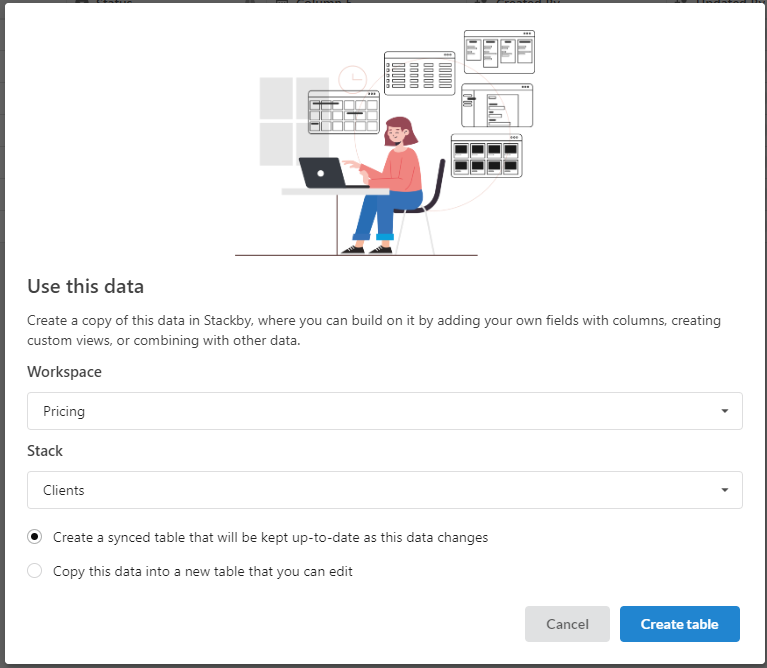
Click on the create table button. You will see that the sync table has been created.
After setting up Sync, it’s essential to manage and monitor its performance to ensure everything runs smoothly:
View Sync Status: In the source table, check the sync status to see the last sync time and any potential issues.
Manual Sync: If needed, trigger a manual sync to update the data immediately.
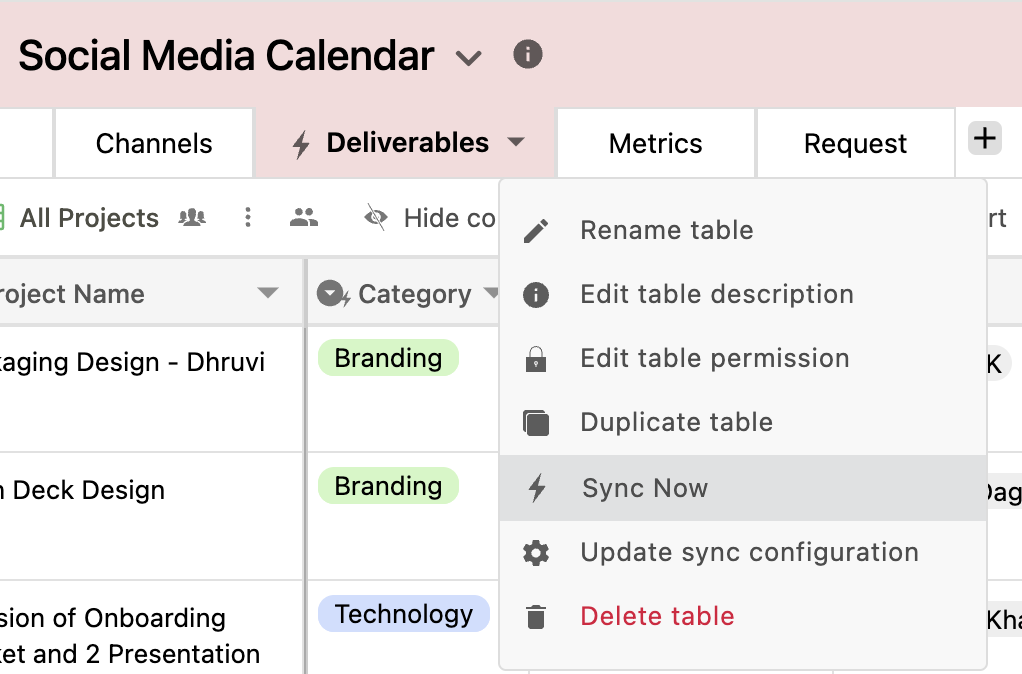
3. Edit Sync Settings: Adjust the sync configuration or frequency as your needs change.
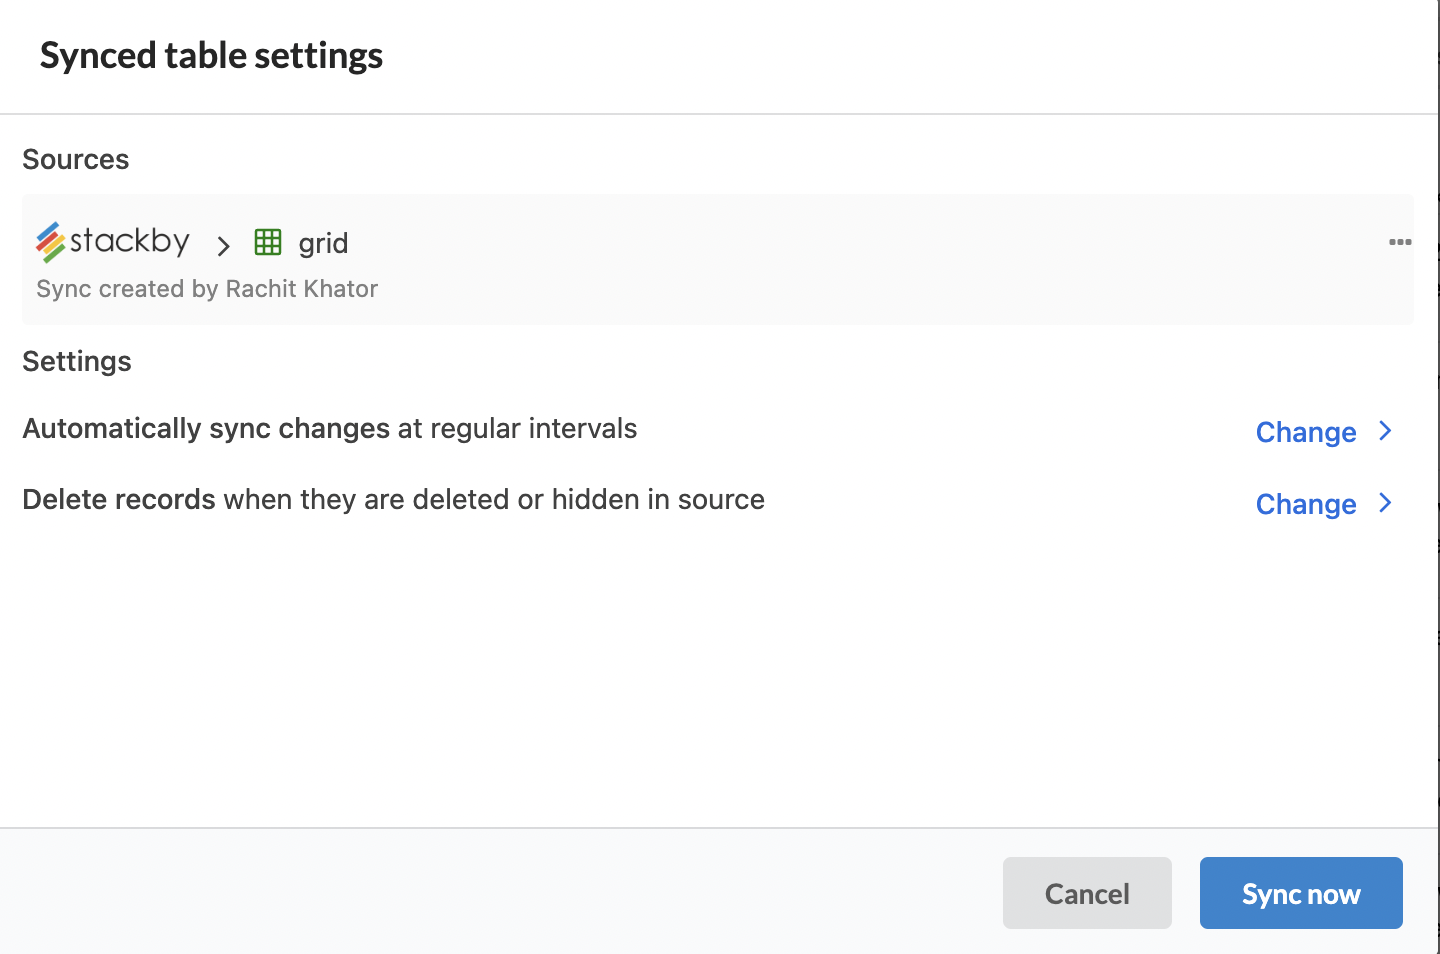
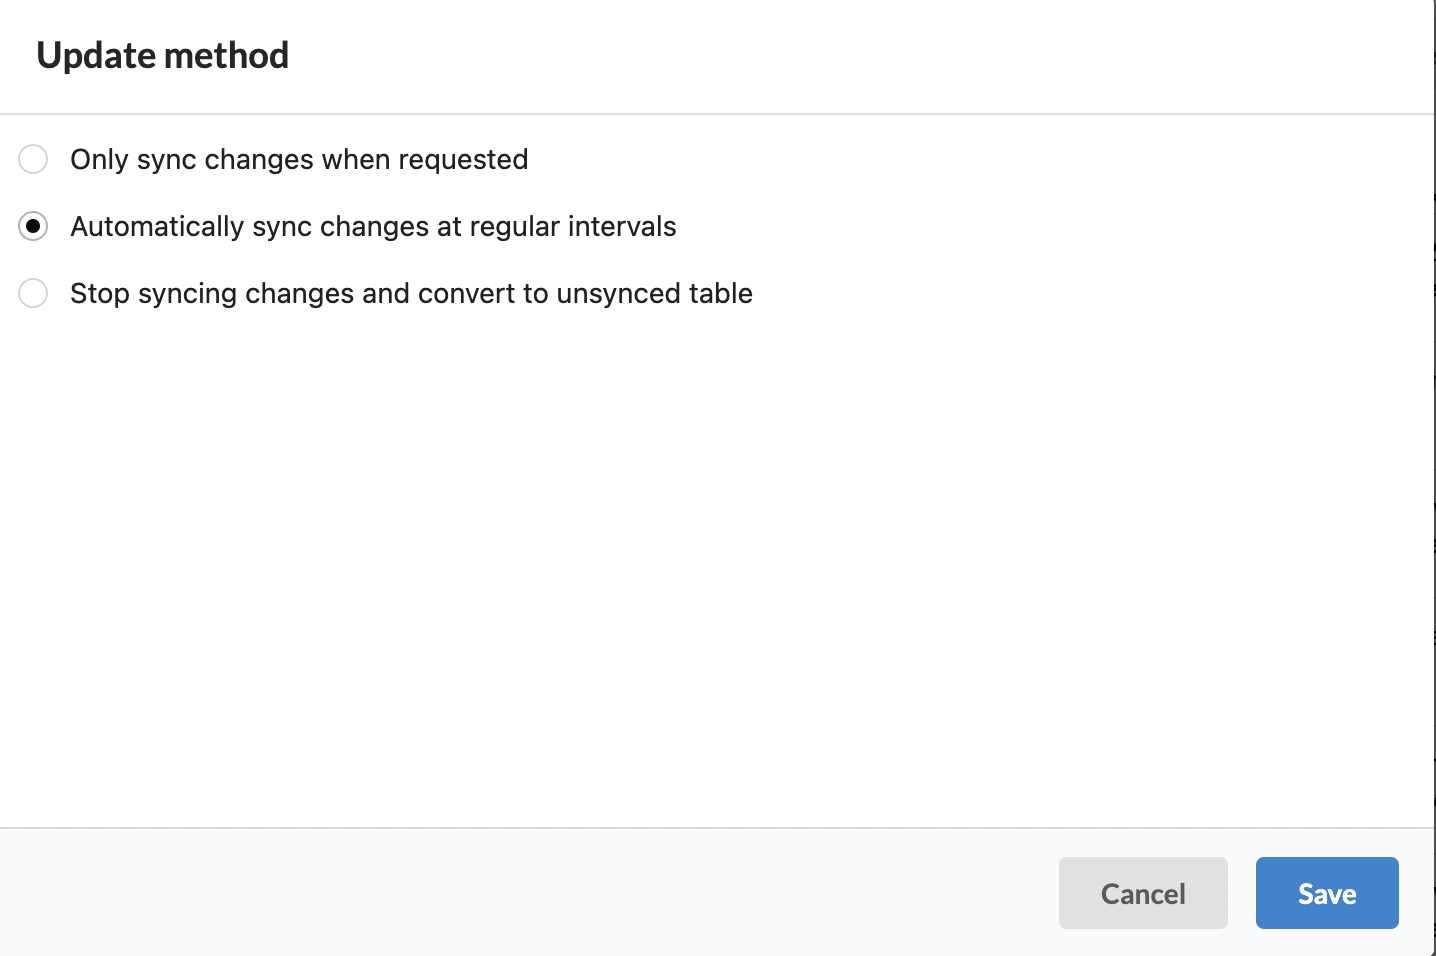
4. You can also change your Sync Update Method
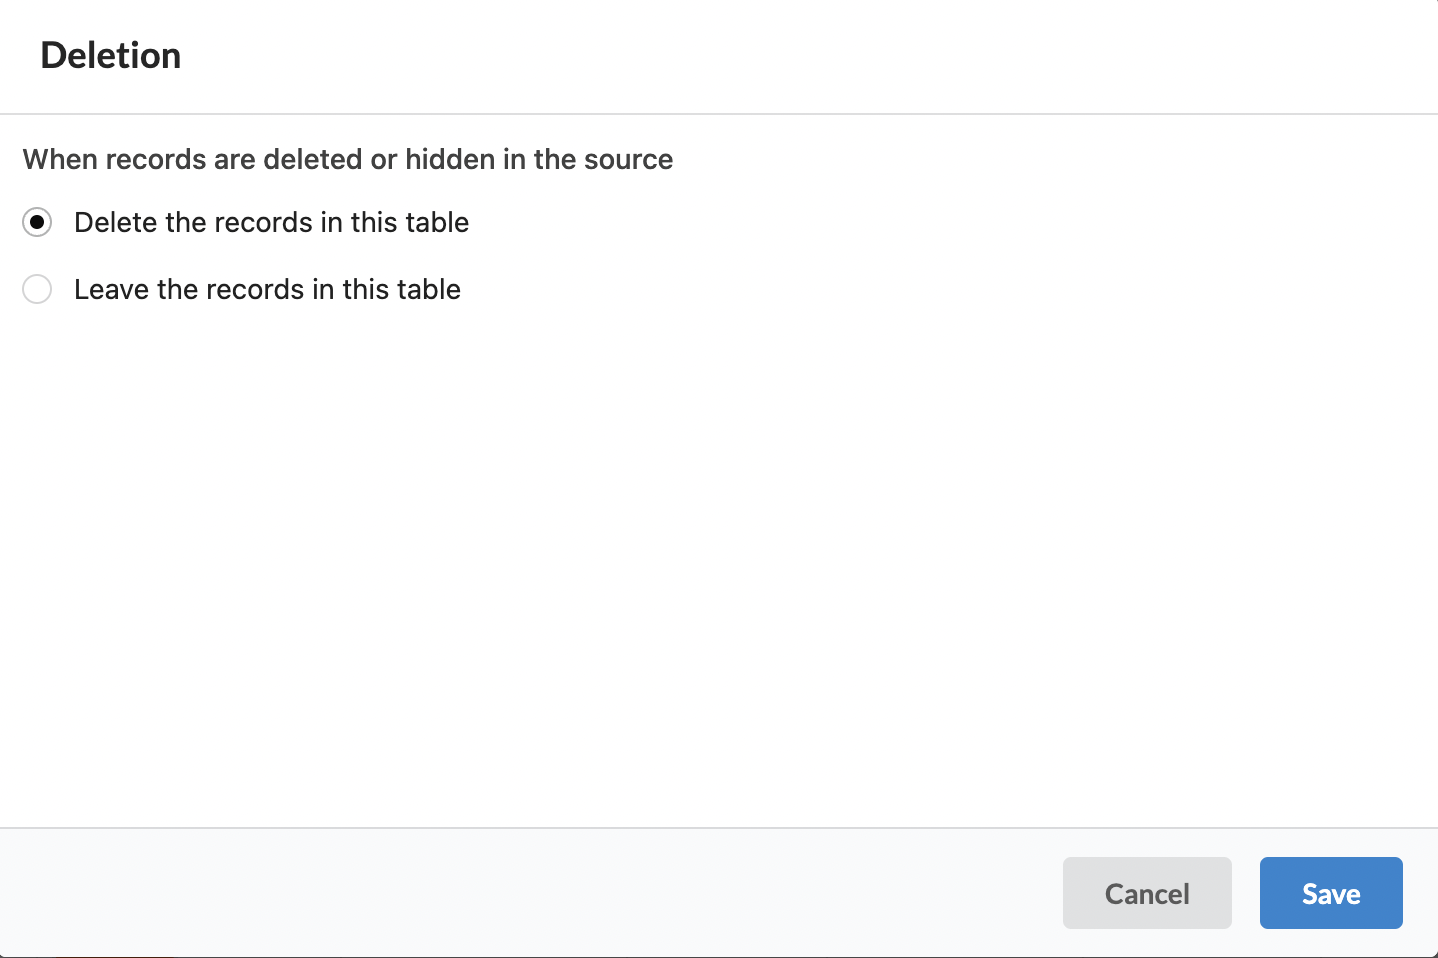
5. Record Deletion: Choose how you'd like to retain your synced records
How often do tables sync?
When you configure a table sync, you can choose to manually or automatically sync changes to your stack.
Automatic syncing happens between stacks in real-time
Automatic syncs will eventually stop on stacks that don't have any recent activity. To keep automatic syncs active make sure that some kind of action (i.e. create a row, update a row, create a new view, etc.) is being performed in the base on a regular basis by automations, humans, or a combination of the two.
Automatic syncing is only available on paid Stackby plans.
2. Will record comments sync over to the destination stack?
No. Only the stack in which the record is located is covered by record comments.
3. What if the view share link is password-protected or email domain-restricted?
We adhere to email domain and password limitations.
4. What happens if the view share link is removed or regenerated at the source?
Until a new authentication is obtained, the sync will halt. A  error icon and the time the table last synchronize will be visible. You'll need a fresh syncable view share link in order to re-authenticate.
5. Why can't I see option to turn on sync from my view?
We currently only offer syncing in grid views.
6. Will the synced table count toward the destination stack's row limits?
Yes. For example, if you sync a view with 500 rows from a source stack (where the rows come from), the destination stack (where you want to sync the rows) will count the 500 synced rows towards that stack's total row limit.