Well, you can print all the data in your stack, but just table-wise. So, to print data from each table of your stack, you need to visit the table and give a print command from that particular table.
To give the print command:
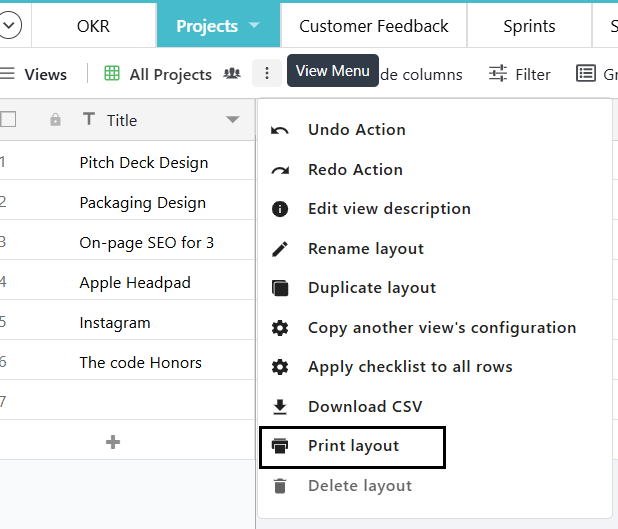
Click on the “View menu” next to view name on the toolbar (top left)

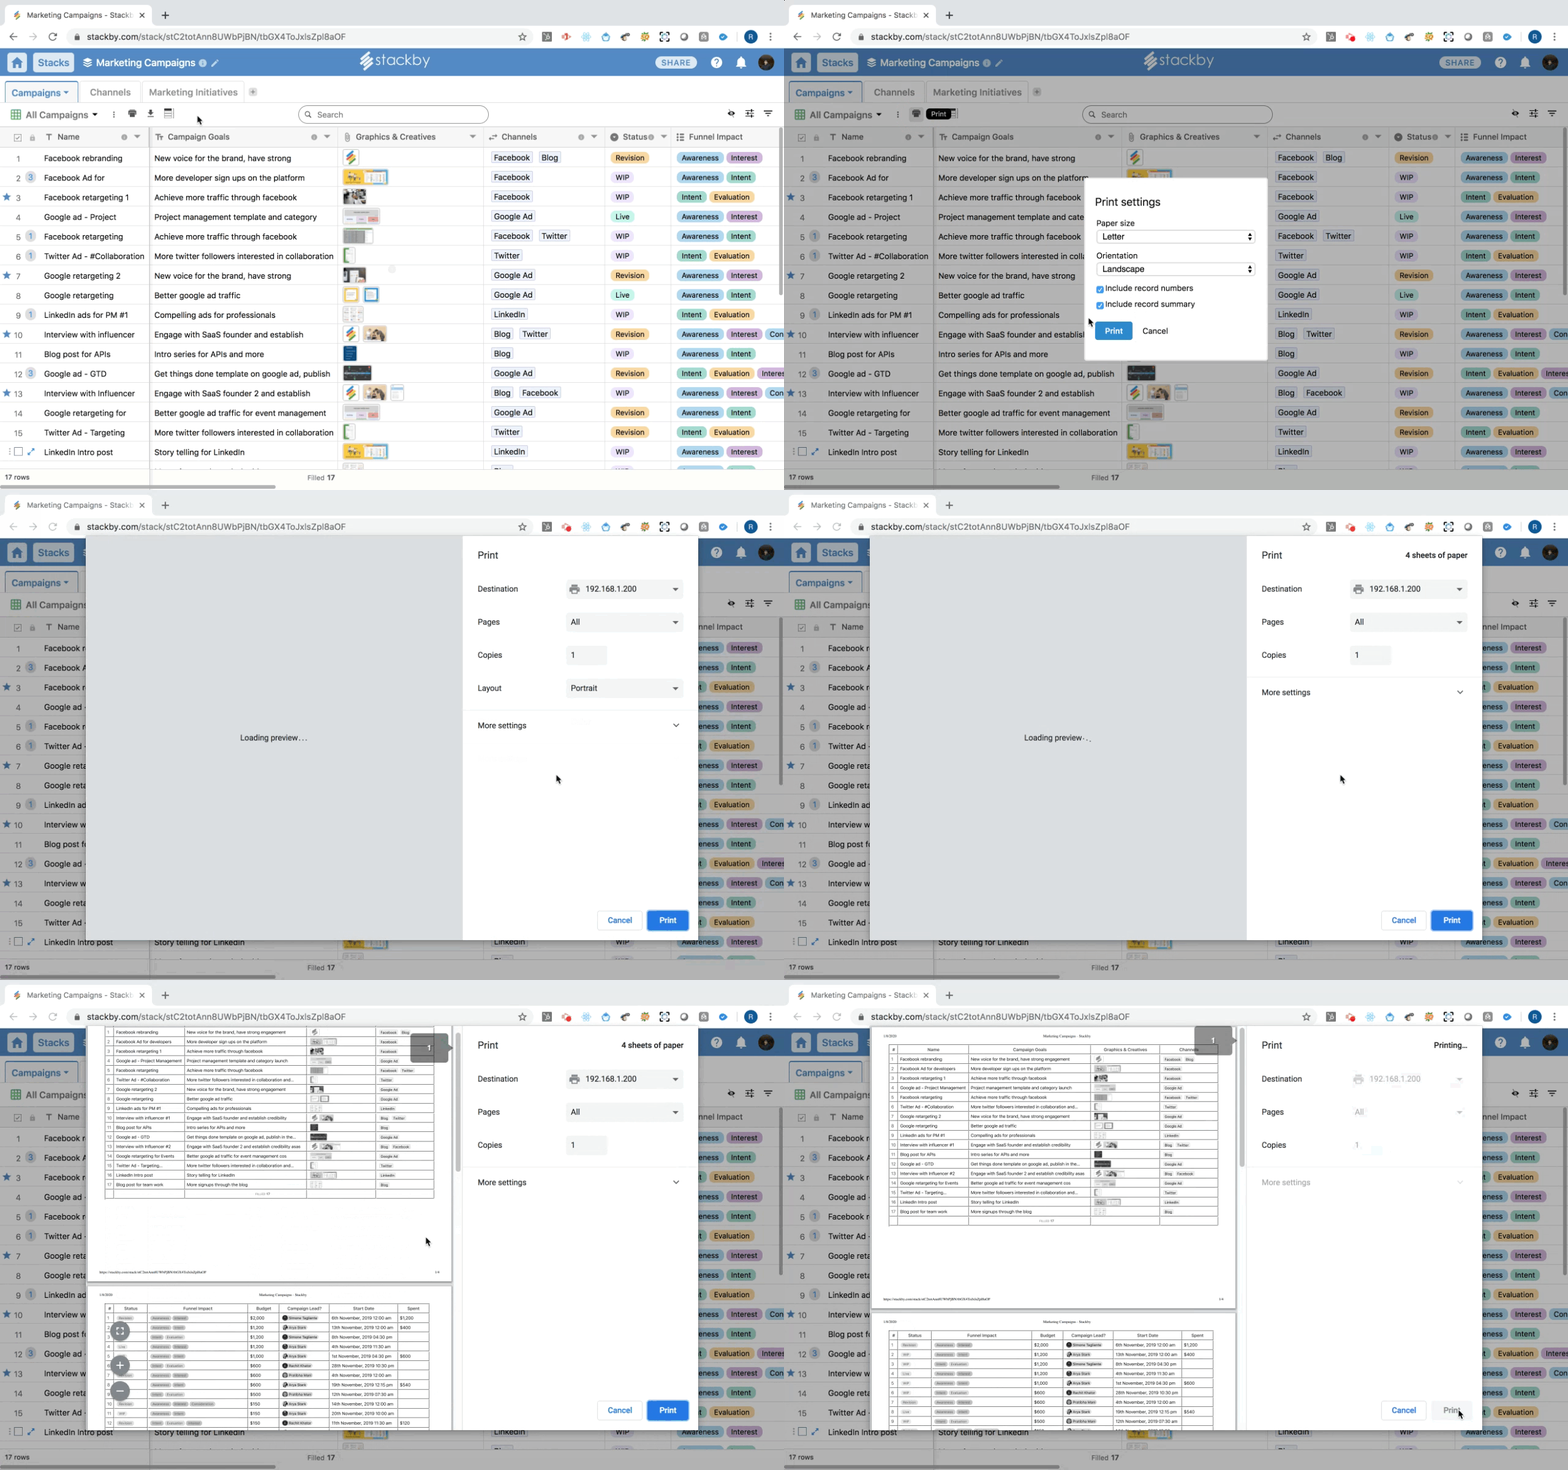
Select appropriate paper size (A3, A4), print orientation (landscape, portrait)
Check the box (if needed) against include the record numbers (the serial number on each row)
Check the box (if needed) against Include record summary (none, filled, empty, unique, filled%, empty%, unique%, earliest date, latest date)
Click on print button
When you click on the print button, the print view will open up so that you can see how your print will come out when printed. You can also see the icons for the following below the print view:
Fit to width
Enlarge
Collapse
Select as needed.
On the right side, you can select the properties such as the printer (your default printer or a different one), pages to be printed, number of copies, colour or black-white, etc.
"More settings" will allow you the change/select the paper size, pages per sheets, margins (by default or customized) and scale (again by default or customized).
Mind you, these selections may vary on different system. Please use your good sense when selecting these properties.
Once done, click on Print and you are done. Collect your printouts.
Here's how you can Print Records:

