

SSO is a feature only available for our enterprise plans. If you’re looking for an enterprise plan, you can contact us here.
This article is intended for administrators setting up SSO for their teams.
The following is a list of instructions for configuring SSO with Azure AD. You can access the Azure Marketplace app page here, which links to a similar tutorial on integrating with Stackby.
Setting up SSO
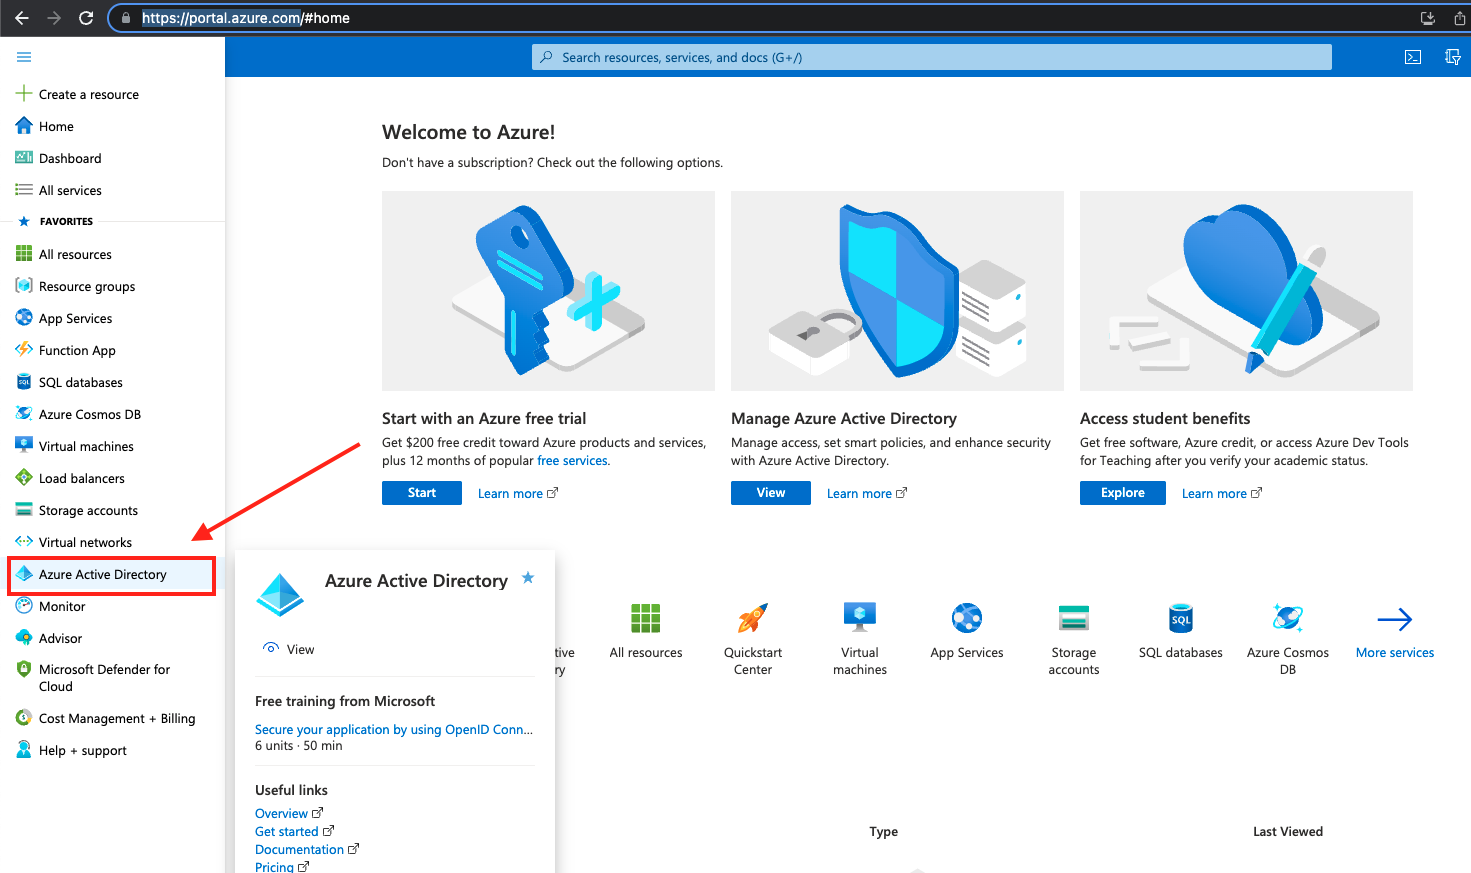
Login to your Azure Portal
From your homescreen, click on "Azure Active Directory"
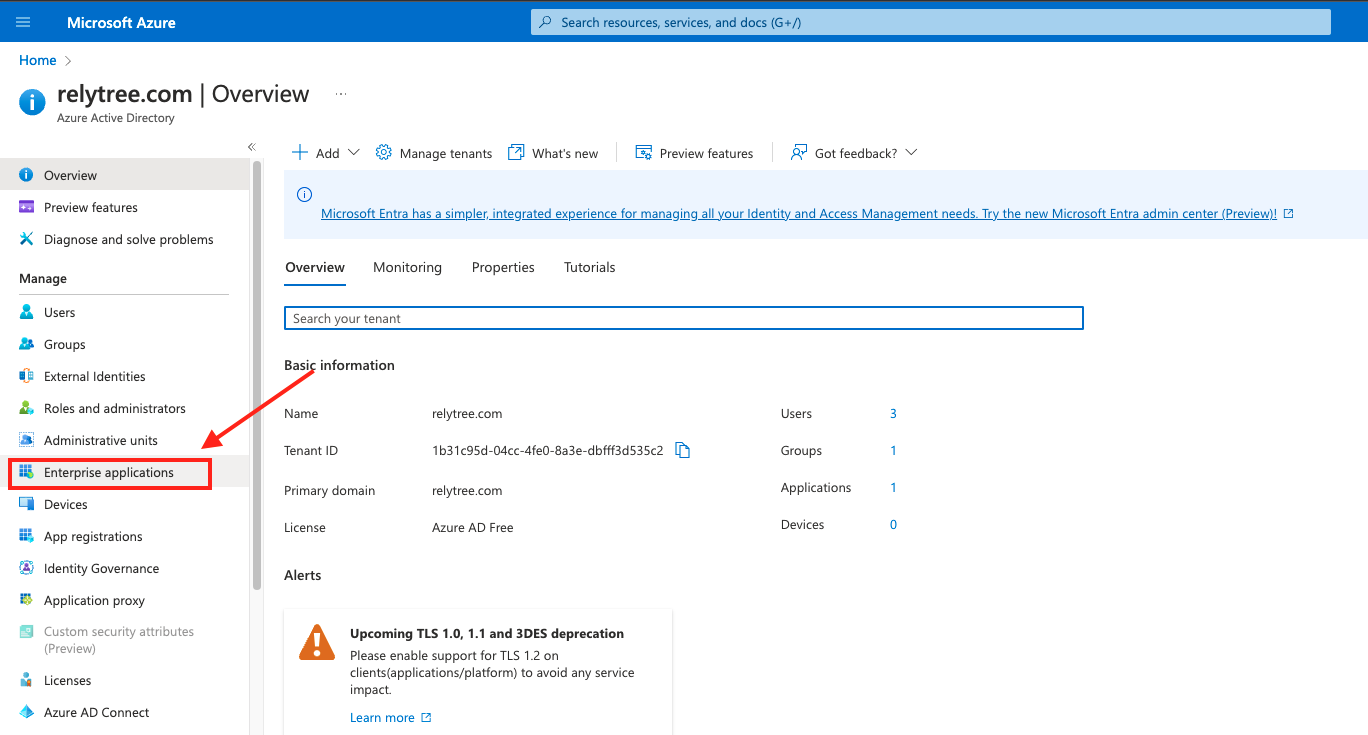
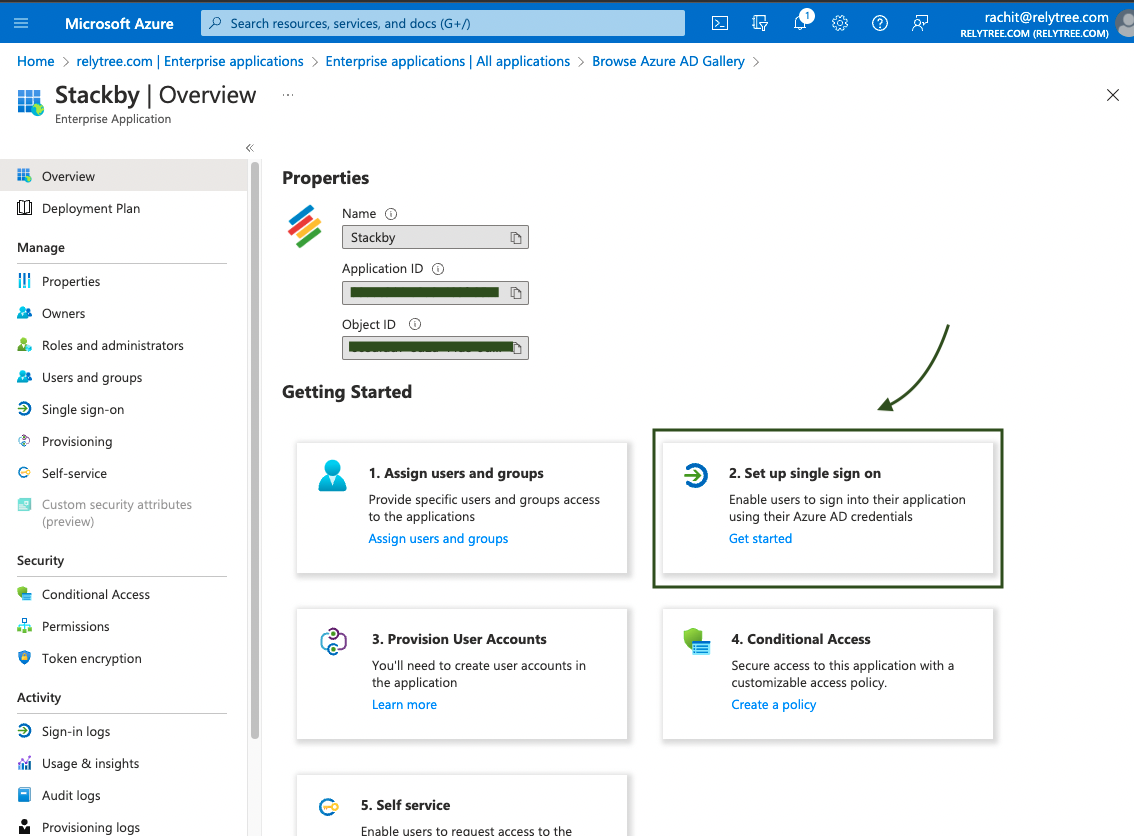
Then click on ‘Enterprise Applications’
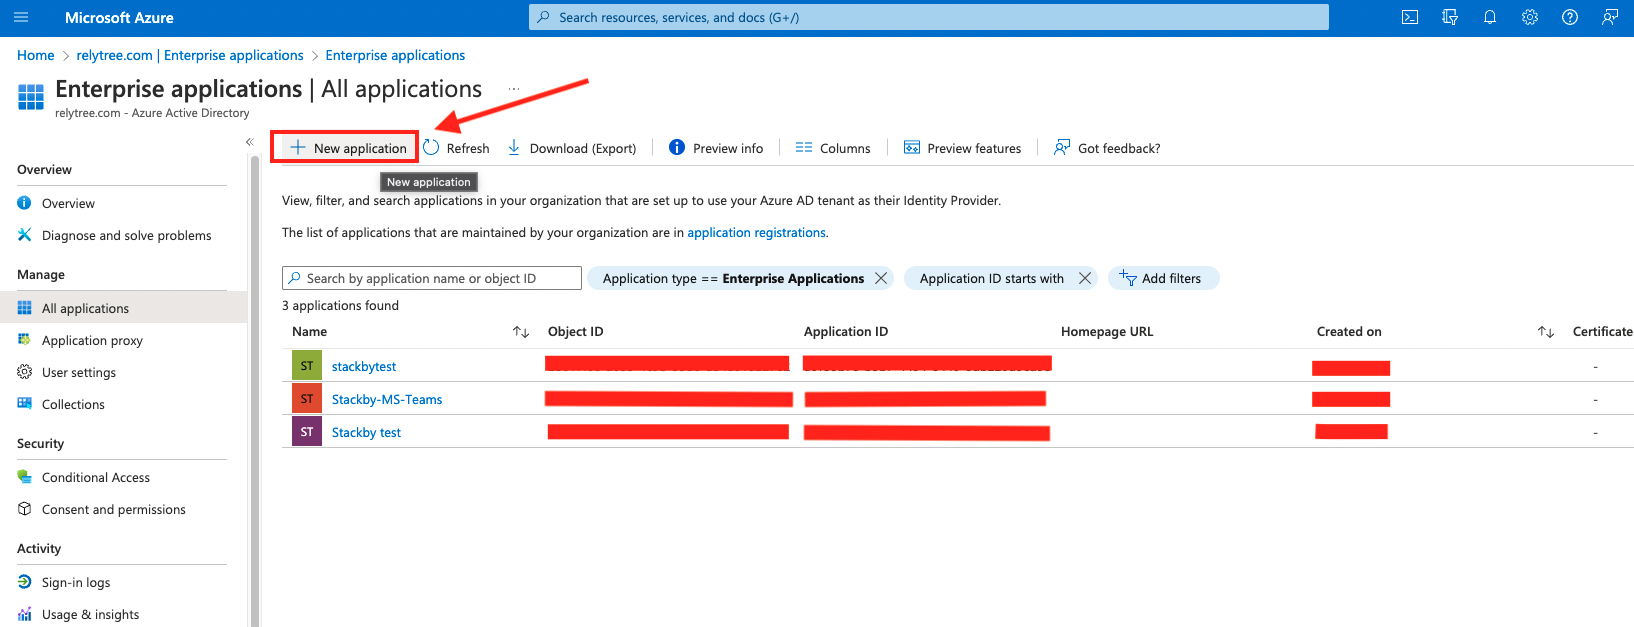
Then click on ‘New Application’
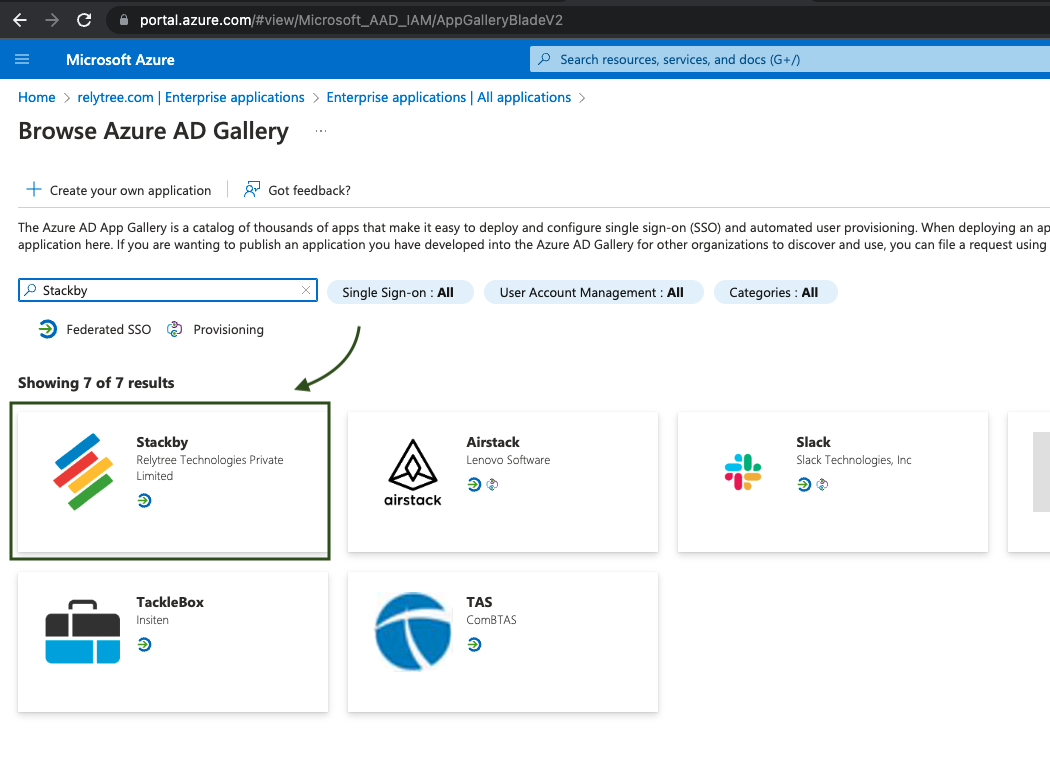
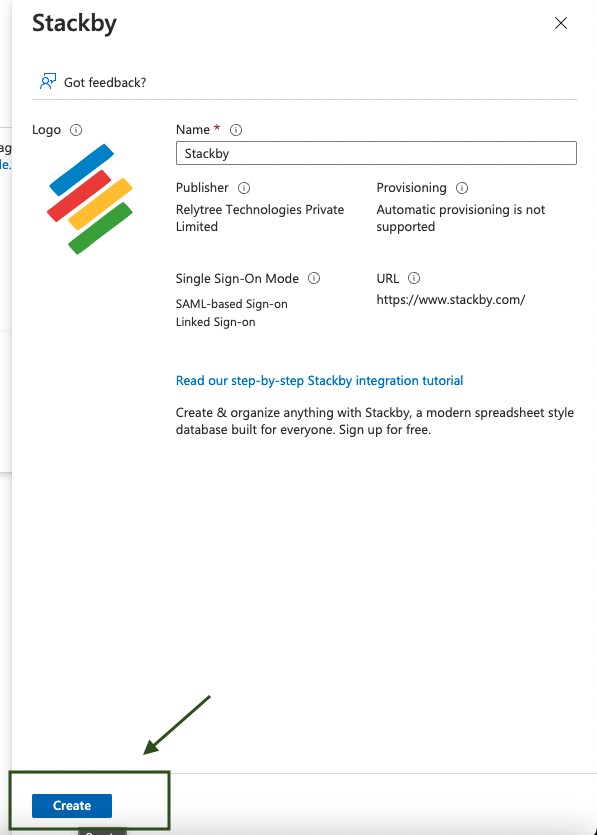
Then search for ‘Stackby’, click on ‘Stackby’ from the search results and then click on ‘Create’
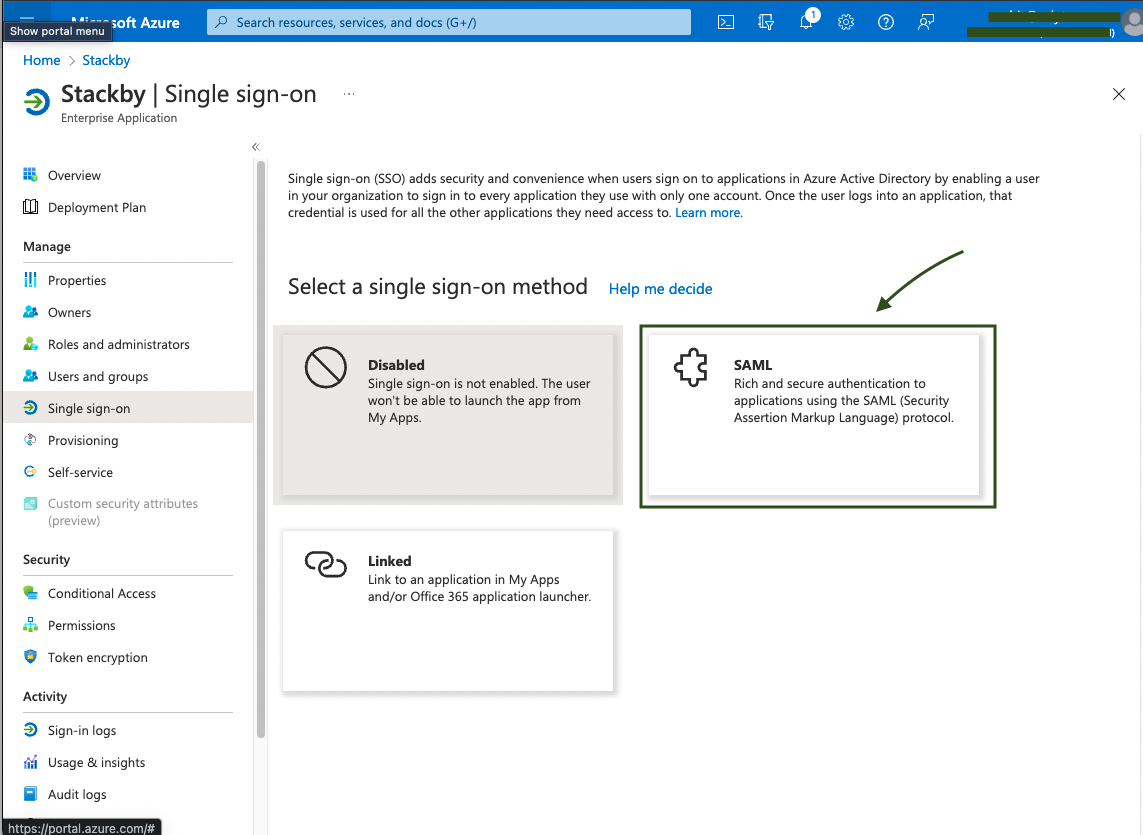
Then click on ‘Setup Single Sign On’ and then “SAML”
Now click on SAML
Add Identifier and Reply URL (will be provided to you by Stackby Support) 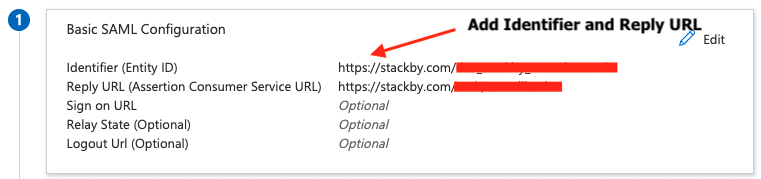
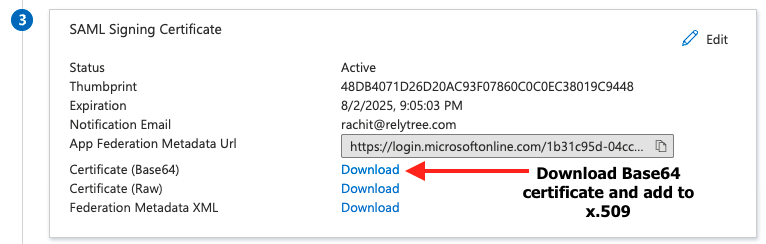
Download Base64 certificate and add to x.509 model in Stackby SSO model
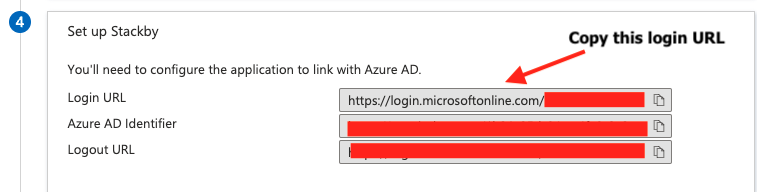
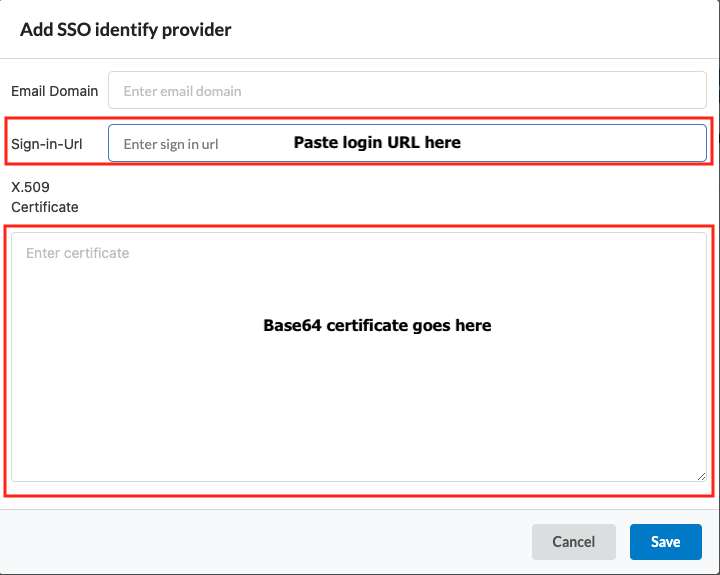
Copy the login URL and paste it to the 'Sign-in URL' in the Stackby SSO model
Paste the details in the SSO model below
Click on 'Save' and your SSO is now enabled.
You can now go to SSO login page and try to login with your SSO enabled email ID. You are all sorted!